The Liberty Print Archers

If you follow me on Instagram, you may have noticed that I have become a bit Archer crazy this month (and you'll also know that I now have blue hair), actually you can probably just tell that from my blog too. Back in my pre-sewing days, I always had trouble finding button-up shirts that fit me well. It seemed that if they fit me well in the shoulders, then they didn't really fit across the bust (or sometimes across my belly), and if I found one that fit across my boobs, then I was swimming in it everywhere else. I think that's why I love sewing these shirts so much. It's a real accomplishment (in my mind anyway) to have such a great fitting button-down - so maybe it's not an obsession, maybe it's love. Anyway, a couple of months ago, I saw a photo from Kelly's (of Cut Cut Sew) instagram feed of an Archer assembly line. She had FIVE shirts all cut out and ready to sew. FIVE!! For some reason that had never occurred to me. Cut out and sew multiple complex garments all at the same time? Yes please!! So I picked out 4 fabrics from my stash (actually I picked out 6, but decided that might be a little extreme), and proceeded to cut out 4 shirts.

IMG_8339

Unfortunately, I didn't consider thread. There is a considerable amount of topstitching with this pattern, and I couldn't decide on a thread colour to match all four, so I decided to do them two at a time. So without further ado, I present my first two Archers of 2015 (don't be surprised to see many more this year):

IMG_5980

IMG_5992

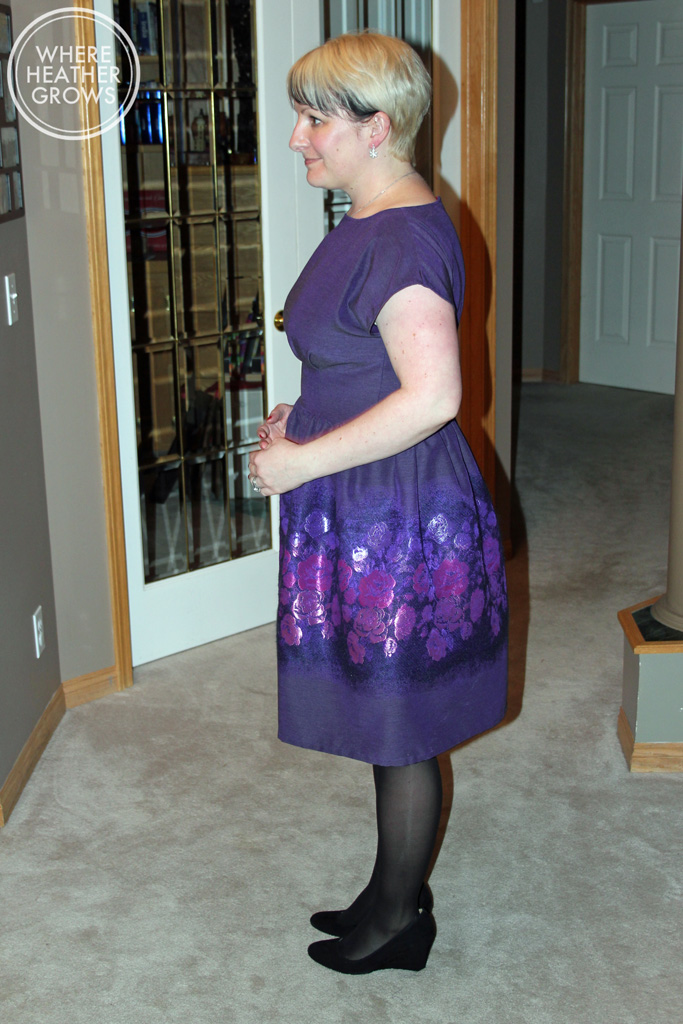
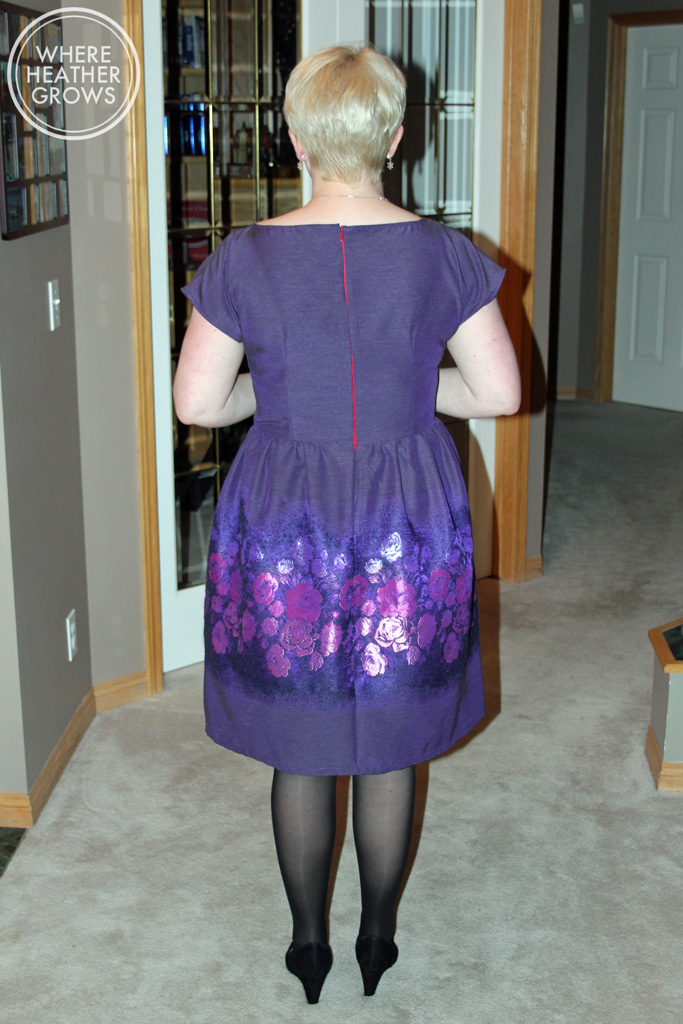
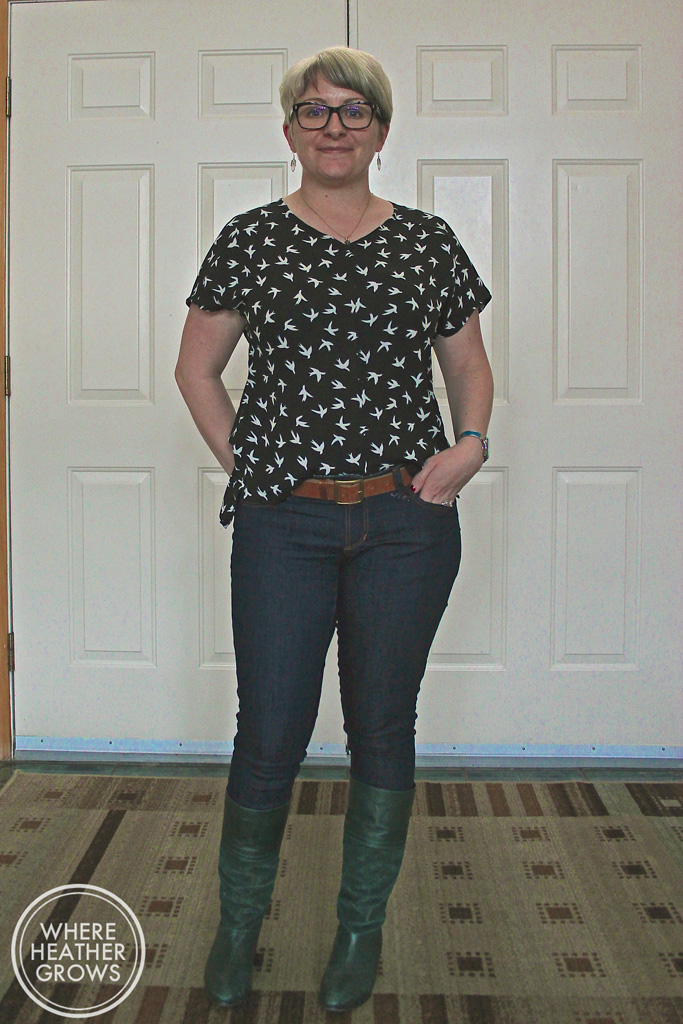
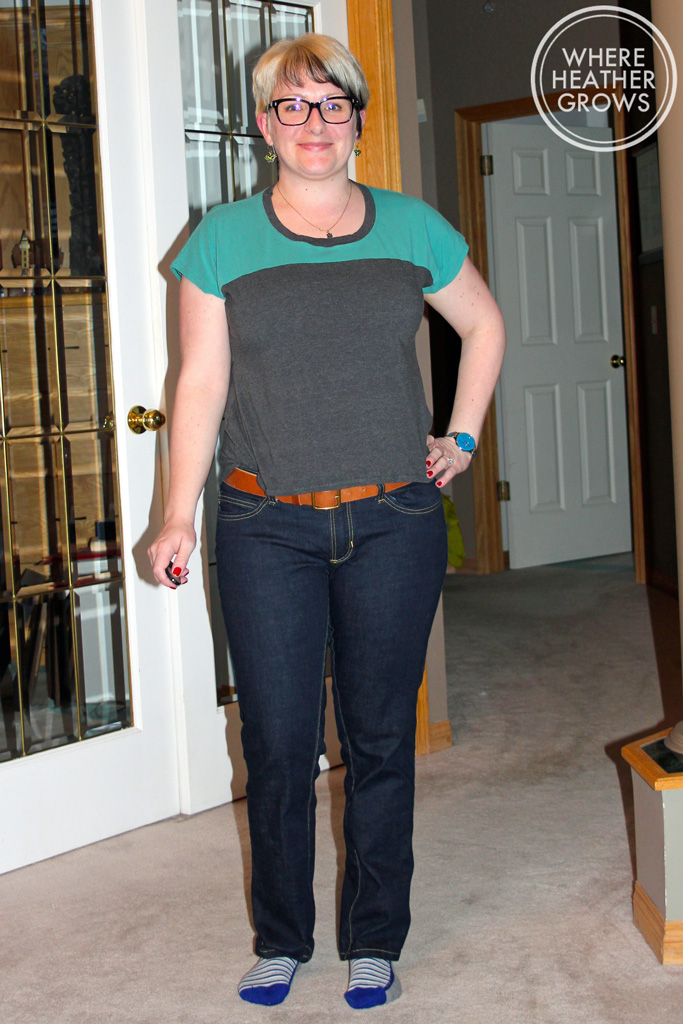
Have I told you how much I freakin' love this pattern? It took me a few tries (and some research) to get the fit just right, but now that I have it, I definitely consider this a TNT pattern. In fact, it's my uniform. This shirt and a pair of Ginger jeans and I'm set!

IMG_5993

IMG_5986

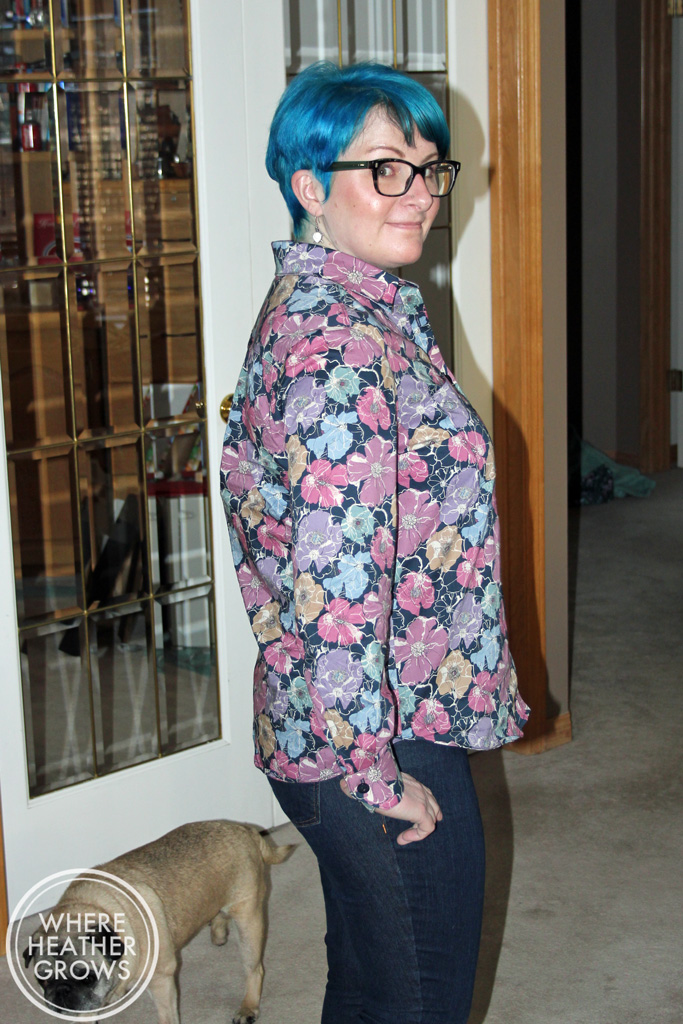
Both fabrics are Liberty Tana Lawns that I got at Shaukat Fabrics in London. I've had a number of Liberty tana lawns in my stash for quite sometime, but I haven't had the courage to cut into them. I am so glad I finally took the plunge as they were a dream to sew with and they are even nicer to wear. So soft and dreamy - I finally get what everyone has been raving about.

IMG_5995

IMG_5984

I've already talked about fitting in a previous post, but here's a recap. My tried and true version of this pattern is a size 6 (chosen based on my high bust measurement) with a full bust adjustment that adds about 1" and a bust dart. This gives me a nice fit all over and it's still very comfy. I also shortened the sleeves by about an inch and a half.

IMG_5997

IMG_5981

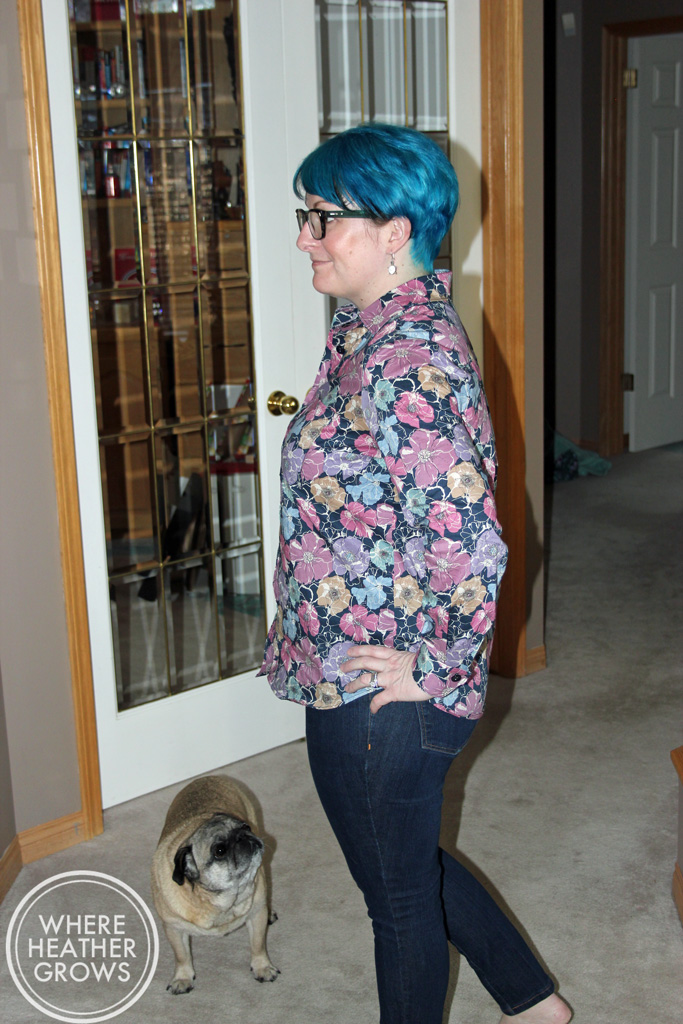
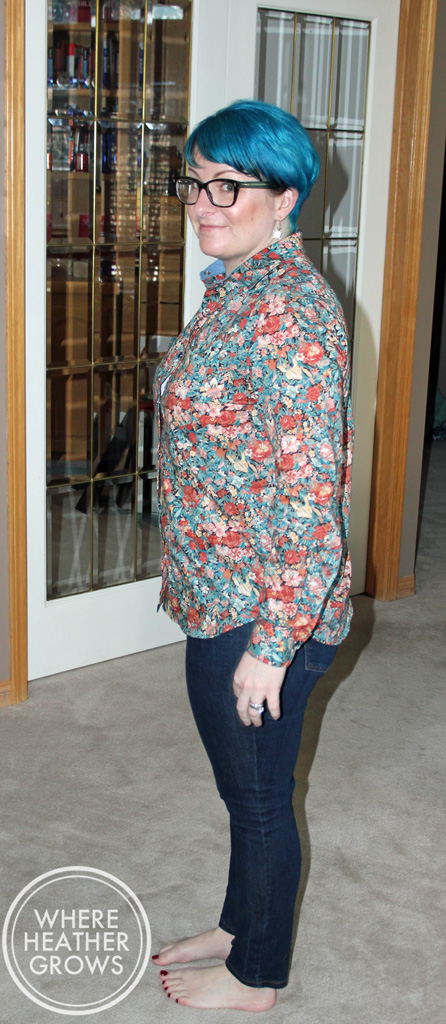
For the peachy floral one, I went with teal pearl snaps from Snap Source (have you tried snaps yet, cause they really are the bomb), and for the navy floral  one, I used some shiny buttons I bought at my local Fabricland. I also played with the pockets a bit. For the peachy one, I made pointy pockets (you can barely see them) and for the navy one, I went with the regular ones that come with the pattern.

IMG_8368

IMG_8370

So there you have it - my first projects of the new year! It was fun to make them like this, and I also mixed and matched fabrics so that they all have contrasting inner yokes, under collars and collar stands. I realize now that I didn't really get any good shots of that, but I'll get some for when I post about the other two.

Hope this New Year is treating you all well so far.

PS: Are any of you sewing friends participating in #rigelbomberjacketjanuary? If not, it's not too late to jump on board. 

Top 5 Hits of 2014 (+ reflections & goals)

15343108663_0fbe099154_m This was a tough list for me to make. I have been lucky to have a number of hits this year, although a lot of them have come in the last six months or so. I really love making a garment that fits me well and looks nice, but that I also wear a lot. So anyway enough blabbing, here are my top 5 hits of 2014:

1. Self-drafted Beetle Blouse - before you get too excited, I drafted this blouse with a pattern-maker template, so it was pretty easy. It was the first button down shirt I ever made, and I still love it to death. I wore in once or twice a week all summer and it still gets a bit of wear this winter with a cardigan thrown over top.

IMG_4810a

2. Sleeveless Moneta - the sleeveless part of this dress isn't the greatest as there is a lot of gaping, but throw a sweater or a jean jacket on top and you would never know. I wore this dress a ton in the summer and then I paired it with boots and tights for the colder months. It is super comfy and so easy to throw on. Plus I find it goes with everything. 

IMG_4895a

3. Grainline Studio's Archer - Dudes!! So far, this is my all time favourite pattern - to make and to wear. The buffalo check one was my first attempt - a bit of a wearable muslin. And then my Crazy Cat Lady version is where I really perfected the fit. I have made this shirt up 5 times for myself already (with 2 more in process right now) and once for my Mom. Now that I have my pattern altered perfectly, it is a cinch to make up. I have done an FBA and added a bust dart for my TNT version. I know some of you don't like bust darts, but it make a world of difference in the fit and look of a garment - I promise you it's worth the effort to add one. Someday I may try a dart less FBA, but for now I'm quite happy with how this baby turns out.

IMG_5417a

IMG_5538a

4. Ginger Jeans - I have made 2 pairs of Gingers so far (here and here) and I love both of them. I wear them all the time. I honestly can't rave about this pattern enough. It fit me pretty much perfectly right off the bat and the instructions are fantastic. I see many, many more pairs in my future, and I have a really hard time seeing myself buy another pair of RTW pants again.

IMG_5739a

5. Holiday Party Anna - okay, so this dress isn't really a wardrobe staple, but I absolutely love it. And everybody needs a good party dress, right? I felt so amazing wearing this at my husband's work Christmas party, and I was so proud that I made it myself. I think the colour really suited me, and the border print worked out amazingly. (If I do say so myself LOL.)

IMG_5814a

So as I said before, this was a tough list for me to make, so I also wanted to include some honourable mentions. I love my Nettie bodysuit and Chardon skirt, I love my Sutton blouses, and I love my Hudsons (see below). I have actually made 4 pairs of Hudsons and they are my go to lounge pant.

Untitled_zpsfc424599

I also have to mention my Pyjama Eaters. I had so much fun making them (and posing them, photographing them, and writing about them), and every time I look  at them I smile.

IMG_5711a

Okay, time for a recap and some goals now: I have had a ton of fun sewing this year and I have learned a ton. I really feel like I have found my calling. It seems I have been searching and searching for a hobby my whole life, and this is one of the first times that I have stayed really passionate and thrilled about something for such a long time (well a year anyway but I'm just as excited about it, or maybe more than the day I started so I think that's pretty good). I look forward to fine tuning the skills I have learned so far and also tackling more complex patterns this year. I am trying really hard not to be intimidated by anything (especially patterns labelled intermediate or gasp! advanced), because I am one of those people who has to do it to learn it. I would also like to attempt making a coat or a jacket this year (hello #rigelbomberjacketjanuary!), and I would really like to make more jeans and some shorts. I am hoping to eventually have a complete handmade wardrobe, but we'll see.  I would also like to make my husband some things - maybe a shirt or two and some lounge pants. I'm trying not to set lofty goals as that seems to make me want to do the opposite - apparently I have a thing about rebelling against rules.

So there you have it - I am finished my wrap up for 2014. I have a bit of a backlog of projects to show you, so I'll get on that soon too! Hope you had a fabulous 2014 and I look forward to sharing my 2015 with you!

Top 5 Misses of 2014

15343108663_0fbe099154_m So I might be a little late to the party, but I wanted to join in on Gillian's year end round up. I had lots of fun discovering sewing blogs last January and I especially loved reading everyone's round ups. I only just started sewing at the beginning of 2014 so I did have a number of projects that didn't quite work out. A lot of them have long been forgotten (I do keep a sewing notebook however and have written about pretty much every garment I've made this year), but I thought I would share a few of the ones I have photos of. Really even if I am saying these garments are fails in this post, they really aren't. Even if they didn't work out I did still have fun sewing them up and with every project I sew, I learn - and that's all good.

Anyway, with out further ado, here are my top 5 misses:

1) Megan Nielsen's Tania Culottes - This is a great pattern, and I had lots of fun making it up, but the finished product just didn't suit my figure. I had hoped that they would fit a lot like a circle skirt and become a summer staple, but they looked horrible on me (so horrible that you will never see me in them). I did however have fun learning how to use the rolled hem feature on my serger. The fabric was a cheap but cute polyester I picked up in the clearance section of Fabricland. I've seen lots of great versions of this pattern online, and it looks great on some people, but it's not for me.

IMG_6245

IMG_6240

2) Bluegingerdoll's Winifred Dress - This one was actually really heart-breaking. I was confident that it was going to fit my shape well based on the pattern description, but after two failed attempts, and lots of Instagram advice, I left it behind. I wasted some gorgeous fabric I got on Goldhawk Road in London, and learned my lesson about making muslin. I still really wish this dress fit me, as I love the style and the bold print, but I just couldn't make it work.  I have however taken extensive notes, so I may try it again someday when I'm feeling more confident about fitting.

IMG_6806

3) Grainline Studio's Scout Tee - I have made this pattern a number of times now, and to be completely honest, I have never really been happy with the fit. I have one floral version that I wear every once in a while, but usually only when everything else is in the laundry. It's okay, but not good enough for me to get a lot of wear out of. I think that I really need to add a bust dart for it to work on me. I'm a bit too curvy to not have a bit more shape. I still probably would have worn this top as is, but the fabric makes it look like a scrub top. It doesn't look too bad in the photo, but in person it looks awful.

IMG_5507

4) Jalie Pattern's Dolman Tops - I actually made 5 of these. I wear 2 of them frequently, but this one just did not turn out. The combination of stripes and long sleeves makes me look like a circus tent. I did end up cutting off the long sleeves which made it better, but I still count it as a fail. I think the look on my face says it all. LOL

IMG_5194

5) Christine Hayne's Emery Dress - this is a fantastic pattern and I love all the versions of it around the interwebs, but this version I made just does not work. I was inspired by Lauren's version, and I should have read her post about it more carefully, because she had the same feelings about hers when she was done, as I did about mine. I wore this dress the day I took the pictures, but that was it. It doesn't look too bad in the photos, but the fit is awful. The bodice is super tight, my boobs are squished, and I think the check is just generally unflattering. I made another version in different fabric that I am much happier with. And truth be told, I will probably make another one someday with some more fit adjustments.

IMG_4769

So there you go, my misses for 2014. I have learned so much this year and I am now making more garments that I wear more often. My first projects were pretty much all dresses, but now I'm making button-d0wns and jeans! JEANS!!! I'm thrilled! When John gifted me a serger last year at Christmas, I had no idea how this little hobby would take over my life, my blog and introduce me to so many new internet friends. I love this community of sewers and bloggers, and a year later I still can't get enough.

Next up will be my Top 5 Hits. I'm having a hard time narrowing it done.

How was your 2014? 

Handmade Christmas Part 2: Dude Sewing

So I have fallen super behind in blogland. I contracted the plague and spent close to 5 days cuddled up in bed with the pugs and Netflix. I wouldn't say it's the worst cold I've ever had, but it is definitely the most persistent (and I'm a huge baby). I thought I would spend 2 days in bed and feel better, but I actually felt worse after the first two days and decided to spend a couple more days in bed. Yuck! Anyway, I have just finished catching up on reading everything in my feed, so now it's time to update. I really want to do a year-end post, but first I wanted to share the rest of my handmade Christmas gifts with you. First off, the shirts I made for the boys:

IMG_5854

Don't they look handsome? I had so much fun making these shirts. John and I picked out the fabric last spring on Goldhawk Road. The boys love to have matching shirts for some reason, and when we saw this map fabric we both thought it would be perfect. I used McCall's 6044 and I made them all the same size. Matt's could stand to be size smaller, but otherwise I am super happy with the fit right out of the envelope. The boys were thrilled to, and impressed that I actually made them. I'm thinking it may end up being a bit of a tradition!

Next up, I made a shirt for my Dad:

IMG_5892

For this shirt, I used Jalie's Men's Polo Shirt pattern, and I opted for a collared long sleeve version with no pockets. I have never made a collar or button placket in jersey, and I have to say, it was difficult. I unpicked the button placket twice, and to be honest, I'm still not thrilled with it. The fabric is a super soft, and super stretchy cotton lycra from Girl Charlee. It's really nice and the colour is gorgeous, but it was tough to work with for this type of project. Next time, I will interface all the placket and collar pieces which I really think would help. Anyway, my Dad is thrilled with it, and has worn it a ton already.

Next up I thought I would show you the shirts I made for our little Shanny. They weren't really for Christmas, but I think they go along with the unselfish sewing theme I have going here. Shanny had to have a couple of lumps removed from her chest/neck, and the best way to keep her from scratching at the stitches was to have her wear a little shirt. The first one I made her fit pretty well, but it didn't come up far enough, so I had to make her a second one.

IMG_5884

IMG_8307

Both shirts are made from super soft jersey remnants that I bought from Girl Charlee. I have no idea why I bought them, but I thought they worked really well for this project. Both shirts sewed up super quick and they did their job, plus Shanny really doesn't mind wearing them. I am also happy to report, that while one of the lumps was cancerous, they got it and she is now cancer free. Hooray!

That's pretty much it for the Christmas sewing. I made my Mom a Linden Sweatshirt too, but I somehow didn't get any pictures of it.

How is your holiday season going?

Handmade Christmas Part 1

So this year, I really wanted to at least try to make some handmade gifts. I know there are a few people on my list that would really appreciate a handmade gift, so I wanted to make sure I took advantage of that fact, because a) I love sewing and b) I hate going to the mall during the Christmas shopping season. Also, I  personally love receiving handmade gifts. It means so much to me when people take the time and put in effort to actually make me a gift. So hopefully, the people who are receiving handmade gifts from me, will feel the same way. Fingers crossed anyway. I made a few things that I can't share with you quite yet, but I have a couple of things that I can. When I saw the LBG Studio Leather Accent Pouch pattern on Indiesew, I knew it would be the perfect thing for two of my girlfriends. I really loved the leather accent details and I thought it would be a good foray into sewing with leather too.

IMG_5835

For the first one, I used some upholstery fabric and for the accents I bought a tiny piece of brown suede, both found at my local Fabricland.

IMG_5831

The construction was quite straight forward, and you could probably make this without a pattern, but I felt like I needed some hand holding, and I am always much to nervous and lazy to figure out dimensions on my own.

IMG_5830

This was my first go at sewing with leather, and I think it went pretty well. I made sure to use a leather needle in my machine, but I don't have a teflon foot. My Pfaff has IDT built in which is basically a walking foot and it worked really well.

IMG_5832

For both bags I used a printed quilting cotton from my stash for the lining and a jeans zipper.

IMG_5834

The second bag was a little trickier to sew.

IMG_5821

The leather came from a used leather jacket that I picked up at an estate sale. It is super buttery soft, and I found that it stretched around at bit and it stuck to my machine a bit more than the other leather did. A teflon foot may have helped and I might pick one up next time they're on sale.

IMG_5822

I think this leather looks a bit nicer than the Fabricland stuff though. The main fabric is more upholstery fabric. The upholstery fabric worked out really well. It added a bit more structure to the bags and I am hoping that it will be a bit more durable over time.

IMG_5816

These were pretty quick projects and I am super happy with how they turned out. I felt really good giving them as gifts, and hopefully the receivers get lots of use out of them.

How about you? Are you ready for Christmas yet? How do you feel about handmade gifts?

Holiday Party Anna

IMG_5814 John's work Christmas party was on Saturday, so naturally I wanted to make myself a new dress. Of course being the procrastinator that I am, I hummed and hawed until late Thursday night. I knew right away which fabric from my stash I wanted to use, but I couldn't decide on a pattern.  I finally settled on By Hand London's Anna, as I have made it a few times before (all unblogged), and I knew that I would have minimal fitting issues as it fit so well right out of the envelope the other times I have made it. Plus I saw the fabulous version that Gillian made for her sister and that pushed me over the edge.

IMG_5807

This gorgeous fabric is a border print that I bought at Tissus St. Hubert back in March when we were in Montreal. It's a beautiful border print and I knew that eventually I would work up the nerve to cut into it.  I have no idea what it's made of. It feels like cotton on the right side and some kind of silk or rayon on the wrong side. What ever it is, it was delicious to work with and to wear.

IMG_5810

Instead of the pattern's gored skirt I went with a simple gathered skirt. I have seen this combo many times (as I'm sure you have too) so I knew it would work perfectly to showcase this amazing border print. Basically, I cut the fabric to the length of skirt I wanted (21" - cause I'm short) and then I just gathered the width of the fabric (which was about 58") and left a seam at the back to match the bodice. This way I didn't have to mess with any pattern matching or anything like that. I am super happy with how it turned out - just the right amount of gathers and the fancy embroidery looks awesome (if I do say so myself).

IMG_5808

Isn't that fabric gorgeous? Anna is such a quick and satisfying make. I had this baby finished by late Friday night. The only problem that I ran into, was I only had a red invisible zip. After conferring with John I decided to go ahead and insert it even thought it didn't match. I figured that it's invisible anyway, and the red pull looked kind of cool with the purple.  How was I to know that this would be my undoing?!

After inserting the zipper, I tried on the dress to figure out the hem and the zipper broke. Well it split really. After much wrangling, I got the dress off and I could see where some of the stitching got a little too close to the teeth, so I unpicked it and was able to re-route the zipper and all was well. Or at least I thought.

IMG_5809

Saturday evening before the party, I put the dress on and the zipper split again. Ugh!! I was so bummed, and kicking myself for not buying a new zipper earlier in the day. But anyway, I didn't. I unpicked some stitching again, cut the end in half, re-routed the zipper pull, and sewed a new stop.  Which luckily worked, and I was able to wear the dress after all.  I did however do the zip up halfway turn the dress around to check the teeth and then twisted it back around for John to do up the rest of the way. So I think that's why the dress looks a bit skewed on my body in these photos. Unfortunately, I didn't realize quite how awful the zipper looked until I started writing this blog post. I swear everything matched up when I sewed it! Oh well! The party had dim lighting. ;)

IMG_5813

John snapped these photos of me just before we left for the party, and in looking at them now, I can see that the dress really looks off kilter on my body. I promise that that is not how it looks in real life, it's just that I had spun the dress around on my body to fix the zipper up, and then turned it back around in a hurry so it was a bit twisted for these photos. I really wanted to make sure we got some photos of it before we left, as I knew we wouldn't really feel like doing it when we got home.  Anyway, it all worked out, and despite my fear of the zipper bursting (I brought a back-up sweater), the dress was fine all night and the zipper held. John assured me that it didn't look this rough at the party, and I got lots of compliments, so all is well.

I am so happy that I was able to make my dress. Sewing is the best! It felt so awesome to be wearing something that I made with my own two hands, that fit me really well, and that I knew no one else could ever have. In the past, I have sometimes worried about arriving in the same dress as someone else - not that that would be the end of the world, but I like to be unique.

Are you sewing a party dress this season? Do you have lots of events to attend?

I hope you all are keeping well and managing not to get too stressed! I'm having lots of fun making some gifts, and stressing about others, but I know it will all work out, it always does!

Ginger Jeans Take 2

First off, thank you all so much for the comments on my last post, for all the helpful tips and support, and also for reading my blog. I have never had so much feedback and I am super grateful for it! Best blogging/hobby community ever! Yay Sewcialists!! Secondly, I have to apologize for these photos. Not my best photography, but the day I took them it was cold and I was having troubles with my tripod, so I took them inside. The colour/contrast is not as good as it usually is but I think you can see well enough to get a good idea of how these Gingers fit!

IMG_5787

So as I mentioned last time, I decided to go down to a size 10. This was a great decision as I think the fit is even better now. I also decided to make the legs a bit slimmer as this time of year I mostly wear boots, and skinnies are so much easier to tuck in. I took a 1/2" off of each side of each leg, grading to nothing about mid-thigh. So that takes a total of 2" off each leg. I used this tutorial and it worked really well.

IMG_5780

The denim I used is from Girl Charlee and I am really happy with it. It's got a nice stretch and it recovers really well. I have been wearing this pair for about 3 days now and they haven't bagged out. They stretch with wear for sure, but not so much that it's noticeable to the outside eye and not so much that I feel like I have to wash them again to get them fitting properly.

IMG_5783

I used a different colour for the top-stitching thread this time too. It's more of a coppery-orangey colour. I like the gold, but I though it would be fun to switch it up. I was debating doing red or blue topstitching too, but I chickened out and went with something more "regular". I don't have much to say about construction this time. The pattern instructions are still very straight forward, and I found things went more smoothly and faster the second time around because I had done everything once before. I really like making jeans. It's so soothing and satisfying; challenging but not overwhelming. I also love wearing jeans so I'm sure there will be many more pairs to come.

IMG_5754

Check out that fit? (I can't believe I am posting a photo of my butt on the internet again, yikes!) I was a tiny bit worried that by going down a size the fit might change, but I am happy to say that I think it just got better. There are still a couple little wrinkles in the front, so for my next pair I might try to lengthen the front crotch just a smidge as Katie suggested in the comments of my last post. But other than that, I don't really want to mess around with them too much.

IMG_5786

I'm not sure if I mentioned this last time, but I had a heck of time getting the topstitching around the fly to look right. I unpicked it three times before I was happy. On this pair, I only unpicked it once. You know what they say, practice makes perfect. Also, I used barracks to sew on the belt loops this time. My beautiful Pfaff actually has a barrack function, so it makes it really easy.

I also took a few shots during construction, so you could see the insides this time.

IMG_8099

IMG_8107

I know Heather Lou suggests having the right side of your pocket fabric showing, but that just didn't seem right to me. I had some kind of mental block about it for some reason. This way if my pocket turns out you see the right side of the fabric.

IMG_8106

I love this rainbow variegated thread with denim (well really, I love it with everything, but it looks extra awesomesauce with denim). One of my favourite things about sewing my own clothes is being able to add little details like this. I love having a unique piece of clothing that no one else will ever have. I can't believe it's taken me so long to really start sewing my own clothes. I can't imagine all the craziness I would have come up with when I was younger. I do remember cutting my jeans up the side seams and adding a strip of fabric. Did you ever do that? A couple of older cool girls at school were doing it, and I loved my pair that I did it to and wore them to death. I wonder why I stopped there? I was probably just too intimidated by fancy patterns. If only I had had the internet back then. The things I would have gotten up too...oh well, I am happy that I am doing it now!

I obviously haven't worked up the nerve to try flat fell seams yet. The serger/overlocker way is just working out so well for me, and it looks pretty too! As you can see, I skipped out on the rivets again. It's not because I don't like rivets, it's because I couldn't find any locally. I have finally ordered a bunch so I will give installing them a try on my next pair. Or I might even add them to this pair, we'll see when they get here.

So there you have it, Ginger Jeans take 2! I have been wearing them pretty much non-stop since I finished them. I can't wait to make more!

What is your favourite thing to sew? Are you doing any handmade Christmas gifts this year, and if so, have you started making them, or are you procrastinating really hard like me?

And just in case you are going through pug withdrawals, here is a picture of Quincie checking out my butt:

IMG_5755


Happy Sewing!

JEANS! I Made Jeans!!

I made Closet Case Files Ginger Jeans to be exact - and I'm pretty tickled with myself. Can you tell? IMG_5739

I would love to tell you that I am a pants fitting wizard and I make pants all the time getting the fit perfect, but I think we all know that just isn't true. This pattern did all the work for me. I feel like Heather Lou drafted this pattern just for me; the fit is amazing! I honestly did nothing to it, well I shortened the legs by 3" but that's it! This is how it fit me right out of the envelope...err..computer pdf file. You know what I mean.

IMG_5741

I took these photos when these babies were fresh out of the wash so there is something going on with the one leg in the picture above, but I assure you it's just cause I didn't straighten them out as I was super excited to get them photographed. Upon looking at these photos, I know there are some wrinkles in the front and the back, but I'm not anxious to mess around with anything as I think the fit is so much better than any RTW jeans I have. But that being said, if you have any advice for me, I would love to hear it.

IMG_5744

I made version A - the mid-rise stovepipe leg version. I am a little scared of the high-waisted version as I am so short, but after making this version and seeing all the awesome high-waisted versions out there I may just give it a go. My top-stitching isn't perfect, but I'm quite happy with it, and unless you get up close and personal, you probably won't notice any wonkiness. I added bar tacks to the back pockets as I didn't have any rivets on hand for this pair, and I really like how it turned out. You want to see another picture of my butt now, don't you?

IMG_5742

I made a straight size 12, and while the fit is pretty spot on, I find them a little loose after wearing them for awhile as jeans always seem to stretch out. They are perfect when the first come out of the wash, but after about an hour they stretch out quite a bit. I took these babies with me when we were away last week, and after about 3 days of wear they were pretty baggy, so for my next pair I plan to size down. In my experience, that's just the way jeans are. On my hunt for the perfect fitting jeans over the years, I've worn high end designers like Citizens of Humanity, J Brand, Paige, 7 for All Mankind, AG, and I've worn Jessica Simpson, Gap, Old Navy, Next, Top Shop, and Joe Fresh (and many, many others). All of them stretch out with wear, so I always try to start with a snug fit. I'm sure going down a size will fix this issue.

I bought this denim from Corrine at The Sewing Affair and it's awesome. It's a gorgeous dark wash, and it's super comfy and soft. After sewing with it, and wearing it, I would definitely recommend it. It's a great weight for jeans, but I imagine it would work perfectly for a skirt or a jacket. I really want to make a denim jacket; know of any good patterns out there?

IMG_5745

The leg on this jean is great (although I usually wear something a little skinnier in the winter as it makes them easier to tuck into boots). It's slim and it looks great cuffed too. I should also mention that I interfaced the waistband with a medium weight fusible interfacing. I love this feature. It makes the waistband maintain its shape. I have a round belly and I usually find that after wearing a pair of pants for awhile, the waistband folds over and kind of bunches up, but that isn't a problem with a little bit of stabilization (is that a word?). It's so awesome to be able to make your own jeans and add little things like that. I also used my rainbow variegated thread to serge all the seams, which looks awesome if I cuff them, and I used a really light weight cotton to line the waistband and for the pockets. For my next pair I will use a little bit heavier cotton as I think it will wear better next to the heavier denim over time.

So there you have it: my Ginger Jeans. I really enjoyed the jean making process and I am just in the process of cutting out another pair (I took a break to blog - FINALLY); I see many more pairs in my future. I am so happy I bought this pattern because it fits me so well. I am now having dreams of cords and chinos, and even dress pants, the possibilities are endless! The instructions with this pattern are really good and the sew along is great for visuals. If you have ever been intimidated by sewing pants, this is a great pattern to quell your fears (well it was for me anyway). And don't be intimidated, it's just sewing. Go slow and sew one seam at a time, it's easy when you break it down step by step. (Another great tool I would recommend is the Pants Construction class by Sandra Betzina on Craftsy. It's awesome and has lots of tips and tricks. Plus Sandra Betzina is a hoot and a wealth of knowledge.)

Have you sewn jeans, or pants before? How did it go? Got any fitting tips and tricks to share? Do you have a favourite RTW (ready-to-wear) pair of jeans that fits perfectly or have you always been searching, like me?