The Alder My Friends, Is Blowing in the Wind...

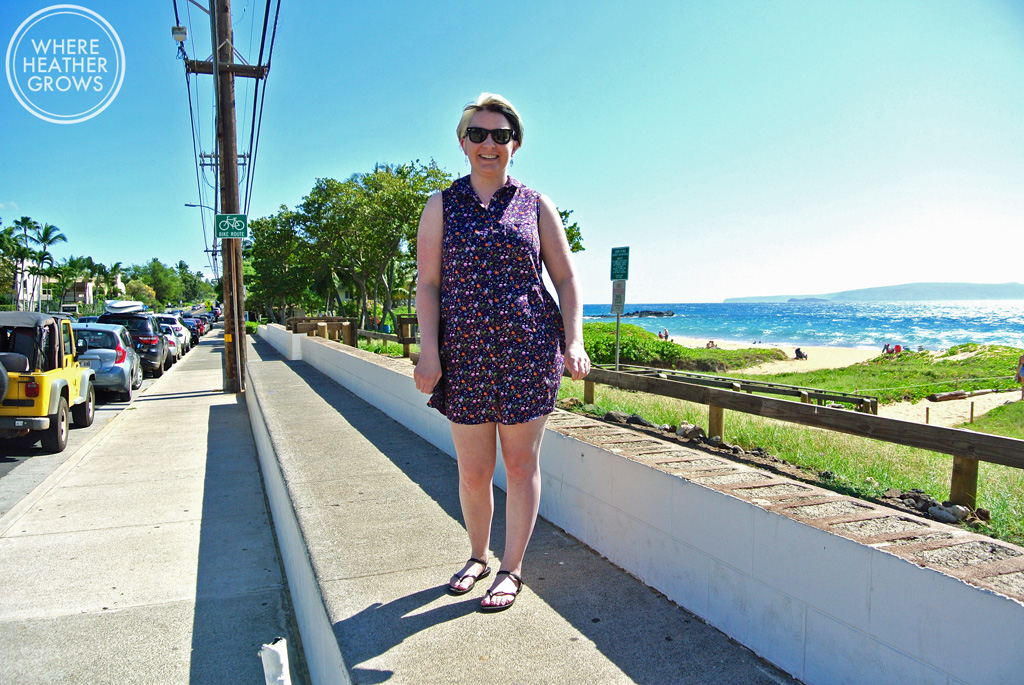
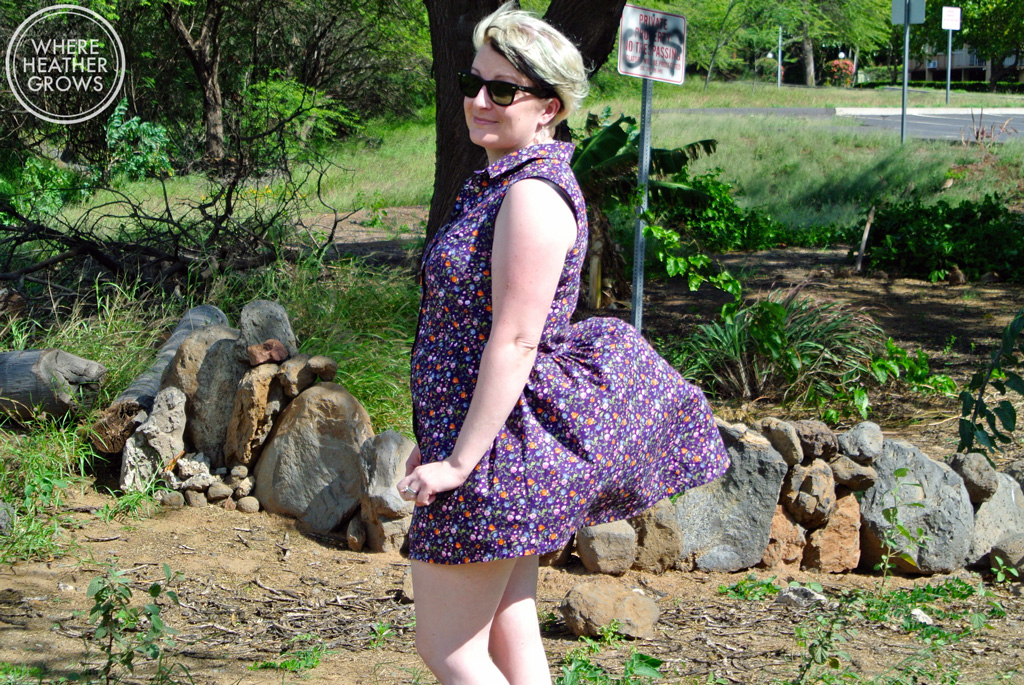
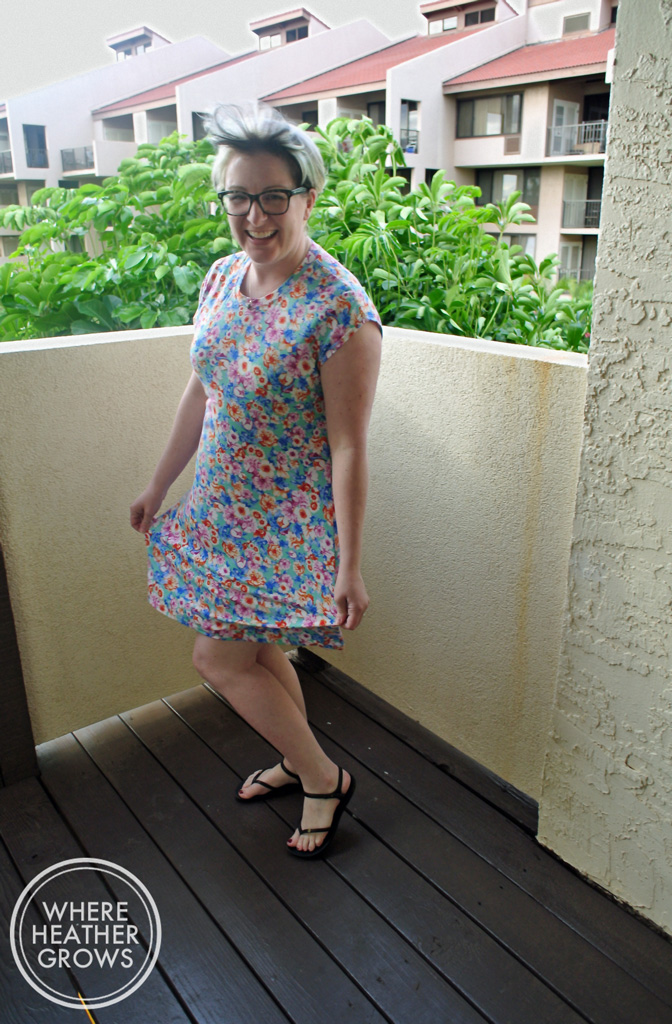
Get it? Cause it's an Alder Shirtdress...Alder sounds like answer... What can I say? I'm a nerd. (Another nerdy fact: an Alder is a tree, and it indeed blows in the wind - okay I'm done.) DSC_5634Anyway, here is my first ruffle butt Alder Shirtdress. I made this one before my Pug one, and while this one is actually a full size smaller, I feel like it fits a bit better.  Weird right? I didn't think that when I made it (obvs because I made my second one a size bigger) but now that I've worn it a few times, I'm liking the fit better. I'm not sure if it's the weight of the fabric (both are cottons but this one is a little lighter) or if I made an error somewhere. Either way, it's hard for me to believe that this one is a size smaller.
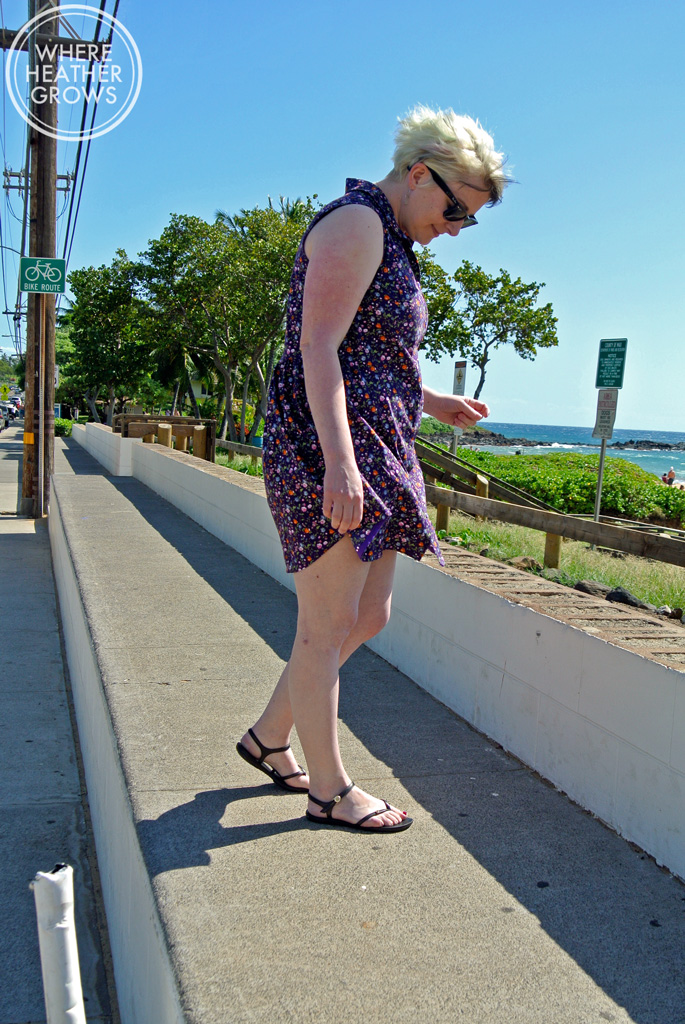
DSC_5642It was an absolutely gorgeous day today, but it was pretty windy (as you will see in the pictures). Maui is known for its tradewinds, and while they made getting these photos a bit of a pain, they keep the air from getting too hot, so you stay cool and comfortable. John and I were out for a walk so I thought we might be able to find a better spot for pictures than our lanai. Might as well get some scenery in there, we are in Maui after all.  John is so good to me, taking all these pictures - talk about patience! We were walking along South Kihei Road which is the main drag here in Kihei. Our condo complex is on one side of this street, and the ocean is on the other.

DSC_5640Anyway, onto more details about the dress. This is a size 6 with an 1.25" FBA. I chose a size 6 based on my upper bust or chest size, just like I did for my Archer shirt. The Alder has a bit closer fit than Archer, so I'm still fiddling with it a little. When I did my first try on of this one, I found it a bit tight across the bust so I took the seam allowances down to 1/4" which helped. It still gapes enough that I added a safety pin today to keep it from gaping wide open, but I'm also wondering if maybe that has a bit to do with my snap placement. I think the snap should be right in line with or just slightly above my bust point, and it's not.  I changed that on my Pug version. I also shortened this by 2 inches at the lengthen and shorten line.

DSC_5655This lovely floral cotton print came from Goldhawk Road in London. It's super soft and perfect for a summer dress. I actually made a Washi dress out of the same fabric in a different colour way. It's beautiful to work with, and I love the colours. I used my favourite pearl snaps from Snap Source. The purple snap matches perfectly. I was tempted to go with an orange snap, but I didn't have any in my stash, and I am way too impatient to wait.

DSC_5650It's hard to see it in these photos because of the wind, but I love the high-low hem this dress has. It's pretty short by design, so longer hem at the back gives a little more coverage if you have to bend down to pick something up.

DSC_5648This windy shot was just too good not to share. How does Beyoncé do it?

I am so happy with how this dress turned out, and I love the colour even though it brings out my paleness. It's been perfect for Maui: light, breezy and comfy.

DSC_5646I am really loving sewing my own clothes all the time, but it was really fun doing it for this trip. I don't have a ton of warm weather apparel because I have a hard time finding what I want (and getting it to fit), so it was nice to sew exactly what I wanted this time. In the past, I would always want to shop right before a trip, but it's hard to find shorts and tees in the middle of winter in Canada.  It was so nice to just reach into my fabric and pattern stash, and make exactly what I wanted (or pretty close anyway). Plus I know I'll wear all of these things come summer. So win win! I ended up sewing this dress and my pug dress, my Marianne dresses, my Carolyn PJs, and a few more things I'll share with you as soon as I get them photographed.

Do you sew or buy specific clothes for trips? Do you feel like you need something new to wear when you travel?

Marianne goes to Maui

What's the word hummingbird? John and I are in the glorious land of sunshine and pineapples - Maui! Actually it's been quite rainy and overcast since we got here, but it's still warm so it's all good. DSC_5599I have to apologize a bit for these photos. John took them twice (on two different days) and the lighting just didn't work out very well. It probably doesn't help that I'm as pale as a polar bear and matching the overcast sky. But anyway, it is what it is, and I really didn't want to try a third time (or ask John to take them a third time). Perhaps I am being to picky, but maybe not.

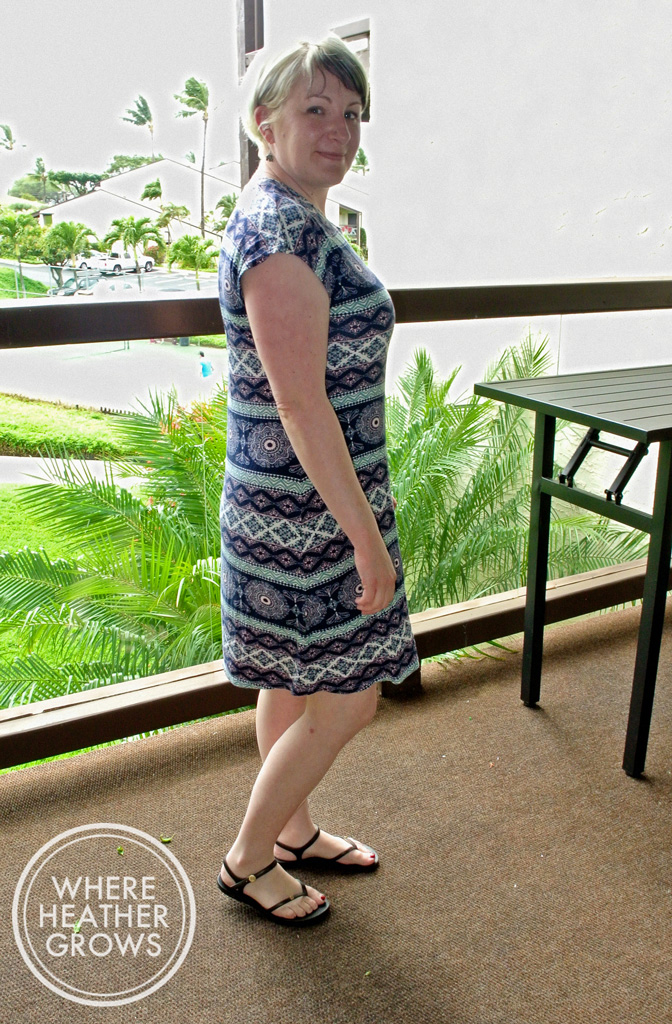
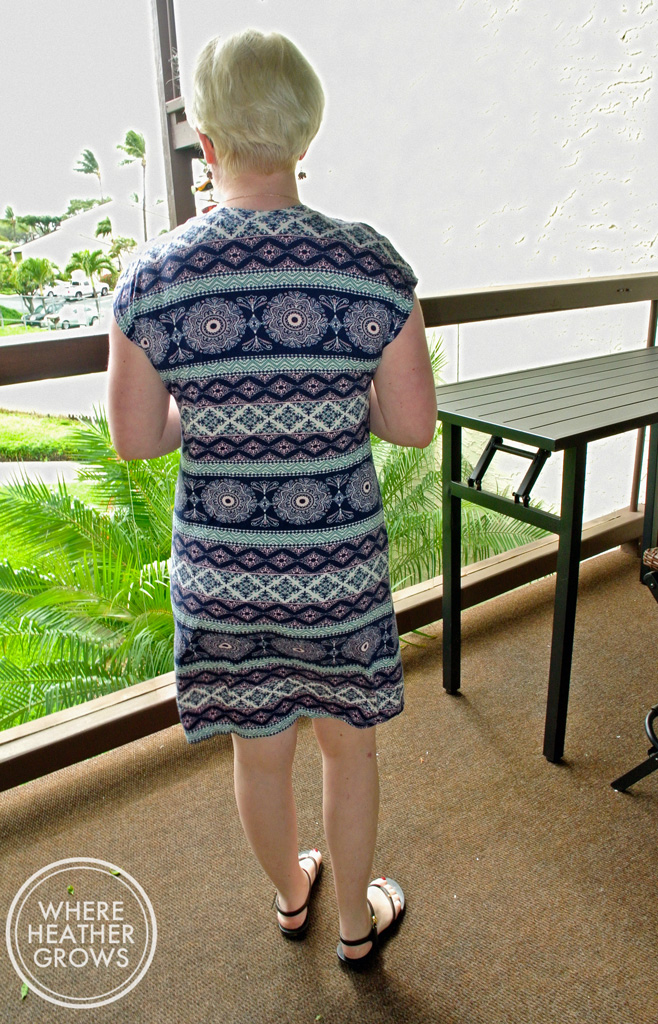
Anyway, onto the dresses! This is Christine Hayne's latest release the Marianne Dress.

DSC_5600

I have to admit that when this pattern first came out, I wasn't too excited about it. I have a couple of knit dress patterns already, and I also thought I could probably achieve a similar effect with a lengthened t-shirt pattern. But then Christine did a round-up of dresses from her sew-along, and I kind of fell in love (I especially loved the red plaid one near the end). Plus I thought the short-sleeve (or rather no sleeve) version would be perfect for this trip.

DSC_5603You're loving my model in the wind pose aren't you? Just wait, there are more to come LOL.

Being the adventurous sewist that I am. I decided to jump right in and crank out three of these little babies in one night (while watching my new favourite show Nashville - have you seen it? S0 addictive!). I don't usually do that - I almost always make one version of a pattern first to check fit and what not, but I decided that knit dresses are pretty forgiving, and worst case scenario, I could just cut them all into t-shirts or skirts or something, if I didn't like the dress version.

DSC_5593

Luckily for me, I loved this dress right away (and for an added bonus, John liked it right of the bat too). It's a perfect, lightweight, easy to throw on dress for a warm vacation. Perfect on it's own with flip-flops, and also quite cute with leggings, boots and a jean jacket or sweater.

DSC_5562

This dress has such a nice and flattering shape. It's super simple, and I was quite surprised that it didn't look like a giant sack. Well it is a bit of a sack, but a sack with shape. I should also mention that the pdf file went together fast and painlessly, and GASP I cut it out instead of tracing like I usually do. That cut down the time considerably.

DSC_5564Based on my measurements, I went with a size 10 at the shoulders and bust, and graded to a 12 at the waist and hip. I am really happy with the fit. And I'm really loving the neckline. I know it's a little high, but I like it combined with the kimono sleeves. I also shortened this dress by 2 inches at the lengthen shorten line, and I still had to hem another 2 inches off but that might have to do with the 4-way stretch of this fabric.

DSC_5583

This is a perfect shot of the wind hitting me. Look at that hair LOL.

DSC_5584All 3 fabrics are rayon jersey knits from Girl Charlee. And actually the floral one and the gray and white one are from my January Knitfix pack (which was jammed with fabulous fabrics by the way. I think I may have mentioned it already, but I was really happy with what I got). The blue multi-patterned one I ordered at the same time, but it wasn't part of the Knitfix.
DSC_5556

I have kind of shied away from rayon knits in the past thinking that they would be clingy and hug all my lumps and bumps, but boy was I wrong! These three lovelies are super soft and have the nicest drape. I think they actually skim over my curves really nicely, and do the opposite of what I thought they would. I see more rayon knits in my future for sure!
DSC_5551

All three dresses were constructed with my serger and then hemmed with the coverstitch machine. I just turned the sleeves and hem under to finish, and then I also topstitched the neckline with the coverstitch too.

This was such a super quick and easy project to make for my trip. These dresses are super easy to just toss on and I feel put together and comfortable. Not to mention that they seem to be allergic to wrinkling - perfect for packing. I've worn them all a bunch already, and I know I will continue to wear them when I get home.

Do any of you have spring/summer on the brain yet? Have you started sewing for it yet? Also any foolproof and easy tips for getting good blog photos are welcome! I hope it's warming up wherever you are (it was actually +16˚C in Calgary yesterday - wowsers!).

The Crazy Dog Lady Sewing Challenge

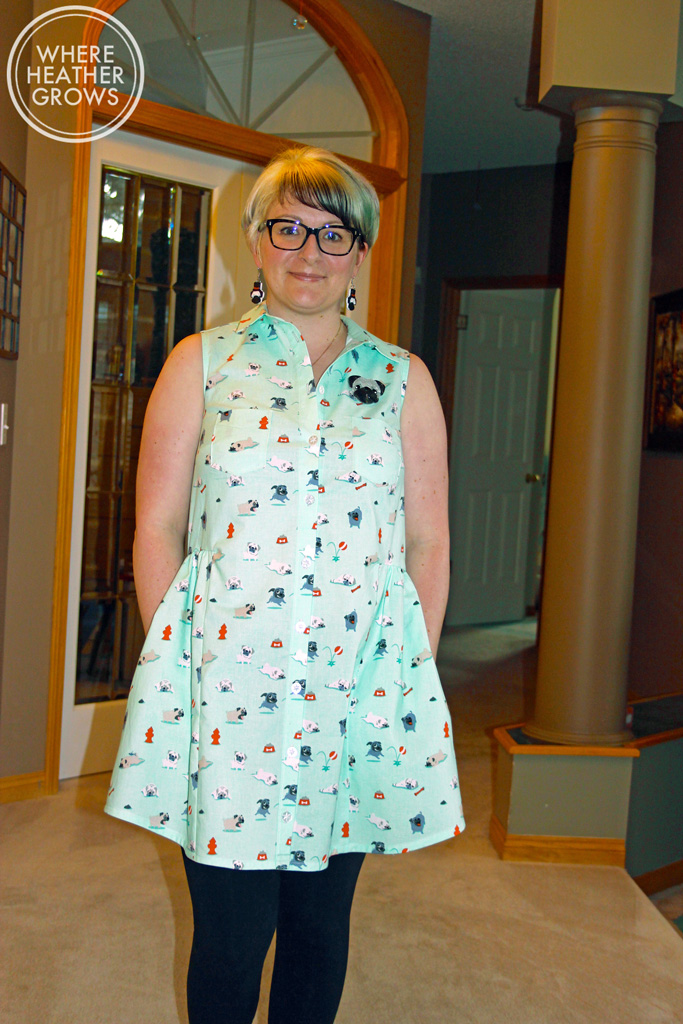
Hey everybody! What's up? You've been waiting to see what kind of crazy dog lady garment I would come up with haven't you? (Or maybe you follow me on Instagram and you already know. Either way, fear not, the wait is over.) Get ready for a pug and picture heavy post. If you have heard about the Crazy Dog Lady Sewing Challenge (or spied the little badge in my sidebar), then this post will not come as a surprise. I think it is pretty clear that I am a crazy pug lady and an obsessive garment sewer, so of course I would join a Crazy Dog Lady Sewing challenge!! When I first learned about this fabulous challenge on Instagram, I was thrilled! I've been hoarding some super cute pug fabric since the summer (I found it when I bought my cat fabric). I was leaning towards making anothet Archer shirt, but I did that for the Crazy Cat Lady Sewing challenge, so it seemed repetitive. I decided to go for an Alder Shirtdress. I have wanted to make the ruffle butt version (thanks Meg for the nickname) for quite some time, so I decided why not go for some seasonally inappropriate sewing? It's time for a change right?

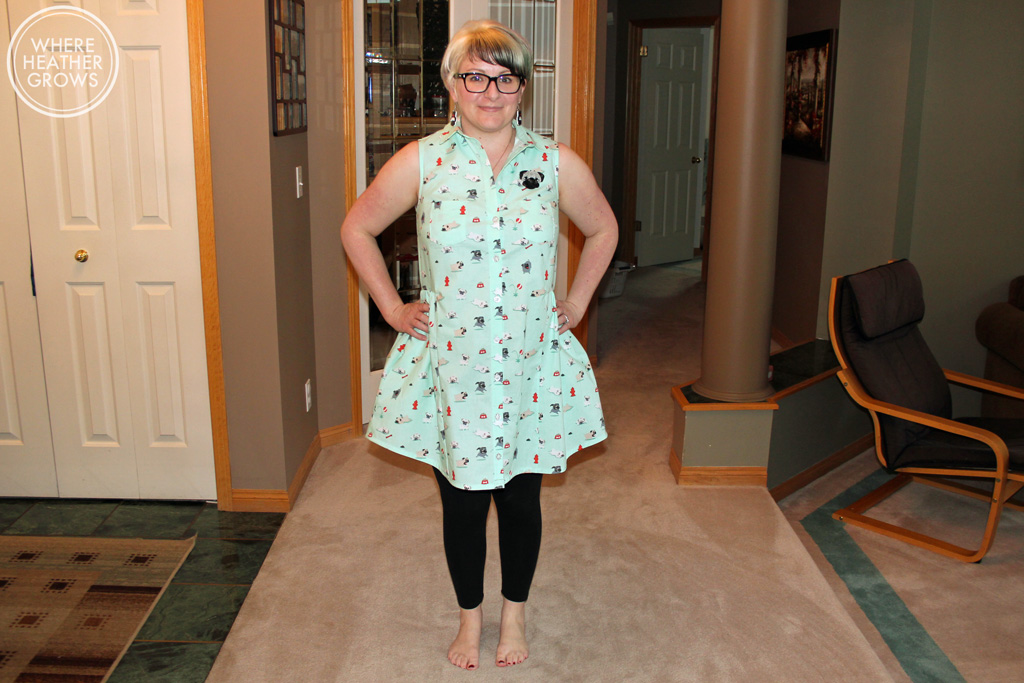
IMG_6308This is View B in a size 8 with a 1.25" FBA. I think the fit is pretty close, but it's not perfect. It still pulls a little tiny bit across my chest (and you can see a little tightness in the back because of it) so next time I think I will go with a size 10 for the bodice with a size 8 skirt and adjust from there. I'm finding fitting Alder a little more difficult than Archer.

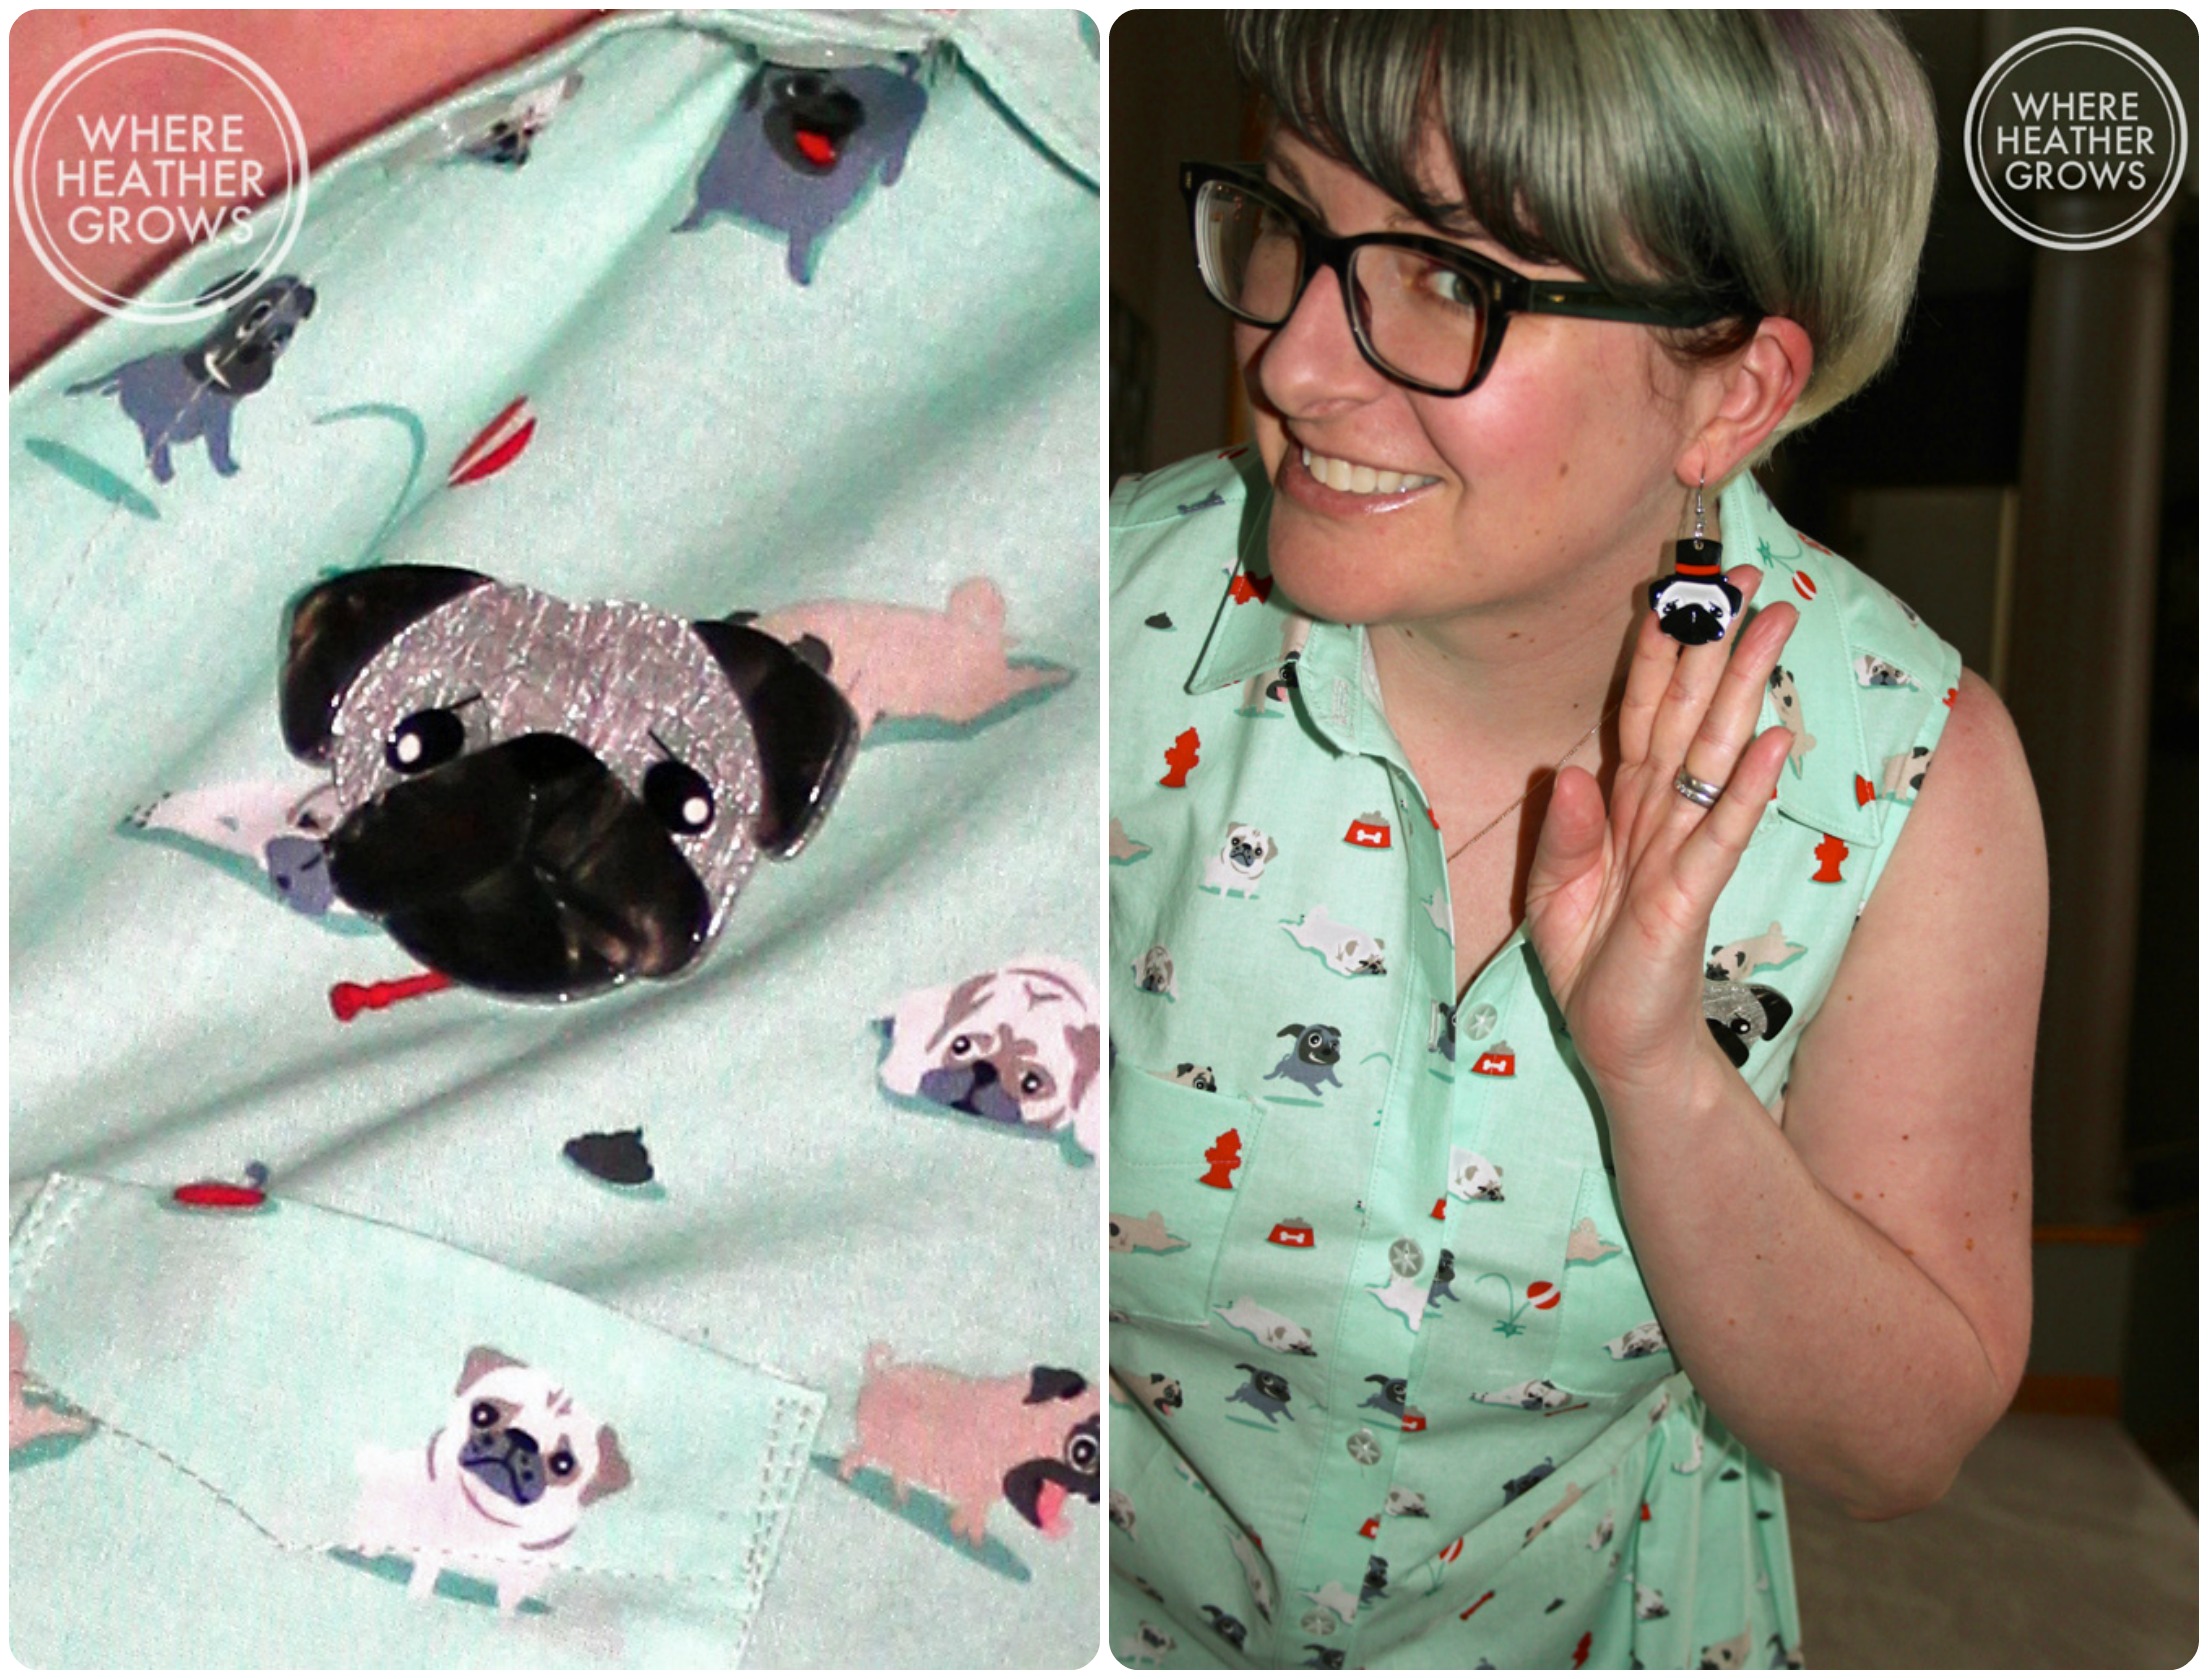
IMG_6341The fabric is a Michael Miller quilting cotton from Fabric.com. It's absolutely adorable with little fawn and black pugs and the rare silver pug . When I saw it, I knew I had to have it. It's called Pugs and Kisses, and I actually bought the other pug print called Pugs on Holiday, but I'll save that for something else. At the time I wasn't sure what I would make out of it, but come on, it has pugs, how can you go wrong? I love sewing with quilting cotton. It cuts and presses so well, and it's just really easy to sew with.

IMG_6346The only drawback to sewing garments with quilting cotton is that it's a bit stiff, but I'm hoping with some more washes and wears it will soften up and drape a little bit better.

IMG_6313I decided to add side seam pockets because who doesn't love pockets? I used the pattern piece from Deer & Doe's Chardon skirt as it was nearby (and I'm too lazy to draft my own). They worked out perfectly, and I think they go well with the style. Although now I see that none of these pictures really show you what they look like. Oh well! My hands are actually in the pockets in the first picture, but it's a little hard to tell because the dress flares a lot in this fabric.

IMG_6338While I was working on this dress, I posted a couple of pictures of it on Instagram and Gillian suggested I find a matching brooch to go with it a la Heather B (who has the coolest brooch collection btw). Then Amber suggested Erstwilder because they make a lot of cute dog brooches. Gotta love the sewing community! I ended up ordering from Aubijou Boutique (an Erstwilder stockist). They have a huge selection of brooches but they also carry earrings, so of course I had to order pug earrings too!

Broach & earringsSo yeah, I've gone full crazy pug lady! And....guess what? I love it!! I know this dress is a bit of a novelty dress, but I love it, and I plan to wear it lots no matter how twee it is. I'm not sure mint is the best colour for me, but it has pugs!! PUGS! And speaking of pugs, it wouldn't be right to finish this post without some pug cameos, would it?

Me-&-the-Pugs-Collage2So from left to right: Quincie (she's 12), Jackie Boy (he's 10) and Shanny (she's 11).

Aren't they cute?  All three of them are rescues that we adopted about 3 years ago. They were all breeding dogs, which has led to some health issues, but we are loving spoiling them rotten and helping them to live out their last years in the lap of luxury. Quincie came to us first, and a couple of months later we got Jackie Boy and Shanny who are a bonded pair. We absolutely adore all 3 of them, and they all the cutest little personalities. Pugs make fabulous, comical, and extremely loyal companions. They seem to get along with everyone, and they live to love (and eat, can you tell?). Aside from their constant shedding, they are an extremely adaptable and low maintenance breed. Pugs are the perfect little package if you ask me, and I am so happy that we decided to adopt these three. Also, did you know that a pack of pugs is called a grumble? The more you know....Lol.

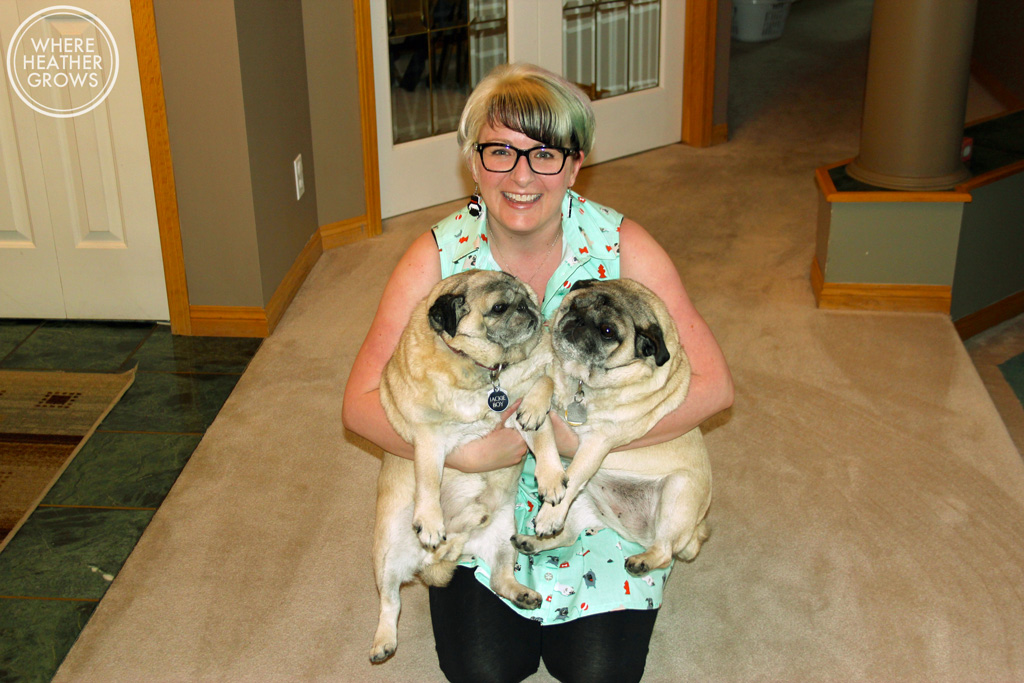
I would have loved a shot with me and all three of them together, but it was pretty difficult to wrangle them all together and get them to stay put, plus they are way too heavy and awkward for me to hold all at the same time. Here's me trying to convince Jackie Boy and Shanny to pose. Pug butts are the cutest!

IMG_6348 And here I am trying to lift them both:

IMG_6350Don't they look thrilled? I love all these shots!

IMG_6354So there you have it. I had a lot of fun sewing up this dress and participating in this challenge. Tanya, Carlee, and Sophie-Lee have put together some amazing prizes and entry is open until March 15th. So if you want to play along, there's still plenty of time. You can also check out (and join) the Flickr group to see some other Crazy Dog Ladies too!

Are you crazy about your pet? Do you or have you ever sewn up and worn a garment in novelty fabric? 

Tropical Pyjamas

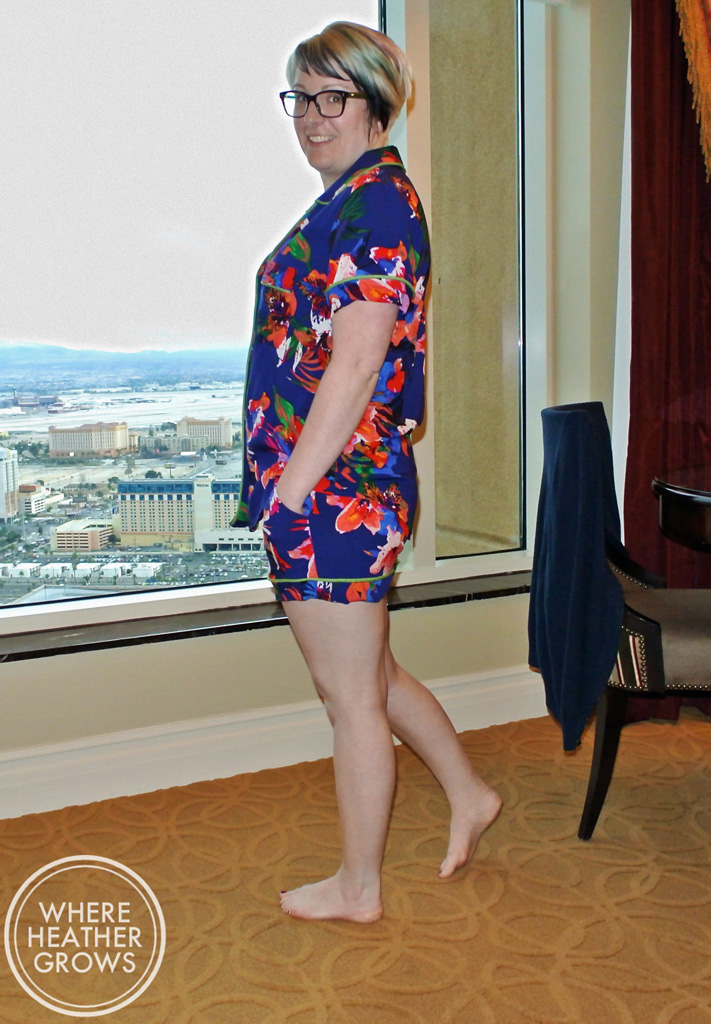
Hey everybody! It's finally time for something different! Pyjamas - with piping and everything! I'm sure by now, most of you have seen Heather Lou's latest pattern (and if not, head over to Closet Case Files and check it out). This time it's all about upping your lounge wear game and I am all for that. John recently bought me some pyjamas (for Christmas) and I absolutely love wearing them. I never used to be a full set type of girl. I used to only wear pyjama bottoms and a t-shirt, but this latest pair I own has changed my thinking. They are flannel (kind of like these but with penguins) and snuggly, and I love wearing them as a set. Who knew matchy-matchy could be so fun? Anyway, being a new full pyjama set convert, I was thrilled to see this new pattern for the Carolyn Pajamas. I really love all the versions included with this pattern, and that they are designed to be fitted, feminine, flattering and comfy, not the usual boxy unisex business.  This girl likes to lounge in style. Plus, I will be way less embarrassed answering the door in the middle of the afternoon in these babies, than in my usual pug-hair covered yoga pants and ratty t-shirt. (Heather Lou the UPS man thanks you too.)

DSC_5541

I have never sewn with piping before, nor have I sewn a notched collar, so I decided I would try the shorts version first (version C). It seemed like less fabric so a good place to start just in case I made of mess of them. I should also mention that the pdf went together really well. All of the markings match up, and I like how you can print the top, pants and shorts separately. Also, I love that you can put the pattern pieces together individually. I'm not entirely sure how to explain it, but you don't have to stick all the pages together to form one giant paper. You can put the first 2 pages together for 8 or 9 rows, then the 3rd and 4th pages together for 8 rows and have all the pattern pieces. Here, I'll show you the layout so you can see what I'm talking about.

Screen Shot 2015-02-24 at 9.15.41 PMHopefully, it's okay that I show you that little diagram, but do you see what I mean? Closet Case Files' pdfs are really well thought out, and always a breeze to put together.

DSC_5542

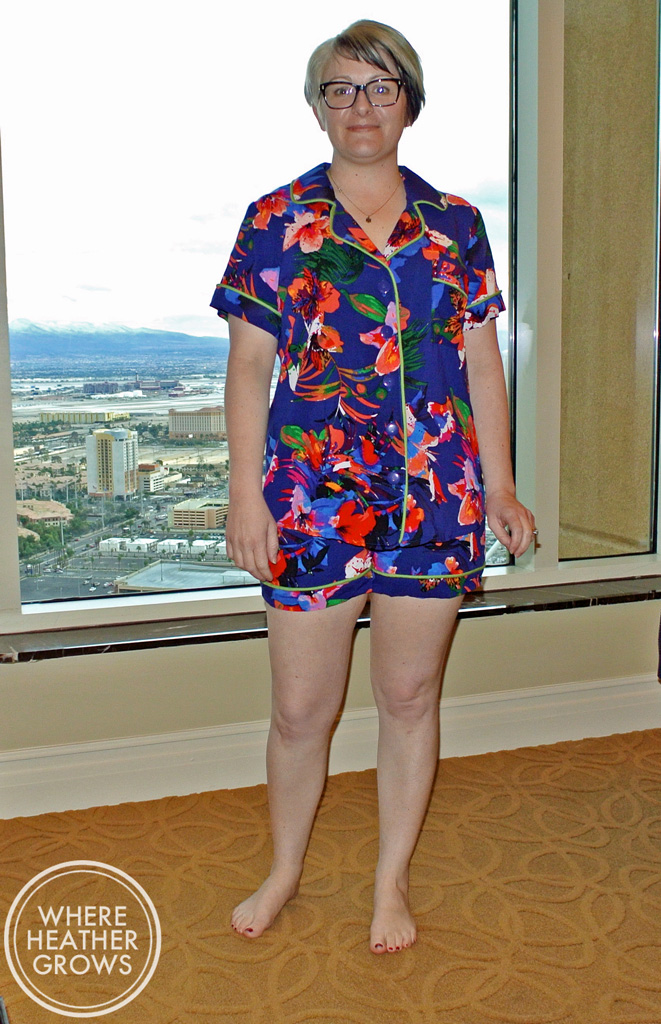
I made up a quick muslin of the shorts in some cheap rayon I had lying around before I cut into this tropcial gorgeousness. I chose the size 10, but found the shorts a little too snug for pjs, so for this version I made a straight size 12 for both the shorts and the top, and I think they both fit perfectly! In fact, I can't really get over just how perfect the fit of the shirt is. I mean check out those shoulders. Once again, it feels like Heather Lou drafted this pattern just for me.

DSC_5543

The fabric is a really gorgeous tropical print rayon voile from Blackbird Fabrics. When I saw it I knew it was destined to be warm weather pyjamas so I snapped it up right away. Unfortunately, I think it is now sold out. Have you ever sewn with rayon voile before? I hadn't until this, and let me tell you it is amazing! This fabric is so incredibly soft, and flowy, and silky, and it was a dream to sew with. I wish I could send each of you a little swatch of it, so you could feel it. It's beautiful! And it makes for an uber luxurious set of pyjamas.

DSC_5544

I went with store bought piping that I picked up at my local Fabricland. I think it looks okay, but it's a little stiff and bulky (the shorts can almost stand on their own). For my next pair I will either make my own smaller piping, or go with flat bias tape piping. I think this stuff might be more suited to pillows and cushions and what not. This was my first time piping anything and I was a little nervous but it went okay. I started with the shorts and my stitching doesn't look the greatest when you get really close up, but I'm okay with that. I mean, who's going to be getting that close to my cuffs while I'm in my pyjamas anyway? The pugs maybe, but they love me and I feed them, so they can overlook wonky stitching every now and then.

After struggling a bit with piping the shorts (I started off using my zipper foot, then my regular foot which worked better than my zipper foot but still wasn't great), I ended up buying a piping foot for my darling Pfaff and it made a world of difference. So if you plan on doing much piping work I would definitely recommend getting the proper foot. It made my life so much easier, and it made my sewing look a lot better too! By the time I got to the cuffs on the shirtsleeves, I felt much more confident in my piping abilities.

DSC_5540

I also struggled a little bit with the notched collar too, but I am confident that my next one will go much smoother. The instructions were fine, but I still consider myself a beginner sewer, and I am definitely someone who needs to do things at least once to figure them out, so I know next time will be a lot easier. And also since I made these, Heather Lou has added a tutorial to her website that is quite helpful for visual learners like myself.

All in all, I am thrilled with how these turned out and I can't wait to make more. I already have a stash of fabric reserved for more sets. My dream is to have a set of these to wear everyday for every season. They are like my version of the leisure suit.

Do you wear pyjamas? And if you do, do you wear the full set, or just one piece? Also what do you think of the pyjama on the street fashion trend? Would you wear them out of the house?

PS: This post comes to you live from Las Vegas. John is here for business and I tagged along. I thought it would be cute to photograph these in the hotel room, but it ended up just being a little creepy so John ended up taking my picture by the window instead of on the bed. LOL

The Linden Tunic

Hey there everybody!! I feel like I haven't blogged in ages, but when I checked the date on my last post it's really only been a little over a week. I have been sewing up a storm and making lots more things, but sadly, I haven't photographed any of them yet. Sometimes I feel like blogging gets in the way of sewing, and I also like to have a bit of a selection of things to blog about so there's been a lot more sewing, than blogging and photographing going on lately. Anyway, I do have one project photographed and ready, so in the spirit of sharing all the makes, I bring you my Linden Tunic Experiment. I know, I know, we're sick of Lindens!! Well to be honest, I am not sick of making them or wearing them, or seeing them AT ALL, but I am a teensy bit sick of blogging about them myself. But because this one is a little bit different, I decided that you all might like to see how it turned out, in case you are thinking about making one for yourself.  Anyway, enough blabbing....

IMG_6259

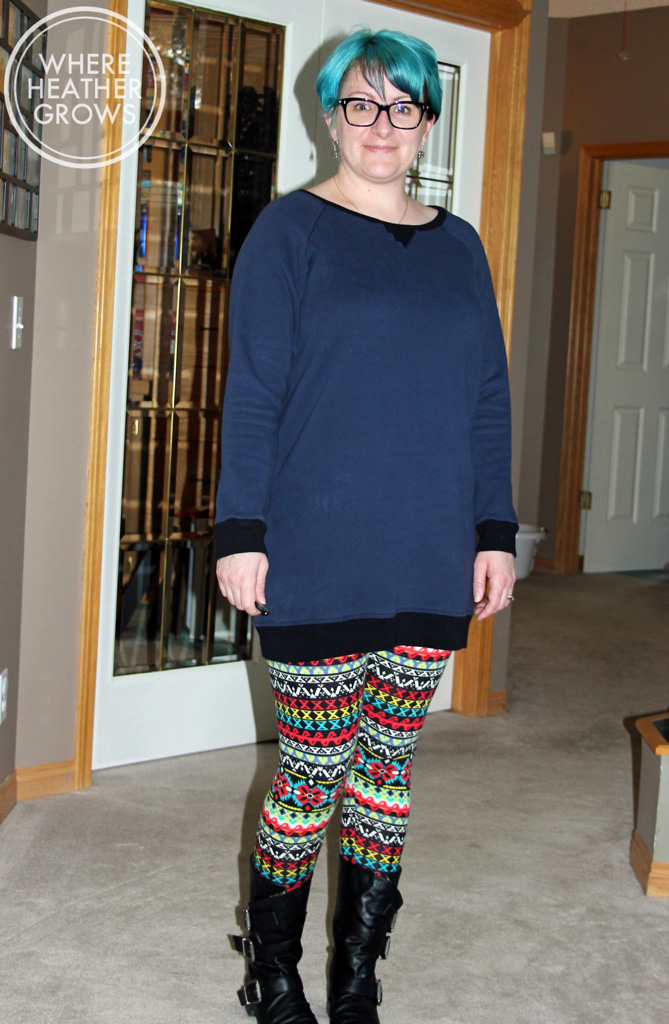
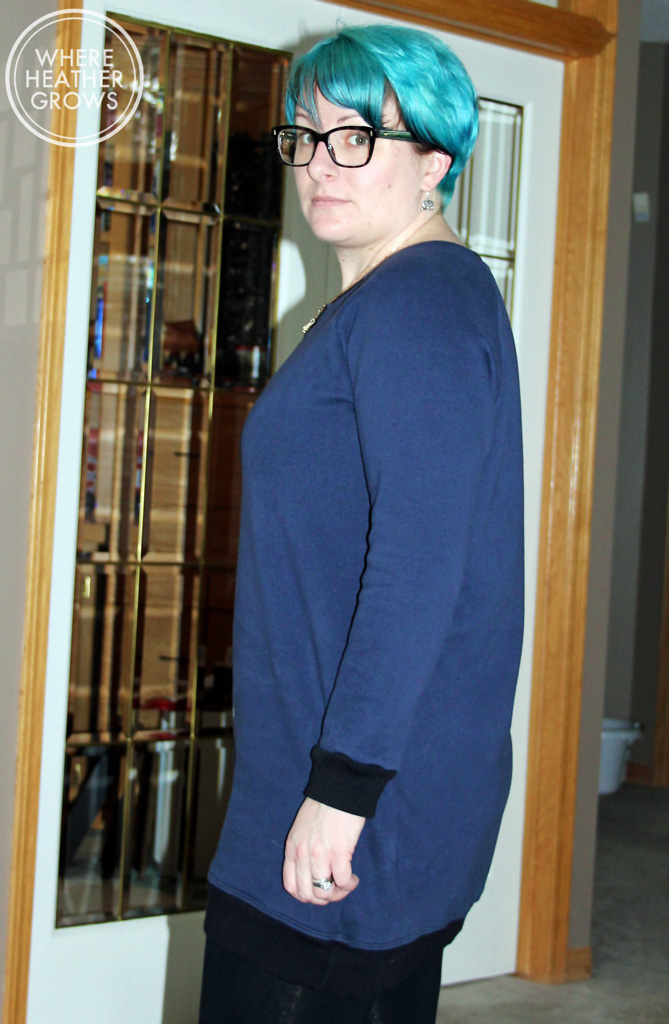
So I'm not sure this is my best looking project ever, but it is sooooo comfy!! I made it out of sweatshirt fleece I bought from Girl Charlee ages ago. I actually bought it to make a Lola Dress, but that doesn't seem to be happening anytime soon, so I decided to just use it for this. It's warm and thick and extremely soft. The right side of this fabric almost seems brushed. Very snuggly. Oh and the black ribbing is from Fabric.com.

IMG_6258

So back to the pattern, all I did was lengthen in by 7 inches at the lengthen/shorten line. Easy peesy!

IMG_6281

One time, a long time ago, (in a galaxy far far away), a very lovely sales girl at Anthropologie told me that a tunic  (or even a short dress) should hit you mid-thigh for the most flattering fit. Right at the point where your thigh starts to widen - does that make sense?  For some reason, that little rule has stuck with me. So that's where I aimed for the bottom of the ribbing to hit.

IMG_6256

I was just looking for something snuggly and comfy to wear with leggings - so this pretty much fits the bill. I'm not sure I am in love with my fabric choice as it is a bit stiff and makes for a sack like garment, but it's okay. It's perfect for lounging around the house and being cozy, and if I need to sneak out to the store, my butt is covered!

I'm not sure if I will make this again. It's a little too plain for me. I feel like it needs a funner fabric, or pockets or maybe a waistline or something. The hunt for the perfect sweater dress/tunic continues!

Actually, not long after I made this up, Paprika Patterns released their Jasper dress. It has an interesting collar and a hood option with really cute welt pockets. So I might try that next time I'm in the mood for a snuggly sweater dress. (PS: I think that pattern is on sale until Feb 24th if you want to snatch it up too!) [Also, guys in the interest of all the advertising/affiliate links conversation going on in blogland - I want to let you know that I am not sponsored or affiliated with anyone at the moment. I know I link to tons of stuff, and I rave about lots of stuff, which may make it seem like maybe I am getting paid to do so but I want to be clear that I'm not. And I promise to tell you if I ever do get sponsored or sent any free stuff in the future. I am totally not against it, but I like it when bloggers are forth coming about it, so I promise to be too.]

So there you have it! I promise to blog something other than a Linden for my next post ;). Hope you all are staying warm wherever you are!

#RigelBomberJanuary

Or as I like to call it #rigeldisappointmentjanuary. I'm a little sore about this project, so sore in fact, that I wasn't even going to blog about it. I thought about pretending that it never even happened. People would forget that I decided to partake in #rigelbomberjanuary, and I could just delete my instagram photos, right? Well, at the last minute (on the last day of the month I might add), I decided not to forget about it. It's good to share the fails too right? First off, let me just say that there is nothing wrong with Papercut's pattern. It was fun to sew up, albeit a little stressful because of the welt pockets. (I had sweaty palms because I have never attempted welt pockets before.)  The jacket itself turned out fine, although the ribbing was a little less structured than I would have preferred, but that's just down to a lack of available ribbing out there. It's just...it's not for me. The colours are not working for me, and I sorta don't think the shape is right for me (but that could be a sizing issue too - I made the medium, but I think I could have gotten away with a small or at least a small in the shoulders). Anyway, I really want to like it, and I have really, really tried to like it, but I just don't.

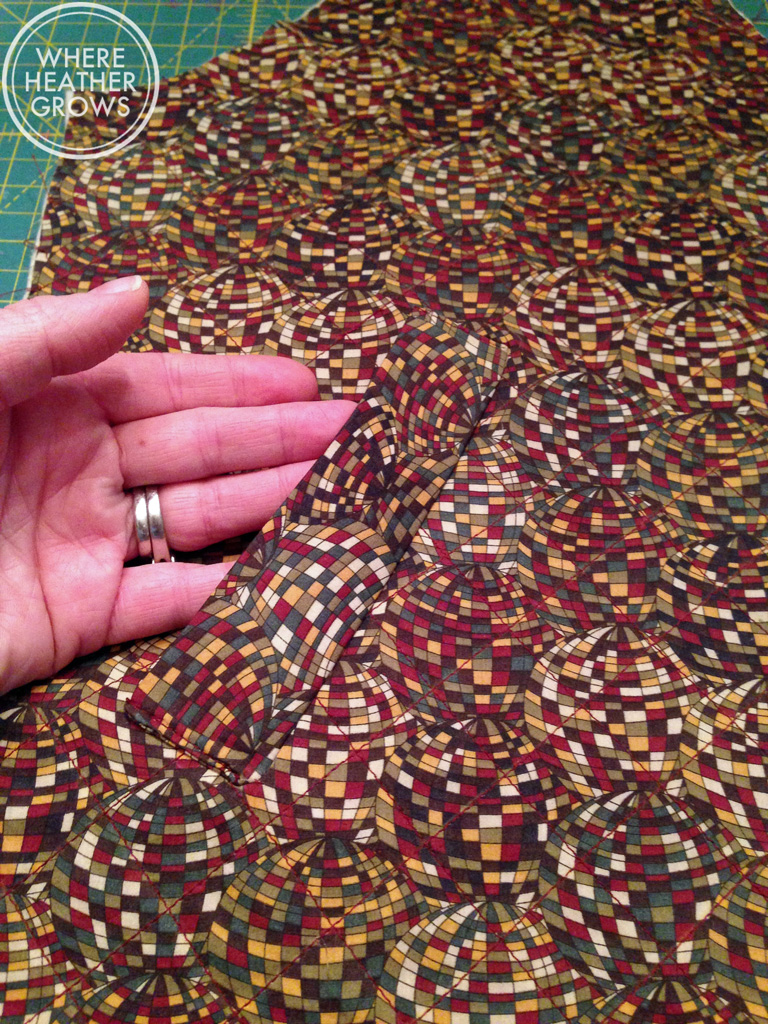
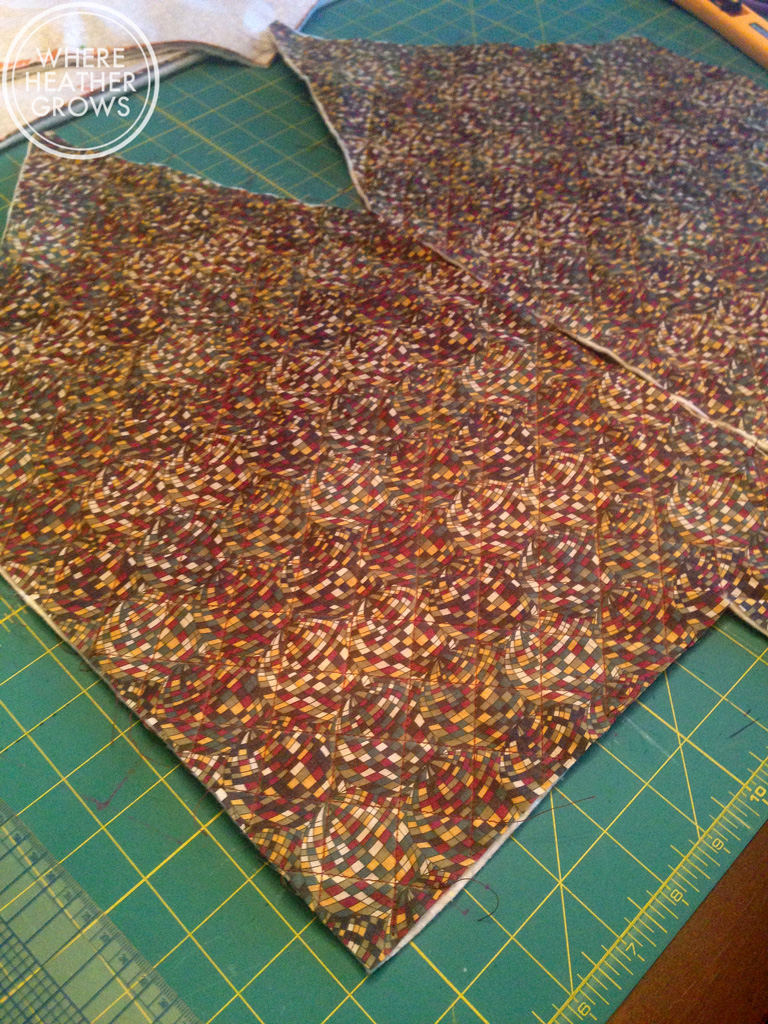
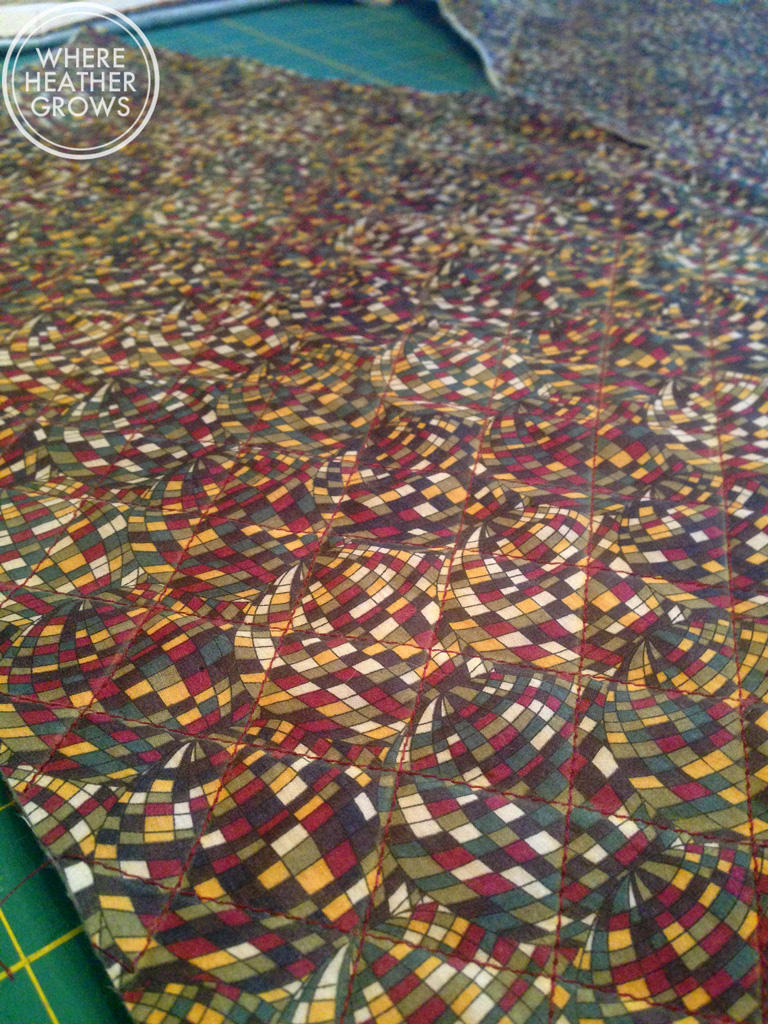
I think the biggest problem with this jacket is my fabric choice, oh and the ribbing too. When Sonja of Ginger Makes announced Rigel Bomber January, and posted some inspiration photos, I fell hard for Craft Sanctuary's quilted bomber. It's made out of a delicious Liberty lawn and quilted and lined. I immediately checked the stash for Liberty prints and the hubs and I settled on this one that we got at Shaukat. To be completely honest, I have no idea why I even bought it because I don't even really like it. I think John chose it because he loves the colours. So there was the first mistake.

The second mistake is that I had to order the ribbing online, so it was really difficult to find a good colour match. In my mind I was looking for a dark maroon/burgundy, but I wound up with this brick red from Fabric.com. By the time it got to me, I was tired of waiting, and wanted to get the show on the road, so I just went with it (I won't be doing that again - settling I mean).

IMG_8563

Ya, so that happened.

I guess it wasn't a total waste because I did learn how to make single welt pockets - I used this tutorial. I have never sewn them before, and I was super nervous about doing them, but they turned out really well. Another sewing fear conquered. Yay! Silver linings people, silver linings.

IMG_8439

I think part of the heartbreak over this make is all the time and effort I invested into it. I mean, I took the time to quilt it all. It wasn't difficult, I just cut out the pieces, marked some lines and then quilted them with some leftover quilt batting I had, but it was time consuming.

IMG_8429

IMG_8428

I also lined this bad boy with a delicious rayon challis from Fabric.com. I used Elizabeth's method which was pretty easy. It feels really nice when you put it on. It's snuggly and warm, and silky against the skin. It's a little stiff due to the quilting, but I think with some wear and a wash or two it will probably soften up really nicely. See what I mean, I really want to like it and I'm really heartbroken that I don't. I kept having that yucky feeling of disappointment and regret in my tummy every time I looked over at it. I even popped it on several times throughout the last week or so to see if I changed my mind.

I just think the colours do not work for me. It might be my insane blue hair, but it might also be the shape/style of the jacket too. It looks so lovely, on so many people. I mean have you seen this one, or this one. Or my favourite this one (I swear Katie and I are sewing twins - we both seem to sew up the same things around the same time not even knowing we are doing so - she has great taste and great style so check out her blog if you haven't already.)

IMG_8447

I didn't really take a lot of good photos of it (my bad), so these are all off my iPhone, but you can see the lining peeking out a bit there.

When I finished it, I put it to Instagram and as I expected got mixed reviews. Some people liked it, some people were quiet about it ('nuff said), and lots of others reassured me that it was fine but also that it was okay not to like it. Thank you guys for that.

Anyway, to make a long story even longer, I had finally had enough of looking at it, and I was about to stick it in the back of my closet and pretend it never happened, when my Mom and Stepmom came over for coffee this afternoon. I wasn't sure if either of them would like it, but sure enough my Stepmom tried it on, it fit, and we decided it looked much better on her.  SOLD! (or rather GIVEN! but you know what I'm saying). This made me ecstatic! I am so happy for this make to have a home, and so happy that it is with my favourite Stepmom! I think she's going to get some good wear out of it because it looks really great on her.

IMG_8561

I sort of sprung the photo shoot on her (poor lady - she really must love me because she agreed to it), but doesn't she look great!

So that wraps it up! (Enough whining and wallowing already!) I really liked this "sew-together" concept. It was fun to sew something with a bunch of other people, watch other people's progress and see what we all did with the same pattern. It also gave me the push I needed to get this done. I have had this pattern for months and it probably would have just sat in my stash if it wasn't for this. Even though mine didn't turn out exactly as I imagine, I would still recommend it. And if you didn't quilt it, it's a really quick sew for a jacket. Now onto different things - I'm planning for the Crazy Dog Lady Sewing Challenge (and there's always more Archers, Gingers and Lindens to sew). Woo hoo!

Has this ever happened to you? Have you ever made something that you just didn't like? How did you get over it or what did you end up doing with your project?

Forever in Blue Jeans...Ginger Take 3

Do you ever have those days where things just don't work out? That seems to be the story of my week with photos. I'm just in a bit of a funk. I finished these jeans on Sunday afternoon and have made several attempts to photograph them, but I am just not happy with how I look in the photos. I finally decided today, after 4 attempts that I was just gonna go with it. I mean come on, I made another pair of Ginger jeans!! I can't just hide them away from my blog because I'm having a bad hair/skin/shoe day.  So with that in mind, I am presenting you with quite a mish-mash of photos, but I think this combo showcases my latest Gingers quite well. IMG_6022

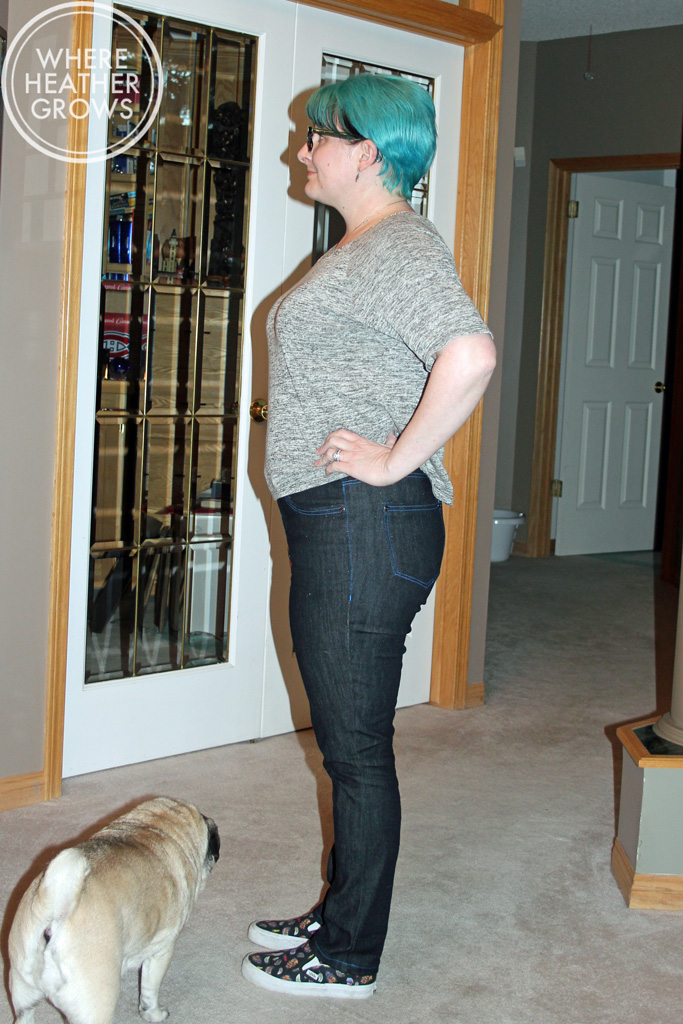
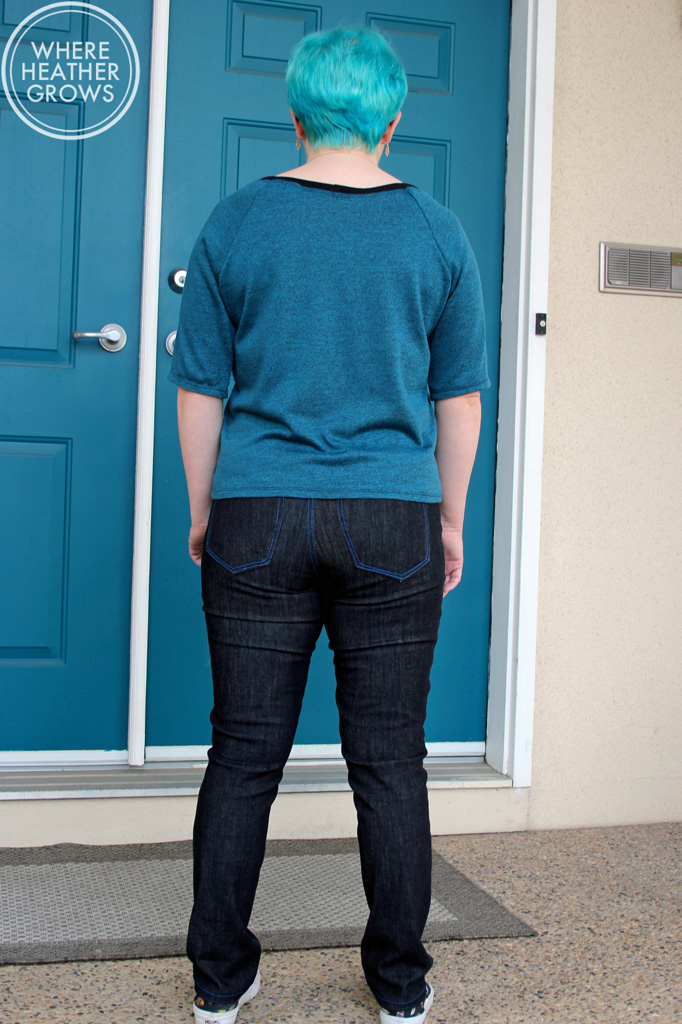
This is Version A again. I made a few changes this time: I lengthened the rise by 1 inch, and I lengthened the front crotch curve by 1/4" (I thought I would start small). I had a few smile lines on my last pair, so I thought that might help, but I don't think it made much difference; the lines are still there, they are just a bit straighter now. I might add another 1/4" next time, but I'm not sure. I'm pretty happy with the fit as is, so I don't really want to mess around with it too much more.

IMG_6085

I also slimmed the leg down by an inch. I took 1/4 inch off each side seam on each leg, grading to zero about mid thigh. This made the legs skinny, but not super skinny like my last pair. I quite like it, although I am struggling with shoe choices. I have these cute booties, but they just look wrong, and I don't always want to wear tall boots. Yeesh! First world problems. But seriously what kind of shoes do you were with stovepipe legs?

IMG_6110

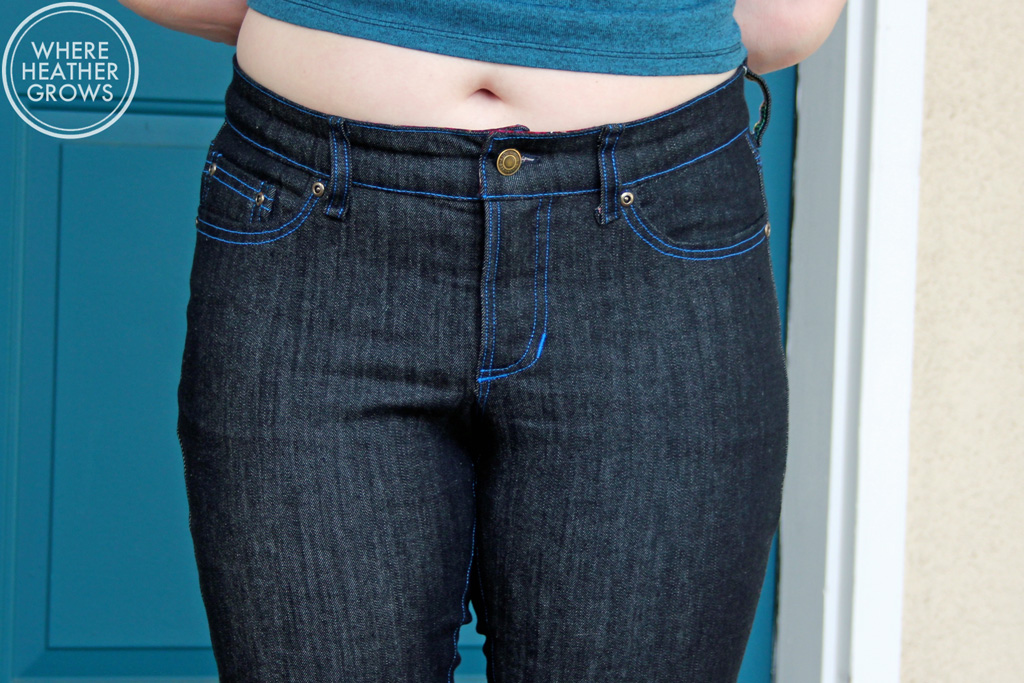
For something different, I went with blue topstitching thread. I really like how it turned out. My machine had some troubles making barracks with this time, and I'm not really sure why. I'm thinking that maybe this thread was just a pinch too thick, or I might need a slightly thicker needle. Anyway, I took what I could get so the barracks don't match and are a little bit longer than I would have liked.

This lovely dark stretch denim came from JoAnn's in Palm Desert. We were in California back in November for a work thing for John, so we hit JoAnn's and we found lots of great fabric. I know that some of you American sewists don't think too highly of it, but I found a number of great bottom weight fabrics (at good prices) and some great flannels and shirtings too, plus I got a wicked deal on Olfa blades for my rotary cutter (half-price - and they were regularly priced half of what I pay for them here). So I have nothing but love for JoAnn's myself. (For my fellow Canucks, JoAnn's is like a combination of Michaels & Fabricland/Fabricville, i.e. Crafter's Heaven.) Anyway, I think this denim is awesome. It's stretchy, has great recovery, and it's kind of brushed on the wrong side, so it is super soft and it feels like pyjamas! Hooray for pyjama jeans!

IMG_6025

As you can see, this pair isn't as highwaisted as the pattern's Version B, but they still hit just below my belly button. I really want to try Version B, but I'm afraid they might be a bit too high for this petite lady. I'm afraid the waist would sit right underneath my boobs, and I'm not sure that would be very flattering. But who knows? The 70's are making a comeback right? I may still give them a go just to see. I also went a bit rivet crazy on this pair. I changed the coin pocket so that you would see both sides of it (basically I just folded it under and topstitched) so that I could have more rivets! You can't see it, but I put rivets on both corners of both back pockets too.

IMG_6030

I'm not sure I am in love with the high-waistedness. I can't decide if it's really flattering, or too mom-jean. You pretty much never see my waist anyway, cause my tops usually cover it, so it's not really a big deal, but I'm still not really sure about it. I probably just need to get used to it. I also went with the built in pocket stays as described in Heather Lou's  sew-a-long. I think they do make a difference in taming the tum, and adding a bit more structure.

IMG_6092

As you can see I have also made 2 more Linden Sweatshirts. I opted for the short sleeved, hemmed version this time, but I'm not entirely sure it's for me. Super comfy, but I think my figure benefits from the hem band, so I may just stick with the long-sleeved version. Or maybe I'll just add a hem band next time. I have already professed my love for Linden in my last post, but I have to say it again, it's a great pattern. I whipped these up on my serger in just over an hour, and they are so comfy!! Both are made out of hacci sweat knits I had in my stash, but I think they are both from fabric.com. So that's it for now.

Do you have bad photo/blogging days? How do you cope, and/or what do you do to get out of the funk? Also have you made Ginger Jeans yet, if not, what's holding you back?