The International Anna Party

Hello Everybody! How are you? What do you think of the new digs? (I hope you like them cause it was quite a bit of work to change everything around. LOL)

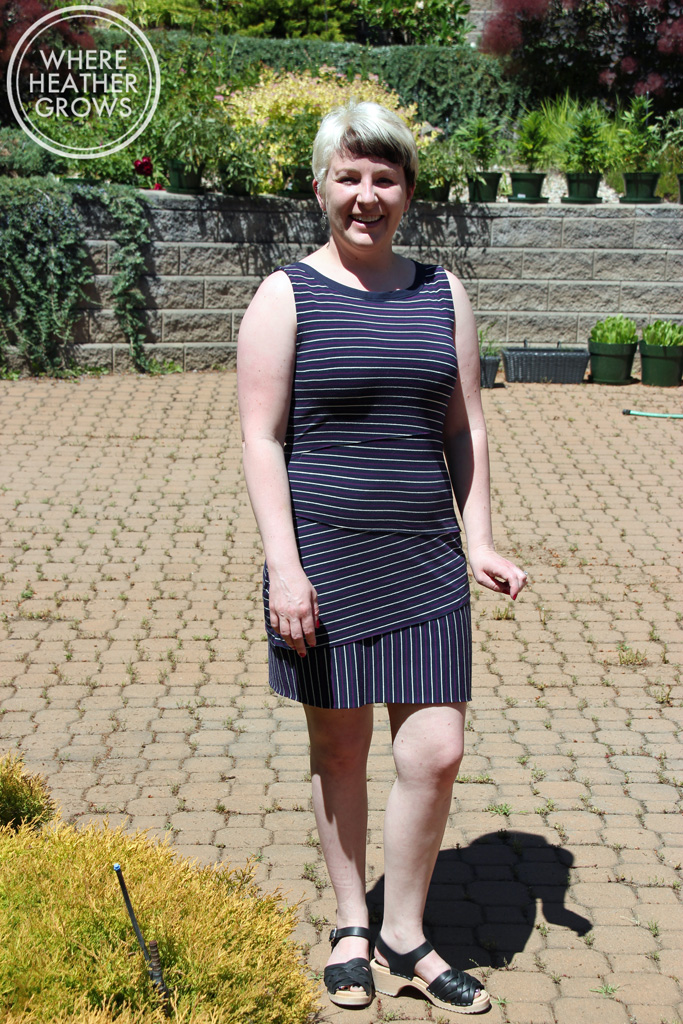
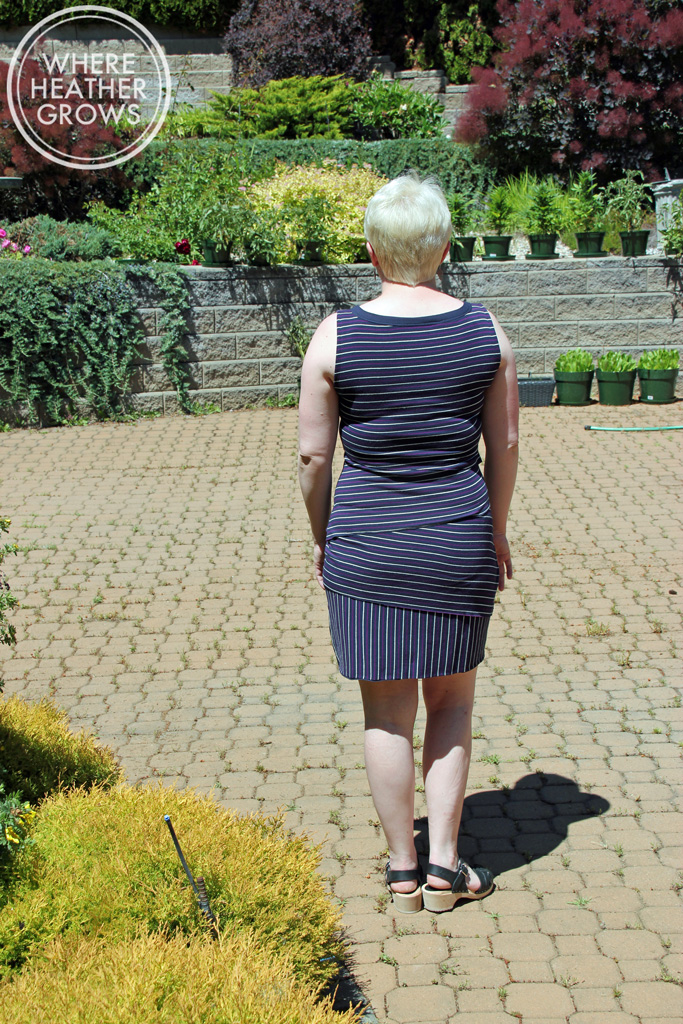
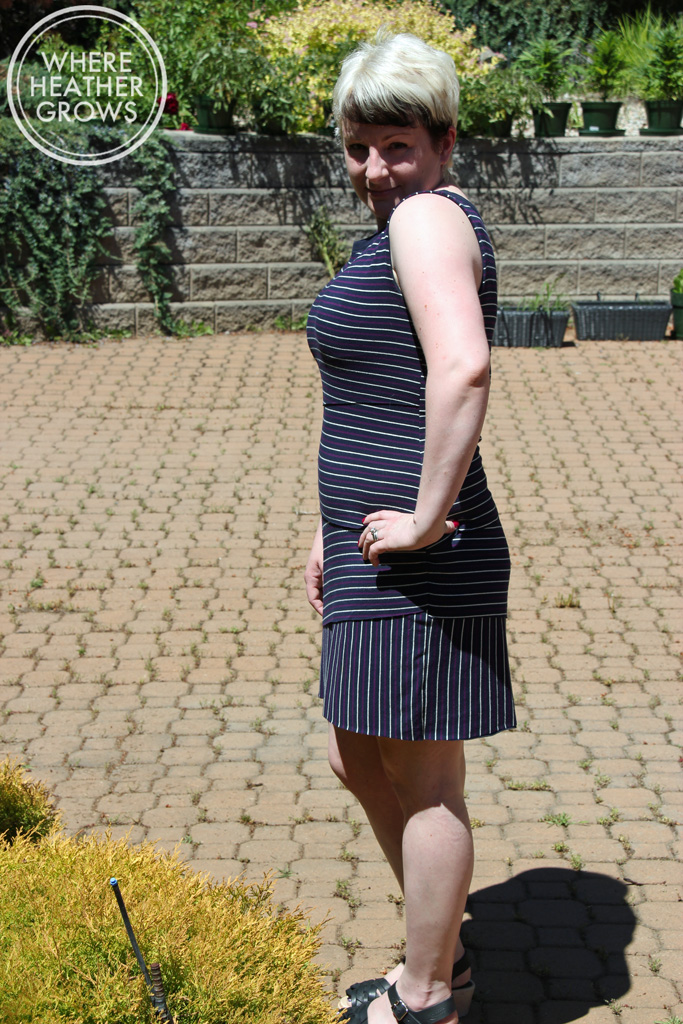
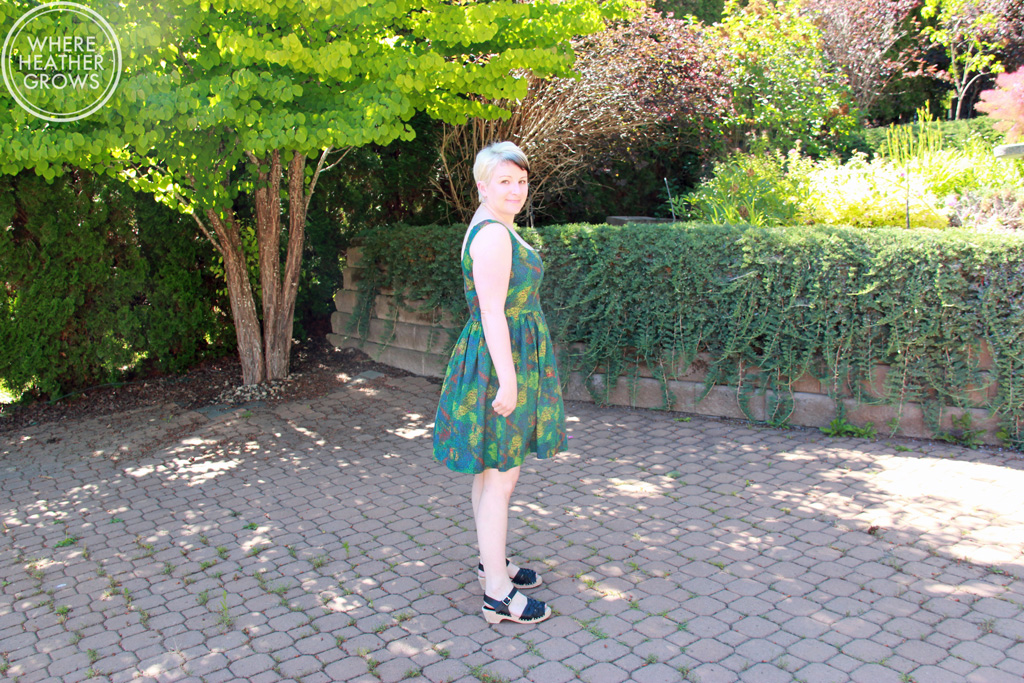
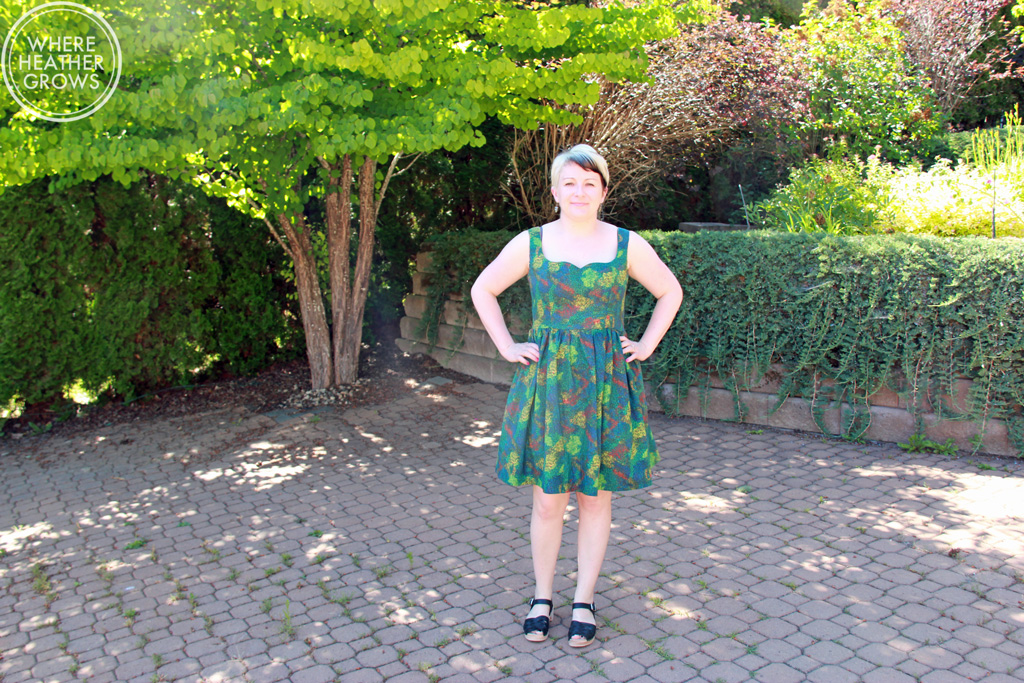
This is my By Hand London Anna dress that I made for the International Anna dress Party happening today on Instagram.

I actually started this dress quite a while ago, but I never finished it for some reason. It sat on my dress form for forever. Which really isn't like me. It usually bothers me having an unfinished project lurking in the sewing room. Anyway, the #internationalannaparty was just the push I needed to get this bad boy finished.

The bodice of this dress is a straight size 12/16, and then instead of doing the panelled skirt that comes with the pattern, I decided to do a circle skirt. It took me awhile to get my head around the math part of making a circle skirt, but I finally got it. I have never been good at math. The bodice fits me pretty well, although my fitting brain is wondering if I could make it fit even better with a smaller size and an FBA. I seem to be all about the FBAs lately. I think the Anna dress is a really flattering sillohuette, and I think it looks really great on pretty much every shape. Just ask the Google, and you'll see what I mean. Anna was the second dress pattern I ever tried when I first started sewing, and it was so nice to sew so it will always have a special place in my heart.

I got this lovely daisy fabric at Walthamstow Market in London, seems appropriate, no? It's lovely, and drapey, and has a little bit of stretch to it too. I think it might be some sort of crepe, but I'm not 100% sure.

The circle skirt turned out really well, and all I want to do is twirl around it. I'm such a goof! The only bummer about a circle skirt is the hem. Holy crow that's a long hem. I took the easy way out and did a rolled hem with my serger. I'm happy with how it turned out. The black thread just fades into the background, so you can hardly even notice it anyway.

It wouldn't be a party around here without a pug or two, and it appears that they are enjoying have a look up my skirt. Silly pugs!

Did you guys join in on the Anna fun? 

The Southport Dress Take 2

Hiya friends! How are you doing? Hopefully the summer is treating you well so far. We are back at the cabin escaping the craziness that is Calgary right now. It's Stampede time, and the city always becomes filled to the brim with tourists, traffic, and crazy cowboys. The Greatest Show on Earth is a lot of fun if you've never been before, but if you've been a bunch of times, and you're not a fan of crowds and weird deep-fried food, it gets old pretty fast. Plus I am really not sure how I feel about the rodeo anymore. It just seems so detrimental to the poor little animals. But anyway, I don't want to get too controversial over here on the old sewing blog, so let's get back to the good stuff. I have wanted to sew up another Southport Dress for quite sometime, but haven't managed to get to it. Until now that is. And of course because I am being a crazy fit fanatic as of late, I wanted to make some changes to see if I could get my second version to fit a little better than my first version.

IMG_7081
IMG_7081

For my first Southport, I made a straight size 10. It fit pretty well, but I found that it was slightly big in the shoulders and a bit loose all over the bodice. I know that this dress is meant to have a relaxed fit, but when I wore the size 10 it would slip off my shoulders with movement, and I found that it was a bit gape-y in the front (the neckline was a bit low for me), especially if I bend down. I also thought the skirt was a little snug around the hips. So for this version I wanted to try and fix those issues.

IMG_7082
IMG_7082

I started with a size 6 bodice based on my upper bust size, but in hindsight, I should have chose the 8. I got everything to fit pretty well, but it's just a teensy bit too tight around the back/bust area. Anyway, I started with a size 6 bodice and adjusted the back pattern pieces first. I did a 1/4" forward shoulder adjustment - this involves shaving 1/4" off the front pattern piece, and adding 1/4" to the back pattern piece. Then I did a 1/4" high round back adjustment, and I wonder if maybe I need a 1/2" for this pattern, so I might try that next time too. Then it was on to the front pattern piece.

IMG_7083
IMG_7083

For the front, I did a 1 1/4" FBA. It's interesting how now that I have done a couple of FBAs, it seems like such a natural adjustment for me. I don't know why I've been so scared of it. Of course I haven't attempted an FBA on princess seams yet, so my confidence might recede.

IMG_7085
IMG_7085

For the skirt, I used a size 12 and it feels better than the size 10. I have a bit more room to move around and play with the pugs. I measured the pattern pieces to make sure that the skirt would fit the bodice and with my alterations they seemed to match up just fine. I finished the armholes and neckline with pre-made single fold bias tape. I love bias tape as it makes for a clean finish and I think it looks really profesh too. I also ended up sewing the button placket closed. I was being a bit lazy, but I also knew that I would be able to slip this dress over my head and that I wouldn't need the buttons. They are a bit hard to see because of the busy floral print, but the buttons are white and came out of one of those bargain button bags. John spotted them at Fabricville in Montreal and bought me two - one with coloured buttons, and one with black and white buttons. It takes a bit of searching to find ones that match, but it's nice to have a button stash.

IMG_7087
IMG_7087

Oh I almost forgot to tell you about the fabric. I have no idea what it's made of, I suspect come kind of polyester/rayon/viscose, but I can't be sure (are there any tricks for that?). I picked it up at Walthamstow Market in London. It feels nice to wear; cool and drapey, and I love the purple flowers.

I suspect I will be making a few more of these dresses before the summer is through. They are just so easy to throw on, and I love the drawstring waist; so comfortable (and easy to adjust after a big meal LOL). Plus pockets! I never really put anything in dress pockets, but I like to have them so I have somewhere to put my hands.

Anyway, that's all for now. Have you tried the Southport Dress pattern? Do you have any go to comfy sundress patterns? I'm always looking for good ones so let me know.

The Greenwood Tanks

Hullo everybody! I feel like I have been trying to write this post for days, and it just hasn't happened. Writer's block or laziness? I'm not sure. Life just seems to get in the way sometimes, and it seem that the blog gets sent to the back burner. But I have been finding lots of time to sew, and to fit so I have lots to share. I have been going further down the rabbit hole with fitting, and having some success in some things, not so much in others. But with every step, and every thing I try, I learn a little bit. Not just about sewing and fitting, but also about myself and my shape. I'll save my introspective findings for another post though. For now, let's get on with the Greenwood tanks I recently made.IMG_7062Have you seen this pattern yet? It's a great wardrobe staple from Straight Stitch Designs. I first spotted it on Meg's blog, and then my good friend Katie recommended it to me too, so I had to give it a shot. I'm not really one for tank tops on their own (I usually use them as a layering piece), but we've been spending a lot of time in BC this summer and it has been really hot. Heatwave anyone? Anyway, a simple tank really fits the bill to stay cool - well that and air-conditioning. The pugs and I could not live without it. And slurpees, let's not forget about slurpees. But I digress.... IMG_7063I quickly whipped up a size 12 tank based on my measurements, and discovered (of course) that it was too big in the shoulders and pretty much all over. It was okay across the chest, but it just didn't feel right. The straps kept sliding down - not cool. So I took your guys' advice from my post about my shingle dress, and decided to do some adjustments to make this tank fit right. I chose my bust size (an 8) based on my high bust measurement, and then I graded to a size 14 from the waist to the hip based on my waist and hip measurements (also I didn't want a super tight fit across the belly fit). Then I did an FBA of 1.25". But doing the FBA created a dart, and I really didn't want to have a dart so I used this tutorial by Maria Denmark to remove it. Sounds a bit tricky, but really it's easy. It just involves a lot of cutting and taping.

IMG_7064Then I did some alterations to the back piece. I should mention that I chose the scoop neck, scoop back version of this pattern, and it uses the same pattern piece for both the front and the back. But if you are like me and you need to do a bunch of alterations, you need separate back and front patten pieces, so trace/print two. Anyway, for the back I did a 1/4" high round back alteration, and I also did a 1/2" forward shoulder adjustment, both which I learned in the book Fit for Real People. Also, because I am short, I shortened it by 3 inches. Phew, seems like a lot of alterations for a knit tank doesn't it? But I'm pretty happy with the results. And now I have a solid TNT staple tank pattern. I used some black cotton jersey from Girl Charlee that I had in my stash for this version and I know it will get lots of wear. There still seems to be a bit of pooling in the back, but I'm not sure if it's just hung up on my bra, or what going on. Your guys' advice is always welcome there, but I'm not really losing sleep over it.

IMG_9863So that's what my two pattern pieces look like. Pretty cool right?

Before I made the Greenwood tank, I took a shot at the Aurora tank from the June issue of Seamwork. I did not like the construction of that tank at all, in fact I found it incredibly frustrating, and in the end I didn't really like the style on me. (What is up with these Seamwork patterns? They really seem to be hit and miss for me - anyone else tried them?) It looks so good on a lot of people, but I found the gathers a bit bulky and I think the instructions and the construction of it just left a bad taste in my mouth, so I just didn't want to like it. I did however like the curved hemline and the way it fell away slightly from the body. John agreed and said, "well why don't you just combine the two?". So that's what I did. And I made 4 more tanks just like that.

IMG_9877

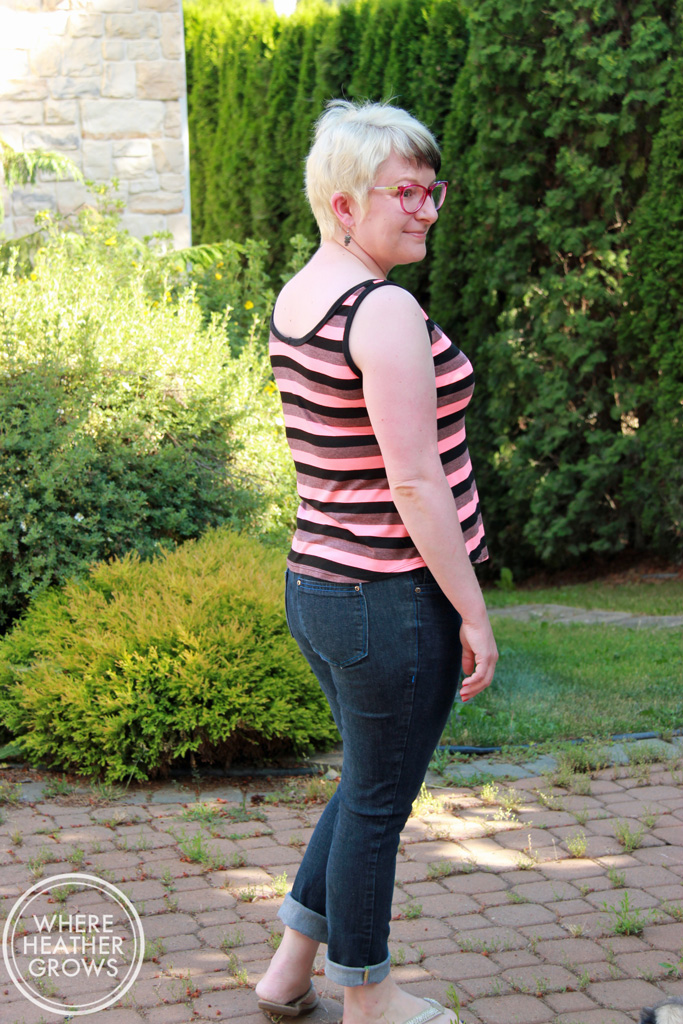
I may have gotten a little carried away and made them a bit too short, but I'm still quite happy with them anyway. See what you think:

IMG_7053

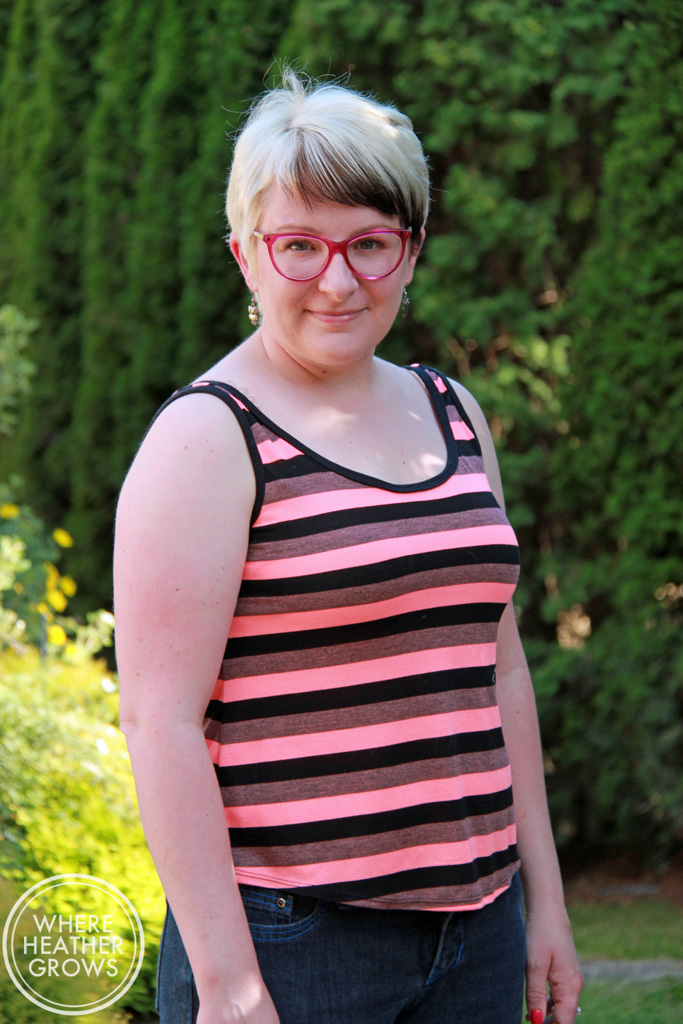
Hello! Everybody needs a super bright tank top right?

IMG_7052

IMG_7050

IMG_7067

IMG_7068

IMG_7069See the back doesn't look nearly as bad here. Maybe it's still just a little bit too tight, and that's why my bra line is so obvious, or maybe I'm just being too picky now.

IMG_7054

IMG_7056So I think that's enough photos of me for now, don't you? All of the striped fabrics came from Fabricville in Montreal (I'm not sure why Fabricville always seems to have a lot more and nicer knits than Fabricland in Calgary when they are the same company, but they do). I think they are all a cotton/rayon jersey blend, but I'm not 100% sure. They have great horizontal stretch, but not much vertical stretch. They worked perfectly for these tanks and I have a bit more left over for t-shirts too! That's another great thing about this tank: it doesn't require much fabric, especially when you're short like me.

I just realized that I didn't get any photos of the skinny striped one I made, it's made from a remnant I got from Marcy Tilton's website, and it's super comfy, but not the easiest to photograph. Those mircostripes always look a bit funny on a computer screen.

Hope you all are having a lovely summer, and for all my fellow Canucks out there, Happy Canada Day!!

Two for the Price of One: By Hand London Kim Dresses

Howdy peeps! How was your weekend? Mine was pretty good; lots of lounging around at the lake and enjoying life, so I can't complain. We had a big rain storm out here on Saturday, super windy and sideways rain - it was a bit nuts but didn't last long. Thank you all for the responses and help with my Shingle dress in my last post. I felt a little self-conscious about such a body-hugging style, so it was nice to get some feedback. I am very much looking forward to making another version that fits better based on all your advice.

Anyway, onto the matter at hand. Way back in the very beginning of 2014, I started sewing clothes and I was delighted to find sewing blogs and Indie Pattern Designers (I had no idea either existed until Google and Pinterest introduced me to many). I noticed that there were a lot of By Hand London Anna dresses out there, and they all looked lovely. That pattern seemed to suit everybody who tried it. So I hopped onto By Hand London's website and I ordered it. It was the second dress I had ever made (a Colette Laurel was the first) and I was thrilled to discover it fit me really well right out of the envelope, and it quickly became my favourite pattern. It was fun and easy to make, there were no sleeves to set in, and it fit me and was quite flattering. So when those lovely ladies came out with the Kim Dress pattern and it started to pop up on blogs everywhere, I knew I had to have that one too.
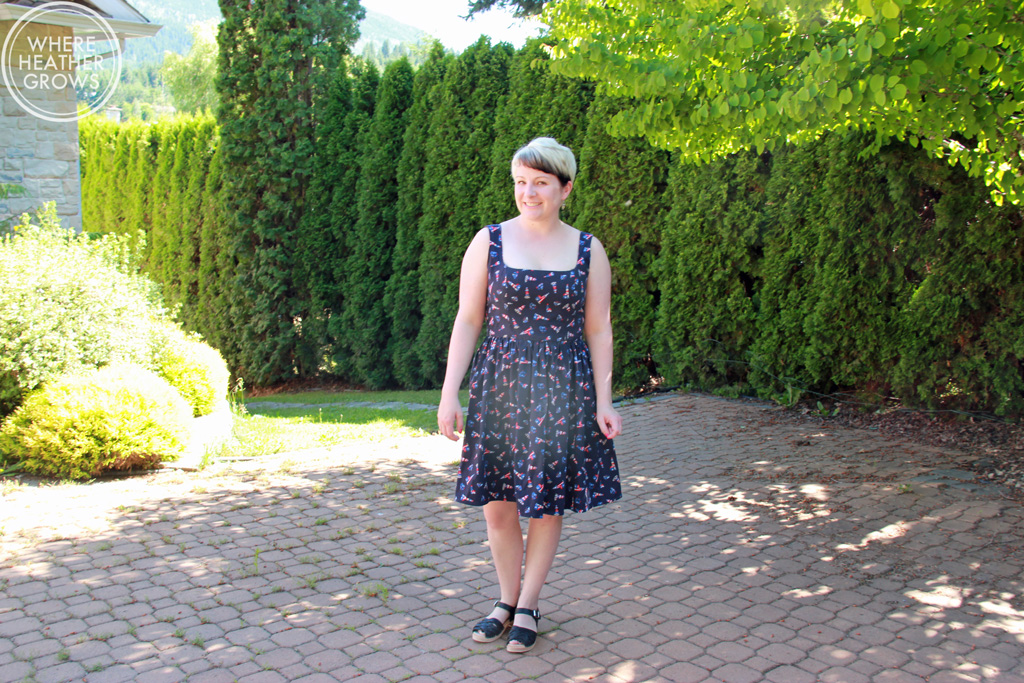
IMG_6953This pattern has two different bodice variations: a plain scoop neck and a sweetheart neckline, along with two skirt variations: a gathered, flared skirt and a more fitted tulip skirt. For my first attempt at this pattern, I decided to go with the plain, round neckline and the gathered, flared skirt.

IMG_6960I hummed and hawed as usual, about what size to make. My measurements are really close to the size 12/16 size, but I know that these patterns are drafted for a B cup and I am typically a D cup. So really I should have chosen a size 8/12 and then did an FBA, but I chickened out because of the princess seams. There are a lot of great tutorials out there, so I don't really have an excuse, except that I was too nervous and too lazy.
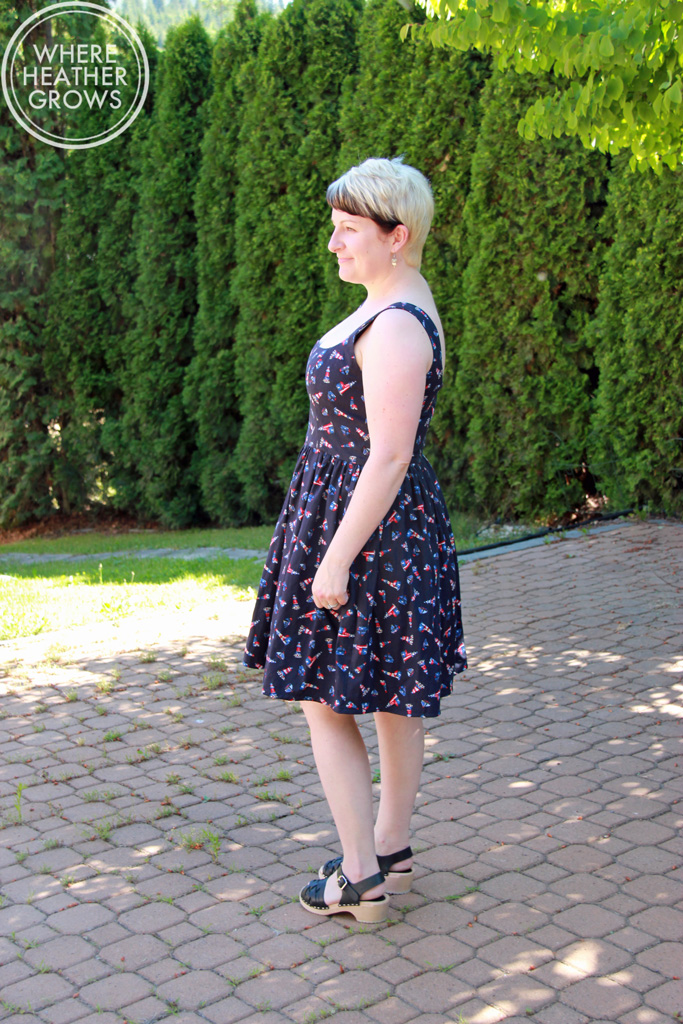
IMG_6954But all that being said, the fit is pretty good. My only real complaint is that I keep feeling like the straps are going to slide off my shoulders, and they do when I move around a lot. I should have added little ribbons to the straps to attach to my bra ala Kelli. If you make this dress, I totally recommend doing that - it's a genius idea.

IMG_6956And speaking of bras, finding the right one to wear with this dress was a little tricky. Most of my bras are full coverage and I found that either the top of the cups would peek out at the front or the straps were too wide. I thought I was getting away with this little number, but here it is peeping out at the back. I guess I'll have to make one! ;)
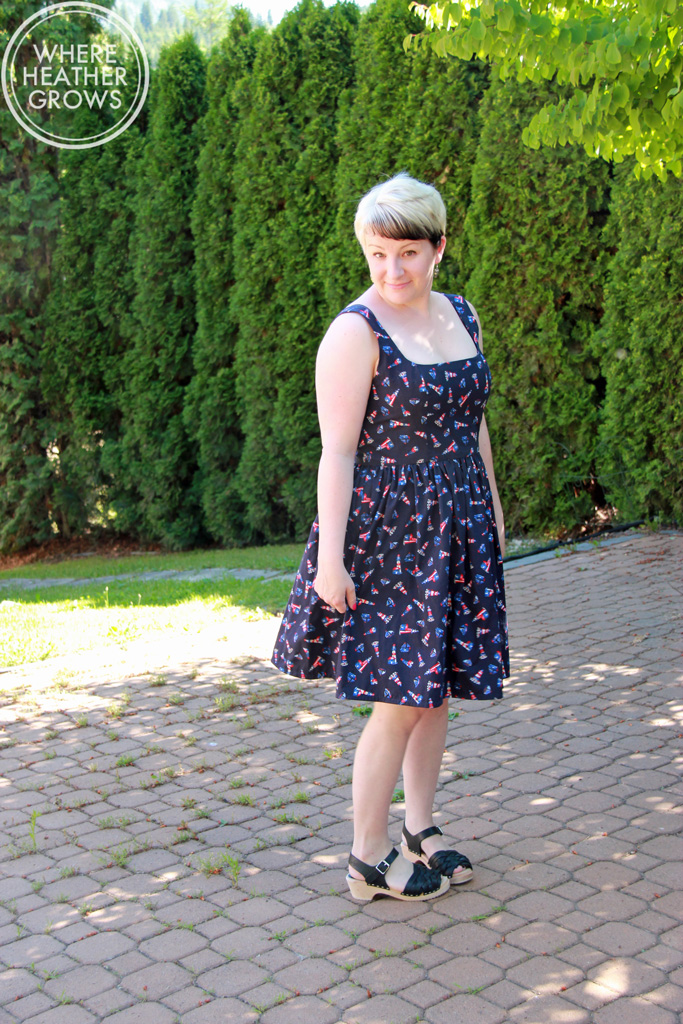
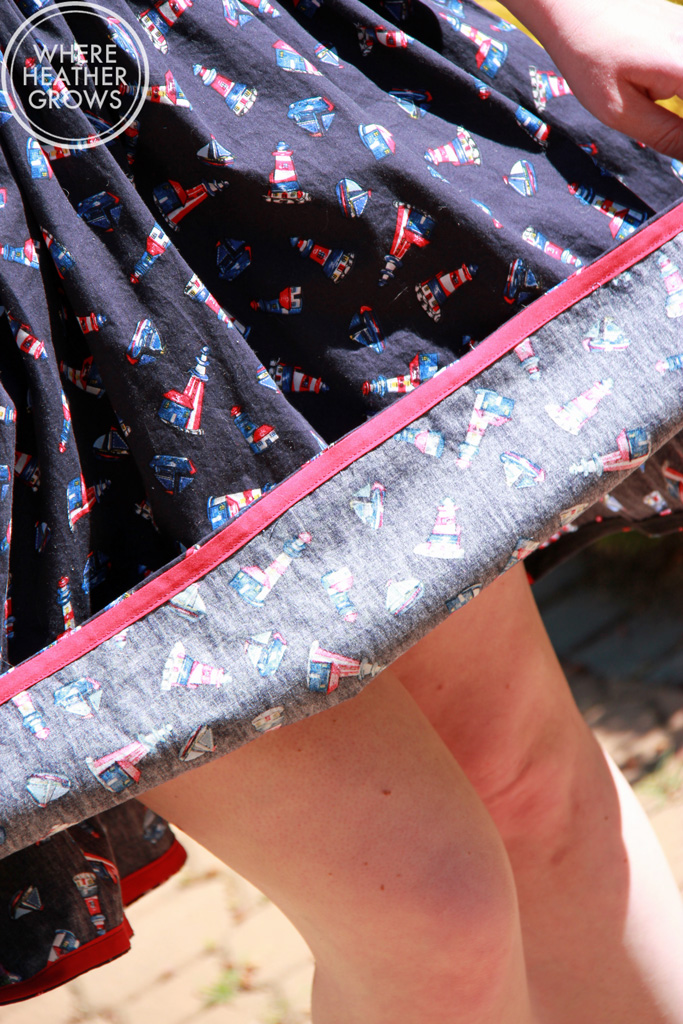
IMG_6958I skipped the pin tucks on the skirt, and shortened it by a whopping five inches! What can I say? I'm short! I hemmed the skirt using bias tape. I love how it looks and that adds a little bit of colour to the inside of the skirt.
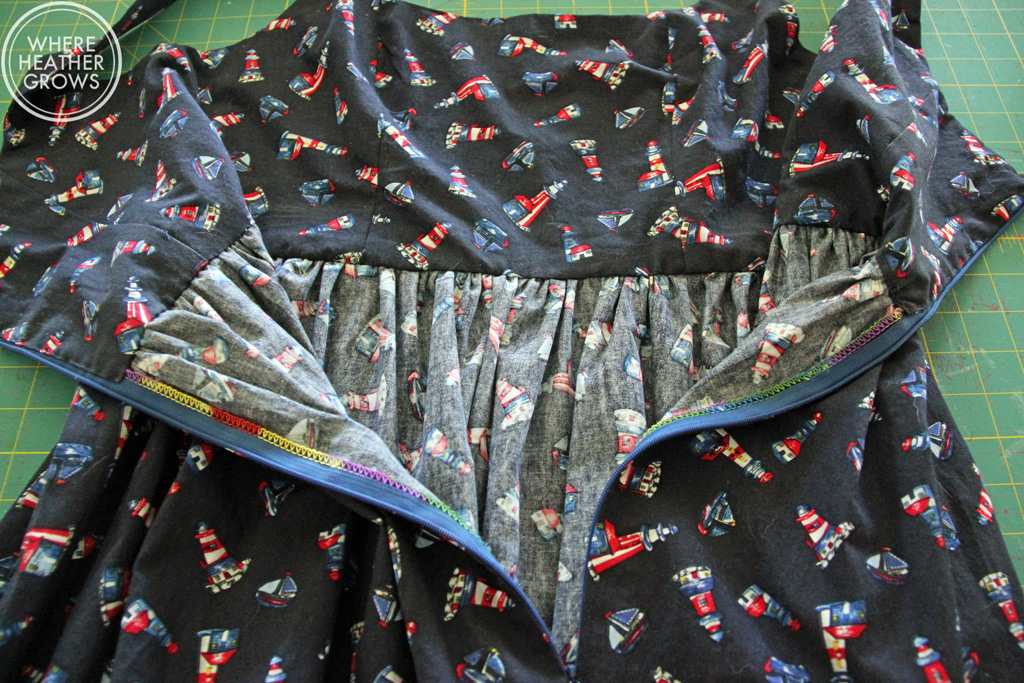
IMG_6972This fabric is a lightweight cotton from my local Fabricland, which I got on sale. Yay! I thought it was pretty cute with the lighthouses and I totally had this pattern in mind when I bought it. The bodice of this dress is lined which is how you finish the neckline and armholes and it gives a super neat finish on the inside. It does require a bit of hand sewing, but I quickly discovered that it is totally worth it. I am really proud of how lovely the insides of this dress look, so proud that I even took a photo.
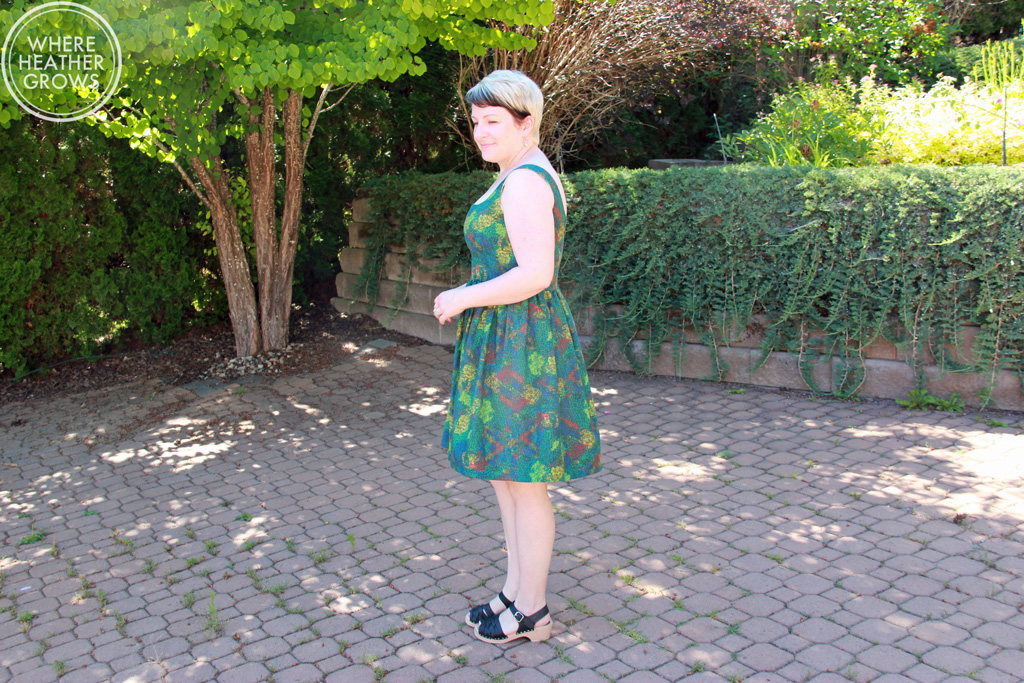
IMG_7010For my second version, I went with the same skirt, but the sweetheart neckline.

IMG_6973This time I decided to shorten the straps to see if that would make a difference and keep them on my shoulders.
IMG_6977I just cut a 1/2" off the pattern pieces, so that removes an inch total. I think it helped, but I still think if I had done a proper FBA, the straps would be a little closer to my neck and that would resolve the problem.

IMG_6979Oops there's my bra strap again!

I totally screwed up the lining/finishing on this bodice, so the zip doesn't look nearly as nice as it should. After you finish the armholes and neckline, you are supposed to only attach the outer fabric to the skirt leaving the lining free, then you insert your zip, and hand sew the lining down. This gives a really nice finish, but I made the mistake of attached the lining and the outer fabric all in one go and I didn't realize what I had done, until I had serged everything. D'OH! Needless to say, no picture of the insides of this one. It's fine, just not nearly as pretty as my first one.
IMG_6981The fabric for this dress came out of the clearance section at this super cool store in Salmon Arm. It's got all kinds of quilting fabric, yarn, sewing notions, and scrapbooking stuff. It's really big and super fun to browse around. If you ever find yourself in Salmon Arm, I would recommend that you stop in. The lining is a pale yellow Art Gallery cotton I had in my stash.
IMG_6975I think this dress is the perfect combo of sweet and sexy. For my shape, I love the fit and flare style, but I am interested in trying the tulip skirt version too. I just have to find the right fabric.

So my love affair with By Hand London dresses continues! I'm actually really kicking myself that I didn't buy Flora before they discontinued the paper patterns. I can still buy it as a pdf, but I really loved their packaging. Oh well, live and learn - this lesson only feeds my compulsive pattern addiction.

Have you tried any By Hand London patterns? Which is your favourite?

Oh, I almost forgot, one more thing: did you hear about the International Anna Dress party happening on Instagram? It's being hosted by my pal Elle (along with two of her friends) and it's a great excuse to sew an Anna if you haven't already and to join in the fun. Plus there's a chance to win prizes. Anyway, if you are interested head over to Elle's blog for all the details.

Hope you all are have a lovely week!

Vogue 8904 - The Shingle Dress

Ola friends! Has it really been 2 weeks since my last post?? Crazy! I don't really have any good excuses for you other than I am a huge procrastinator and my blog always seems to get pushed to the bottom of the list. But not to worry, I am still sewing my little heart out and I have lots of projects to share. So let's start with something a little different shall we. IMG_6893Many moons ago, when I didn't sew but was still a clothes addict, I came across the Column dress at Anthropologie. I remember thinking that it was super interesting looking, and one of the sales girls told me that everyone who tried it on, loved it, and that it seemed to be universally flattering on every shape. Needless to say, I never got the courage to try it on, but it stayed on my radar. When I saw Marcy Tilton's Vogue pattern (8904)  for the same style of dress, I decided to buy it. And it sat in my stash for months.

IMG_6903Then I spotted Meg's version and it got added to my queue. I was still a bit apprehensive to make it as it seemed like it would be a lot of work with all those shingles, but I couldn't stop thinking about it. I don't have a ton of experience with the Big 4 patterns, and I find choosing the correct size tricky. This pattern is designed to be quite body hugging and I was a bit nervous about just how tight it might be, so I chose my size based on the size chart. I planned this to be a wearable muslin so I wasn't overly concerned, and because it's a knit, I figured it would be better too big than too small because I could always slim it down. I traced a size 16 for the shoulders and bust and graded out to an 18. I also went with the shorter version (but I left off the sleeves) as I am short and this seemed like it might be a bit tricky to shorten due to the shingles.

IMG_6911I ended up shaving about an inch off each side seam after it was made up - which means I took a whopping 4 inches off the circumference. It might be slightly tighter than I would have liked, but in the case of a knit body hugging dress, tighter is better than looser, I think. Next time I will probably go down to a 14 or even a 12. Which brings me to a question: how do you choose the right size? I have a bit of weird shape because of my belly (so my waist measurement is always in a bigger size than my bust and hip), and I never seem to get it right, so any advice you dear readers might have would be greatly appreciated. Maybe I'm not pulling the tape measure tight enough? What's the secret? I seem to do better with Indie Patterns, although my latest Papercut Jacket was way too big too. Someday I'll get it right.

IMG_6908The fabric I used for this dress is from Girl Charlee, and it super soft and wonderful to wear. The under dress (that the shingles are attached to) is a plain navy cotton spandex, and the stripes are a cotton jersey. It's actually a bit heavier than you might guess, but it's super soft and comfy - talk about secret pyjamas!

IMG_6909This is probably my main complaint with the dress - I obviously need some sort of sway back alteration to get rid of that pooling at the back. It's okay if I straighten it and stand still, but when I move it looks pretty bad. I'm not entirely sure how to go about doing that alteration because of the shingles, but I think I should be able to just pinch out the excess, and it will probably improve if I get my size right too.

IMG_6905I really love how the stripes look with this pattern, and it think that it works out to be quite flattering. I think it would still look cool in a solid colour, but I think that might make it a bit dressy, and I like to stick with the casual. The construction is really quite simple and straightforward, and because it's made with a knit nothing is hemmed, you just leave the edges raw on all the shingles. I did end up shortening this by about 2 inches, but that is to be expected - I am vertically challenged after all.

IMG_6918I imagine wearing this dress with runners (I love my pink ones, but I think it would be super cute with white converse too) and a denim jacket on cooler days, but it could easily be dressed up with heels. I think it's quite versatile. This is definitely a different style for me, and I feel a bit out of my comfort zone when I wear it, but I do plan on wearing this version and I do want to make it again. It's nice to have something a little different.

Do you ever venture out of your comfort zone with sewing? Would you wear such a body hugging dress? I curious to know what you guys think.

My #sewingdare: The Waver Jacket

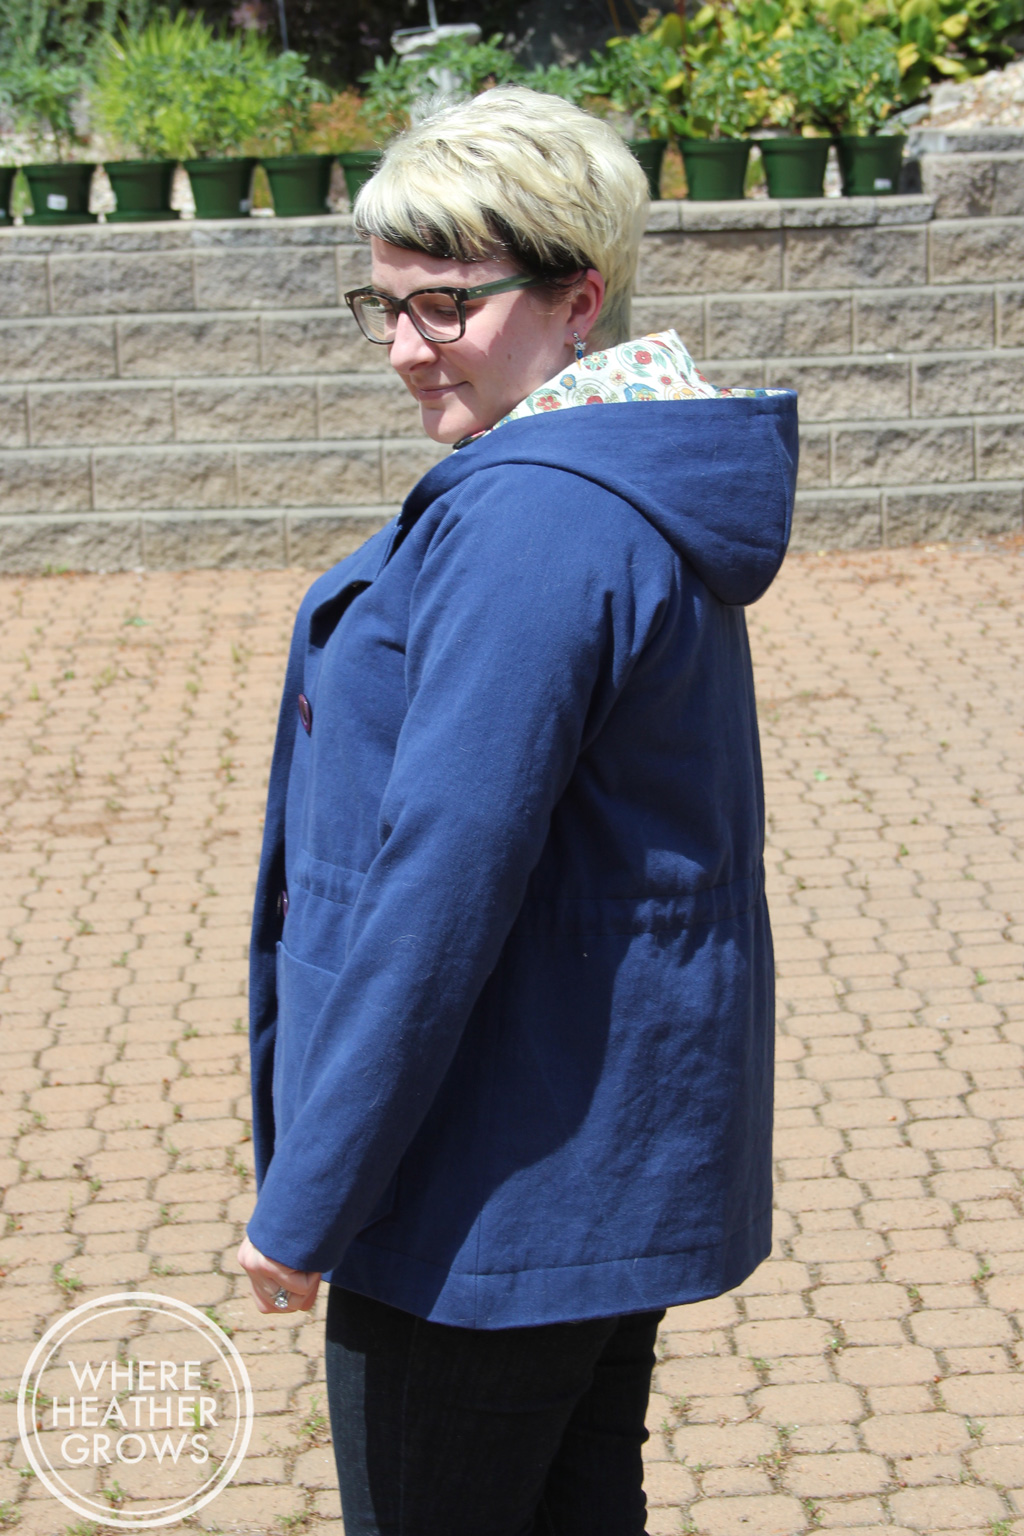
A few weeks ago, Gillian over at Crafting A Rainbow, issued a little challenge to the sewing blogging community: a sewing dare. Just like Truth or Dare at a girlie sleepover, but without the truth and probably less humiliating than some of the things my adolescent friends came up with. Anyway, Gillian specifies that the sewing dare should be something challenging and out of your comfort zone, but still fun. I asked Gillian to give me a dare, and after a bit of thinking, she decided that a good dare for me would be to sew outerwear of some sort. She's good! This was the perfect challenge for me as I have wanted to take a stab at sewing (and lining) a jacket, but have been too chicken to do it. This was just the push that I needed. After a lot of humming and hawing, I finally settled on one of Papercut Patterns' latest releases: the Waver JacketIMG_6841To be completely honest, I wasn't overly enthused with the sample of this pattern on Papercut's website. It looks very lab coatish, but I decided to look past the sample and use the line drawings to visualize a nice spring/fall jacket. Because I was looking for a lighter jacket, I decided to go with the short, drawstring version of the Waver (although I may end up giving the other version a go in a more wintery fabric - it looks quite cute too).

IMG_6828I had some really nice cotton twill in my stash that I bought locally, and I thought it would work perfectly for this pattern. I've never worked with twill before and it's actually really nice to work with - a lot like denim. This stuff is the perfect weight for a jacket, and I can't really describe it, but it has this kind of natural smell to it. It's not a bad smell, just a distinctive smell, kind of like raw denim.  It reminds me of my Dad for some reason. I think maybe he had twill coveralls for working in the garage or a twill jacket or something, because every time I smell this fabric I feel really nostalgic for my Dad. I always find it so interesting that a smell can bring back a really clear memory, or even just a familiar feeling. But anyway, I digress, back to the jacket.

IMG_6830The pdf pattern went together really quickly, and easily ( I really should by stock in Scotch Tape). The only other Papercut pattern I've used is the Rigel Bomber, and I had the hardcopy for that. I am pleased to say that the pdf, was just as nice to work with as their beautifully packaged paper patterns. And there's nothing like the instant gratification of a downloadable pattern. The instructions are very clear and have nice diagrams too.

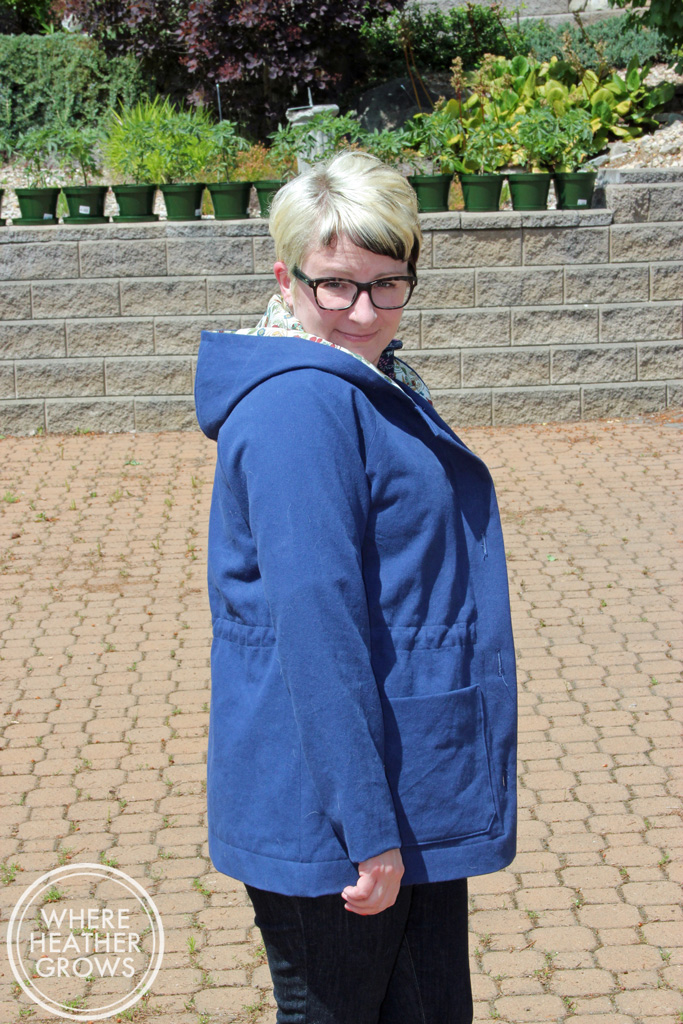
IMG_6844I chose my size based on Papercut's sizing chart (the medium), but once I had the shell made and tried on, I realized that it was HUGE! Like a massive tent - I'm not kidding!  I quickly asked my Instabuddies (I am such an instagram junkie and I love the little community of friends I've got going on there - so great for sewing questions and support), and most people that answered my call mentioned that Papercut Patterns tend to fit on the larger side. D'oh! Maybe I should have asked that question before I started. I ended up increasing the side seam and sleeve seam allowances by a whole inch! That seemed to work so I did the same thing with the lining pieces. Next time I make this coat (and I am sure there will be a next time) I will probably size down to a small or even (GASP!) an extra-small. I'll take the time to measure the pattern pieces and decide from there.

IMG_6834I think that the trickiest part of making this jacket was "bagging" the lining. The instructions that came with the pattern are really good, but I really wanted to machine sew the lining to the jacket at the sleeves too. The pattern instructs you to hand sew that part, but I hate hand sewing, so I hit up Google to see if there was another way. And of course there was. I used Jen's tutorial, and it worked out really nicely, although I was sweating while I was doing it. I still had to do a little bit of hand sewing to stitch up the opening you need to leave to turn the jacket through, but that was pretty minimal.

IMG_6836I used a Liberty lawn I had in my stash for the lining and it feels amazing, plus I think it goes really well with the blue outer fabric. As you can see, I don't have toggles for the inner drawstring yet. I just haven't been able to find any that I like, but I will. For now, I just cinched the drawstring and tied it in a knot. Not overly professional and it doesn't work quite as well as the proper toggles will, but for now no one really sees it, so I'm okay with that.

IMG_6848The construction of this jacket was straightforward and quite speedy. I think that aside from figuring out the lining bit, it didn't take me much longer than making an Archer. Gotta love those raglan sleeves - so much quicker than set in sleeves. Anyway, while the size isn't perfect I am really happy with the finished product and I am looking forward to wearing it a lot. I made a couple of minor sewing mistakes with this jacket (my seam ripper really is my most used sewing tool) as this was my first run through, but I expect things will go smoother next time around.

I wasn't completely sure this jacket was going to suit me right up until I finished it. I tried it on for John before I put the buttons on, and we were both like, "eh, it's okay...". But once I cinched up the waist and added the buttons we both changed our tunes. It's amazing how such a small thing can totally change the look of the jacket.

This jacket makes me really happy and has rekindled my love for Papercut. I now really want to make another (more attractive and properly fitting) Rigel bomber, as well as try out some of their other patterns too. Plus, this jacket reminds me that I am part of such a great community of sewing bloggers, and Instagram sewers, and I love that! You guys are so great!!

Anyway, thank you Gillian so much for the dare, it was a lot of fun, and I learned a lot too!

Have you participated in this daring challenge, if not would you like to? Gillian set the end date as May 31st (I'm squeezing in just under the wire) but I highly doubt that is set in stone. So if you'd like a dare, just ask. Thanks for reading along, I hope you are enjoying your weekend!

Heather's Tips for Sewing Jeans

Hello my friends! I have been trying to write this post for quite awhile now, but I just haven't been feelin' it. I just can't seem to get into writing mode lately. My sewing mojo is alive and well, I have been sewing up a storm, but I just can't get my head into writing gear. Anyway, I have loads of projects to share with you, but I haven't really photographed any of them. The weather has been either way too sunshine-y for good photos or it's been raining. Plus I tried a new face cream and cleanser about a week ago, and I had a really bad reaction so I haven't feeling very photogenic especially not in front of my DSLR. Anyway,  my skin is finally starting to settle down, so I'll try to get some posts in this week. Note to self, change is bad. Anyway, that's what's up with me, now let's get down to business. I know that there are already a number of posts out there with tips for sewing jeans, but I felt like after making a number of pairs I should add my two cents. For myself, sometimes I can read the same tip written by a few different people, but it doesn't click until the writing makes sense to me, and I find that everyone has a different perspective, so I like having a few different articles out there to refer to. So here we go with mine:

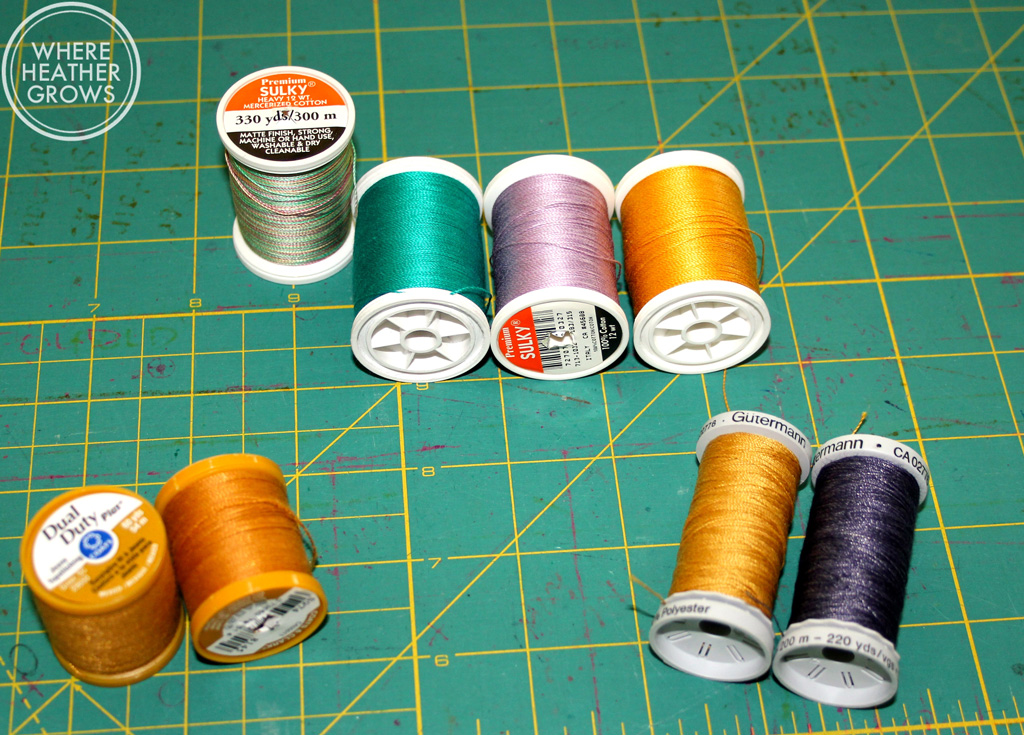
  • Topstitching Thread - try different weights and colours, and don't be afraid to try different brands. I love the Gutterman denim topstitching thread that you can find at JoAnn's or Fabricland, but there aren't a ton of colours available. I ended up chatting with the lady who sold me my Pfaff about it, and she suggested a heavyweight cotton quilting thread (Sulky 12wt.). It comes it tons of different colours and my machine loves it. It sews really well and I don't struggle to make bar tacks or button holes with it, plus it comes in variegated rainbow so you gotta love that! I have also tried the Coats & Clark denim thread and had lots of luck with it too. I should also mention that I use navy thread in my bobbin, or sometimes I use the Gutterman denim thread that is a little bit lighter weight than the topstitching thread and it works really well too. Also, bear in mind that you may have to play with your machine's tension, so it's a good idea to have your machine's manual handy and try some test stitches before you start.
IMG_6811
IMG_6811
  • Needles - I have found that a dedicated topstitching needle works the best. And I try to use a new one for each pair of jeans I make. I have tried sewing jeans with a denim needle, and a larger universal needle, but neither seem to work as well as a  proper topstitching needle. So if you are finding that you are having troubles, changing your needle is an easy thing to try.
IMG_6813
IMG_6813
  • For beautiful looking topstitching, lengthen your stitch - at first I really didn't want to do that. I don't know why, but I just thought a 3.5-4mm stitch looked way too long. But after making a of couple pairs now, I know it's not. It might look weird at first when you are sewing, but once you have your jeans constructed, and you put those bad boys on, a longer stitch length looks better. Check out a pair of RTW jeans, and compare. Once you have your machine set to where you want it for topstitching and your stitches look the way you want them too, take a quick cellphone pic of your settings. It's an easy and quick way to refer back to your settings. When you are going back and forth with changing thread, or maybe you are sewing over a few days or weeks, you know exactly where everything was set. Maybe it's just me, but I've forgotten exactly what length I've set my machine to, and then I've had to waste time figuring it out. It's also nice to do for your bar tack stitch setting too.
  • Slow down - This is something I am constantly working on with pretty much everything I sew. Sometimes I just get into "must finish this right now" mode, and I put the pedal to the metal, and zoom away. With topstitching, you really need to take your time to be accurate and straight. My sewing machine has an option to slow the speed down, so when I'm making jeans, I always turn the speed down.
  • I think one of the trickiest parts of sewing jeans, is topstitching the fly front. I have found that if I mark my lines with chalk (or whatever removable marking tool you would normally use), and then start from the centre front at the bottom, things go more smoothly for me. I don't know if it's because I get the curve out of the way, right away, or if it allows me to see better. But starting from the bottom seems to garner the best result for me. Don't be afraid to play around with the direction of things and find what works best for you. Oh and really try to make sure you catch that fly facing underneath too, that helps things to stay in place better when you wear the jeans.
  • Bar Tacks - I am lucky enough to have a machine that actually has a bar tack stitch (although it doesn't always work as smoothly as I would like), but if you don't, a tight zig zag stitch is usually what's recommended. Recently I have discovered that a really narrow satin stitch works really well too. I really like how it looks and it's really strong. I used it for all the bar tacks on my last pair of jeans, and it worked really well.
  • Interfacing - do you really need it? There is a bit of a debate about whether or not you really need interfacing for denim. I have tried it both ways, and my finding: use it! I like to use a lightweight interfacing so things don't get too bulky, but you should probably judge it by the weight of your denim. For my Cone Mills denim pair I used a really lightweight interfacing, but for my Girl Charlee denim pair, I used a medium weight interfacing. It helps everything maintain structure and it keeps your waistband from stretching out too much.
  • I always sew my back legs together, do the middle lines of topstitching and then attach my pockets. This allows me to use the topstitching lines to place my pockets evenly and then things look a bit more centred. If you attach your pockets first, I find one always looks slightly off, or too close to the centre.
IMG_6659
IMG_6659
IMG_6657
IMG_6657
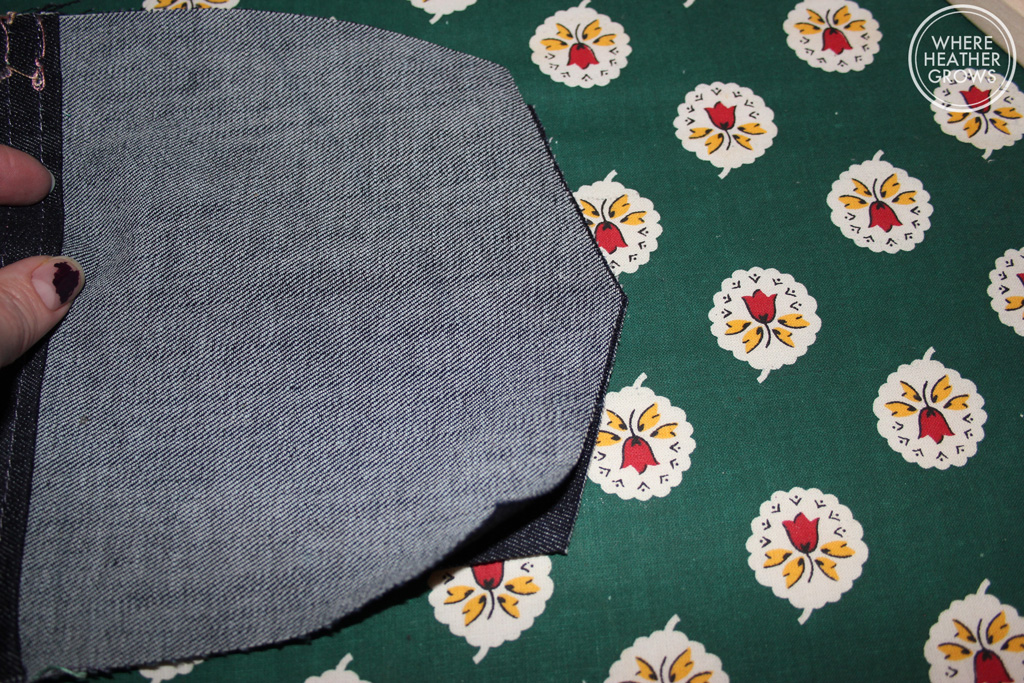
  • I also use my tailor's ham to pin the pockets in place before I stitch them on. I find that because they will be against a curve when you wear the jeans, positioning them on a curve before you sew them helps them to lay better when the jeans are finished.
IMG_6656
IMG_6656
IMG_6655
IMG_6655
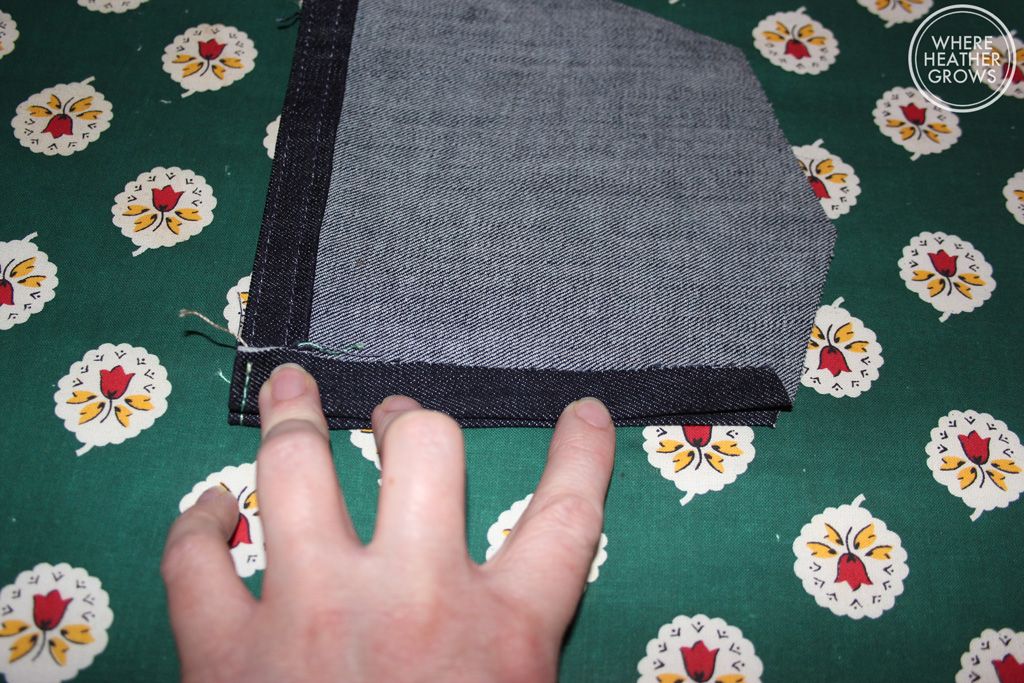
  • And while we are on the subject of pockets, when I am pressing the edges in, I usually eyeball it (Gasp!), but I always line the two pockets up to make sure they are exactly the same. So I fold and press one pocket and then put it underneath the other one as a guide. Does that make sense? Here are some photos so you can see what I mean:
IMG_6653
IMG_6653
IMG_6654
IMG_6654
  • Another thing I like to do is I lengthen the belt loops a little (about 1/2" to 3/4" each) and attach them before attaching the waistband. I feel like it just gives them a little more strength, especially if you are someone like me who habitually uses them to pull up her jeans. I'm not entirely sure if it really does add strength, but it makes me feel better so that's how I do it. Here's what it looks like:
IMG_6492
IMG_6492

So you sew them to the pants, then you attach the waistband, and finish off the belt loops.

IMG_6507
IMG_6507
IMG_6510
IMG_6510
IMG_6513
IMG_6513

If you find that your belt loops are too long, you can always trim them off at this point.

IMG_6511
IMG_6511
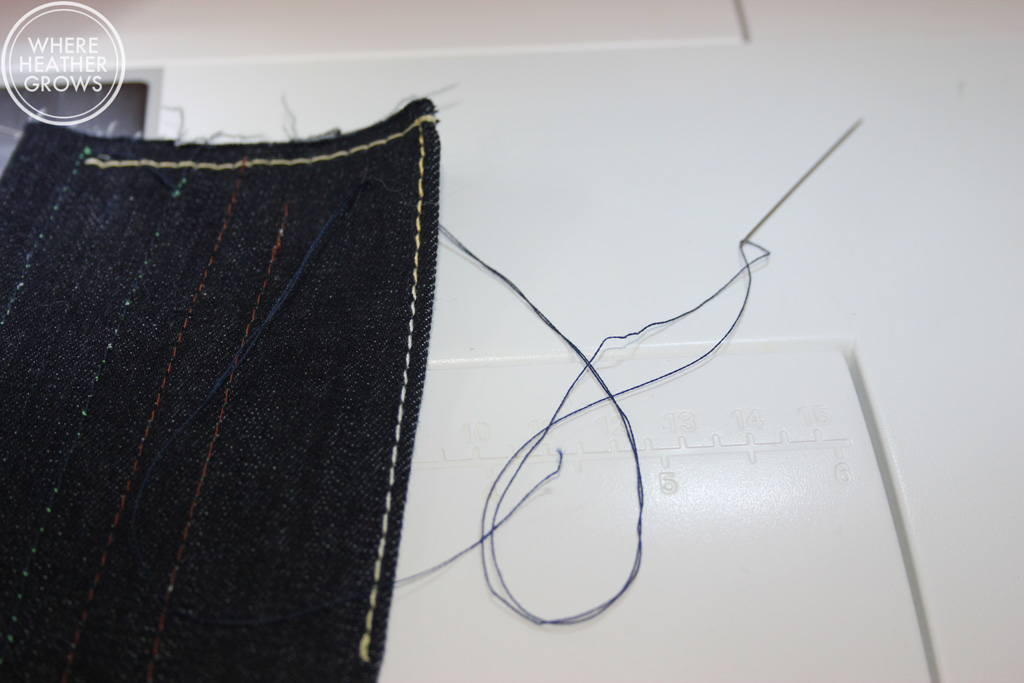
  • And finally, one more thing: sometimes when you are topstitching especially at the corner of the waistband, your machine can kind of "eat" your fabric or the feed dogs don't quite feed it properly, and normally you might pull your threads to get things moving (like at the beginning of stitching a seam), but in this case you won't have those threads to pull. So what can you do? Take a separate needle and thread, and thread it through your fabric near the corner, and use that to pull things along. Then you can just remove it, when you are done. You can totally get away with this with denim, but I wouldn't try it with delicate fabrics. Here are some pictures that I hope make this a bit clearer for you - I'm just using a scrap of fabric with some test stitches on it, but I think you can see what I'm doing:
IMG_6851
IMG_6851
IMG_6852
IMG_6852
IMG_6854
IMG_6854
IMG_6855
IMG_6855

Does that make sense? You are just using that thread to pull or guide the fabric so it doesn't get eaten by your machine.

So there you have it, my tips for sewing jeans. I hope you take away at least one thing that might be helpful to you. I really want my blog to be helpful, as well as a place for me to share my projects and communicate with all of you lovelies.  Anyway, if I come up with anything else that might be helpful when I make my next pair, I will be sure to let you know.

I hope your week is going well, and that you having lots of fun with the final days of Me Made May!

Have you made jeans yet? Do you have any tips to share? I would love to hear/read them if you do!