Fabric Shopping in London: Walthamstow Market

Are you sick of hearing about fabric shopping yet? Good, me neither LOL. I have been to Walthamstow Market before and I blogged about it here. It's a really great place to go for bargain shopping. Sometimes that means super cheap deals on cheap fabric, but there are also some good deals to be had on some quality fabrics too. It's a bit of a ride to get there, but both times I've been, it's been worth it. For us, we headed to Shepherd's Bush tube station, and took the Central Line to Bank station, where we changed for the Victoria Line that took us all the way to Walthamstow Central station. I think it probably took us around 40 minutes or so. From there, it's a short walk to the High Street, where the market is. I was under the impression the market was only on Saturdays, but I discovered this visit that the market is open everyday except Monday. You can find pretty much anything you could imagine at this market, but there is a lot of junk too. It's actually Europe's longest outdoor street market, so it's something to see, and great for people watching too. IMG_7676

IMG_7670

IMG_7669

IMG_7671

IMG_7667

IMG_7665

There are fabric shops along this street and as you walk further and further, you'll find the higher quality shops like Hussain Fabrics and Saeed Fabrics. Unfortunately, by the time we got down there I had my hands full so I didn't take any pictures of those two shops. Hussain Fabrics has some fabrics, but Saeed is the one with the nicest fabrics on this street, but it can be a bit pricey in comparison too. They were having a bit of a sale so I got some good deals on cottons, and a couple of wools.

If you read Karen's blog over at Did You Make That?, you have probably heard mention of the man in front of Sainsburys. He runs probably the best stall at the market in my opinion. Great deals to be had and some really great fabrics. I would got all the way there just to buy from him.

IMG_7678

I did discover however, that he is not there everyday and he is not always in front of Sainsburys. He told me (well actually one of his son's told me) that he is only in front of Sainsburys on Saturday, and then on Tuesday and Thursday he is in front of Lloyd's Bank which is about halfway down the street to Sainsburys. Monday the market is closed, and they just aren't there on Wednesday and Friday. (You might be asking yourself, what is this Sainsburys. Well it's a grocery store on the high street - I would say if you start at the train station Sainsburys is about halfway through the entire market.)

IMG_7681

IMG_7682It was difficult to get really good photos as there were people everywhere. This was probably the busiest fabric stall.

Anyway, I got a wide range of fabrics: some super nice wools, some cottons, some wool blends, some cotton lace, and some silk, and then I got some viscose and some poly blends. I don't mind buying some cheapies because they are great for muslins and wearable muslins, and some of them are really pretty. Here's a look at what I will be hauling home:

fabric

These photos don't really do justice to these fabrics, but I'm sure you'll get to see them again when I sew them up. Anyway, I hope this was helpful to you, and I hope you get to visit this market too!

Fabric Shopping in London: Goldhawk Road

IMG_7515 When I first starting reading sewing blogs, I kept hearing about this amazing place in London called Goldhawk Road. I wasn't sure if it was  a market, a store, or a street, but what I was sure about was that I wanted to go there. Great deals on apparel fabric? Yes please!

So the next time we were planning a trip to London (which was when we came last spring) I showed John where it was and asked to go there. He discovered that it was just a short bus ride from our hotel (for your reference, if you get to Shepard's Bush tube station which is on the Central Line - you can catch the 237 bus and it takes about 3-5 minutes to get to the first fabric shop on Goldhawk Road - about 2-3 bus stops) and so we went.

Our first visit there was extremely overwhelming. It took me a few shops to warm up, and even consider buying anything. (I know right! That does not sound like me at all - I love to shop!) It wasn't that things were overly expensive or anything like that, it was that each of the little shops was crammed with copious amounts of glorious apparel fabric, and I had never seen anything like it. Stacks and stacks of apparel cottons, rolls of suitings, bolts of waxed prints, shelves of silks, jerseys, chiffons, and crepes - amazing! A far cry from what I am used to in Calgary (two or three chain stores with mostly quilting cottons). Anyway, I wrote a blog post about it last time, but this time John helped me keep track of which fabric came from which shop. Unfortunately, I didn't do as good a job at keeping track of prices, but the most expensive fabric I bought was £12 per metre and the cheapest one was £3 per metre. I think the average came out to be about £5 per metre which is a really good deal in my book especially for the quality.

So here we go, get ready for lots of pictures. I hope you don't mind me sharing all the fabrics I bought with you. I just figure that, that is probably the most interesting part (exactly what you could buy if you were to visit here), but the side effect to that for me is now you will know how much of a fabric junkie I actually am, and exactly what is in my stash. LOL. Stashing isn't the same as hoarding is it?  Anyway, shall we walk down the road? Lets!

IMG_7494

This shop had tons of African waxed prints. John is not really a fan, so I didn't get any myself, but there were some really gorgeous ones. I ended up with this bottom weight plaid which is really lovely. It will probably become a skirt.

IMG_7496

IMG_7497

This shop was fantastic, will a very friendly gentleman inside. I recognized some of the fabrics inside as ones I had bought last time. Some great deals on cottons in here. Here is what I came away with:

IMG_7498

IMG_7500

This store was one of my favourites, but it is a touch more expensive than some of the other ones (depending on what you buy). The two printed cottons I got were £10 per metre but they are absolutely gorgeous, and the two solid shirtings were only £3 per metre.

IMG_7501

IMG_7502

At this shop, I picked up this plaid fabric (in the photo below). I was convinced it was silk, but the shop proprietor assured me that it is 100% cotton! I swear to you it feels just like silk. It's amazing! I think it was about £4 per metre. My go to amount to buy for fabric is about 2m. Unless I know for sure what I am going to make out of it (or if it's really expensive then I only get 1m). I have found that because I am short, 2 metres is usually enough for a fit and flare dress, or a button down shirt or any shirt really, or for a skirt with some generous scraps leftover (depending on the length that is). I do my best to use up my scraps - they are great for underwear, contrast facings, pockets and my favourite way to use them is for contrasting yokes and inner collar stands on button down shirts (ahem..Archer..cough, cough).

IMG_7503

IMG_7505

IMG_7507

This is a beautiful printed cotton that John fell in love with, and the striped fabric was in with the African waxed cottons, but it doesn't really feel like cotton. I asked the gentleman that rung me up, but he said he wasn't sure. He said it was probably a viscose cotton blend, so who knows how I'm going to wash it. LOL

This brought us up to the tube station and a Costa coffee shop where we decided to have a break. One of the fun parts about shopping on Goldhawk Road is that there are loads of fashion students shopping for school projects, so the people watching is brilliant. We got a seat by the window, had a latte and a coke and enjoyed watching the people go by.

After a rest, we were ready to concur the other side of the street, so off we went.

IMG_7508

This was a really large shop where I bought quite a few fabrics last time. This time I didn't find quite as much, but we did walk away with this lovely cotton. Are you getting a feel for my colour palette yet? Well mine and John's colour palette really.

IMG_7509

IMG_7510

This shop was really busy, and yes those are flamingos! I think it's a rayon or some kind of poly blend but it has a really nice drape and I love the pink flamingos. I also really loved the colour of this plaid which will probably be my next Archer.

IMG_7512

And this brings us to our final shop:

IMG_7513

This is another place for bargains on Liberty fabrics. They have quite a few Tana Lawns and also a number of Liberty silks among many other fabrics. The staff here are all very nice and very helpful. The older lady that took my money was incredibly sweet and quite funny too. I walked away with this gem, yet another Liberty print. I didn't find any current Liberty prints here and the selection is nowhere near Shaukat, but still really good deals. I think this one was £12 per metre. Woo hoo!

IMG_7514

So that was pretty much it for us on Goldhawk Road. Pretty awesome, huh? I think there might be a few more shops past where we stopped and crossed the road, but not many. There weren't a ton of notions in any of these shops, but I think there are a couple of haberdashery shops up the road a bit as well.

Hopefully this helps you a bit if you ever get a chance to visit London. This would definitely be one of the must do's on my list for fabric shopping in London. You can hit a bunch of shops all at once and get a lot of bang for your buck as they say.

Fabric Shopping in London: Shaukat Fabrics

Last time we were in London, we passed by a little fabric store while we were on the bus called Shaukat Fabrics. It was near the end of our trip, and I had already completely blown through my fabric budget, so we didn't end up going there. I did however, google it, and read a great review on Katie's blog here. Katie's review is very thorough so I won't bother repeating everything she said, but the gist is that if you are looking for Liberty prints, this is the place to go. Liberty cottons are absolutely incredible; beautiful, super soft and a dream to sew with, so it was the first place we went this trip (well the first place we went for fabric anyway). IMG_7488

This shop is actually very convenient to get to, in fact, there is a bus stop right in front of it. We are staying at the Hilton Olympia again (I think we even got the exact same room we stayed in last spring), which is conveniently located on Kensington High Street. We tend to stay in Hiltons when we can, because: a) they are usually nice and clean, b) they have great buffet breakfasts, c) they are reasonably priced (most of the time), and d) if you stay enough and collect Hilton Honours points, you get things like free Wi-fi and Executive Lounge privileges. Anyway, probably not everyone's cup of tea, but we like it.

Another reason we love this hotel in particular, is that it is a short bus ride to most of our favourite places. In all of our travels to London we have discovered that the bus is a great way to travel. It's much cheaper than taxis, requires less walking than the tube, and you get to see the city when you ride it - plus the bus goes everywhere, and who doesn't what to come to London and ride a red double decker?  We hopped on the C1 bus right outside the hotel and jumped off right in front of Shaukat on Old Brompton Road. It was about a 10 minute trip altogether.

IMG_7490

The shop is clean and organized, but doesn't seem overly impressive when you first walk in, but then you go down the stairs to Liberty fabric heaven.

IMG_7487

These pictures really don't do it justice, and I didn't really take enough of them. I was a little bit timid taking photos as there were always staff members around. I only ended up taking two, but there is a whole other room filled with suitings, and then another room with pre-cut liberty fabrics. You can do a bit of a virtual tour on the website if you want to see more. It was really huge and to be honest a touch overwhelming. It's mostly Liberty prints, but there are also other fabrics like shirtings, ginghams, quilting cottons and what not.

IMG_7485

The staff were very friendly and helpful, and patient as it took me forever to decide what to buy.  The tana lawns where pretty much all priced at about £17 per metre (including tax), which is still quite expensive, but if you were to go directly to Liberty they cost anywhere between £21-£34.50 (plus tax), so it's quite a savings. I don't think they had the newest prints, but they definitely had lots of the same ones still available at Liberty.

They also do tax free shopping, so if you ask, they give you a special receipt that you take to the airport and you can claim your VAT back. They also ship worldwide, so if you go onto their website you can get fabric delivered right to your door. There is also a remnants bin upstairs, where I scored the best deal - 2 metres of this gorgeous gabardine (at least I think that's what it is) for £10.

Here are the spoils:

IMG_7614

IMG_7615

The top picture has all the tana lawns plus one craft cotton (which I think is like a quilting cotton) and the bottom photo is of the green remnant John picked out for me. It feels beautiful but I'm not sure what it is, maybe a gabardine? It was £10 for 2 metres and it's super wide. Definitely the steal of the trip.

At this point, I think I should mention that I have the best husband ever. He is so patient with me when it comes to fabric shopping (and all things sewing really). He holds my bags, he takes me to pretty much any shop I want to go to, and he even helps to pick fabrics out - which he is very good at, I might add. He really understands that fabric shopping in Calgary pretty much sucks, so he doesn't mind coming with me to check out fabric shops when we travel. I am so lucky to have such a supportive spouse!

So I think I made out like a bandit! These fabrics are gorgeous and I can't wait to make things out of them!

Are there things you like to do when you travel that your spouse/significant other doesn't or vice versa? Do you go fabric shopping when you go away? How does your spouse/significant other feel about it?

Radar Love

A few weeks ago when Miss Crayola Creepy announced her Cat Lady Sewing Challenge, I kind of brushed it off as I am not really a cat person. It's not that I have anything against cats, in fact, if anything, I really don't know much about them. I've never owned a cat and my only real experience with them, are having them either ignore me, bite me or stratch me. And I think it's pretty obvious by now that given the choice I am a die hard dog lover, and in particular a die hard pug lover. So sewing a garment covered in cats seemed almost hypocritical (I know, I know, I'm a bit weird). But then I was browsing Fabric.com as I often do, and I decided, just for fun of course, to search "cats". When I came upon this crazy, halloweenish cat print, I knew I had to have it:

Large_0350184

It reminded me almost instantly, that there actually is a cat that I love. A cat that I would happily pay homage to by participating in a Cat Lady Sewing Challenge. An adorable feline that I have had a number of good experiences with, and even a few cuddles: Radar.

IMG_5742

About a year ago, Anne (my favourite stepmom) lost her long-time kitty companion Ming. Ming was a beautiful and elegant, shy siamese cat that was a constant companion to Anne for about 16 years (why can't pets live forever??). After Ming passed, my Mom and Anne weren't sure if they would get another cat; they thought they might be okay with living in a one cat household (my Mom also has a feline fur baby named Minou) but after a few weeks, Anne decided that two is always better than one. So it was off to the rescue foundation they went, where they fell in love with this adorable black beauty. He's around 7 years old, but he looks and acts like he is a much younger kitty.

IMG_5739

I have only met Radar a handful of times, but every time I see him, he comes right up to me and gives me lots of cuddles and lovins. He is the first cat that has really made me consider the possibility of having one as a pet someday. He is the one black cat that I don't mind crossing my path. He is soft and sweet, he lets me pet him and (GASP!) he even trusts me enough to fall asleep in my lap - I mean, what's not to love about that? I have heard though, that he is constantly up to mischief; he loves to knock things off counter tops, to mess with Minou, to hide in the rafters, and to open screen doors to try to make his escape (classic cat stuff).

Anyway, when I saw this fabric - I immediately thought of Radar. (Anne named him Radar because he has big ears that stand straight up, it's very fitting actually.) Plus, I thought it would make an excellent October/Halloween shirt. So after a series of clicks, it was in my cart and on its way to my house - it costs a fortune for shipping to Canada, but Fabric.com always ships super quickly so it at least feels a bit worth it. Naturally, as I am still in the midst of my mad love affair/finding the perfect fit obsession with Archer, that's what I chose to make...again.  Surprise, surprise! (I promise I will sew something else someday.) Quilting cotton is probably a little heavy for a shirt, but I think it turned out really well and it was super easy to work with.

IMG_5537

I actually did a few different things with this one. I went down another size, so this one is actually a size 6. And again I did a full bust adjustment (for reference, I slashed and spread about 1 inch). I am super happy with the fit on this one. I think it is safe to say, that this is definitely the TNT version for me now.

IMG_5536

I decided to make the pockets pointy on this one as it seemed to go with the theme. It's a bit tough to see as this fabric is so busy, but the pockets really are there.

IMG_5535

I also decided to try a different sleeve placket this time, and I love it!! When I first looked at the tutorial, it looked super complicated, but take it from me, it is actually super easy. I would venture to say easier than the normal sleeve placket. There are more steps but I found the actual sewing part to be easier - no weird rippling or stretching of cut fabric. The tutorial I followed is here. I think I will do all my sleeve plackets like this from now on. I love that it allows one to show off a contrasting fabric, if one wants should desire to do such a thing. It really is all about the little things for me.

IMG_5538

There, you can see those pointy pocket in this picture. I used leftover scraps from my second Washi dress, and I think it worked out really well. I also used that same fabric for the inside collar stand and yoke.

IMG_5539

I also went with snaps again (they really are my favourite closure), yellow pearl snaps to be specific,  and I love how they turned out. A little pop of colour to a monochrome fabric is perfect in my books. I thought the yellow was quite fitting, as Radar's eyes are a greeny, yellow. I don't seem to have a photo of it, but I finished the hem with purple bias tape (my new favourite hemming technique), and I used my variegated rainbow serger thread to finish my seams, so this shirt looks just as cool on the inside as it does on the outside.

So there you have it, I have officially embraced my inner crazy cat lady. I'd like to tell you that I will probably reserve wearing this shirt for October and close to Halloween, but I love it so much, I'm sure it will get into the regular rotation.

Do you like cats? Enough to sew and/or wear cat themed clothes?

PS: I am now in London - so look as I originally started out as a travel blogger, look forward to some travel posts and fabric shopping! Phew, finally a break from all the Archer madness. LOL

My Mom's Happy Birthday Archer

My Mom's birthday is coming up at the end of October, and I really wanted to make her something awesome. I took her basic measurements back in June in anticipation of wanting to make her something someday, and I was pretty confident that I would be able to make her a well fitting knit top of some sort. But then I fell in love with Archer, and I knew she would love to have one too (she made a huge fuss over my first one). I was a little nervous, because Archer requires a bit of fitting and I wanted it to be a surprise so I didn't want to have her try it on before hand. So a bit risky, but I figured worst case scenario, it would fit horribly and then I could just make her another one. It's just fabric, they will always be more. [I used to work as a dental assistant and I remember the dentist that I worked for (who was a really good guy btw) used to say, the great thing about being a dentist is that it's just teeth, at the end of the day, nobody dies - so much better than being a doctor. So at the end of the day it's just fabric, the world won't end if it doesn't work out. Okay, I'm getting off the soapbox now.) But lucky for me (and her), it fit! IMG_5525

Now, wait a minute...if my Mom's birthday isn't until the end of October, why is she wearing her Birthday Shirt now? Well John and I are going to be in London on her actual birthday and I was so excited to give her this gift; I gave it to her over Thanksgiving when we were together. She was thrilled with it, and was kind enough to pose for some blog photos. Isn't she cute?

IMG_5526

For this baby, I made a straight size 18. I picked the size based on the my Mom's bust and hip size. I shortened the sleeves by about 2", but she probably need them a bit shorter still. I inherited my petite-ness from her as you can see.

This gorgeous blue floral cotton screams my Mom. I had planned to make a sleeveless shirt for myself with it, but when I was looking through the stash for something to use for my Mom, John and I both knew she would love it (he's my design consultant). Plus it washes and wears really well. This gem was part of my Goldhawk Road haul last Spring. I also used scraps leftover from my second Archer for the inside yoke, inner collar stand and the sleeve plackets. Have I mentioned that I love all the little details that sewing your own garments allows you to add?

IMG_5527

As you can see the fit is not perfect, and if (when) I make her another one, I will make some adjustments to make it fit better. She could use smaller shoulders and an FBA (I'm getting better at those), and the sleeves are a bit too long too. I love that I am starting to recognize fit issues more easily and also that I have some idea of how to fix them. If you can't tell from her grin, my Mom is super happy with this shirt. It was funny while I was taking photos of my Mom, I was like come on Mom work it, and she did all the same silly poses that I do, when John takes photos of me. It was pretty funny (I'll save my Mom and not post all the crazy shots). Like mother like daughter I suppose.

IMG_5530

It's hard to see because of the busy fabric, but I actually used pearl snaps for the closures on this shirt. I was shakey and sweaty setting them, because of my Nettie experience, but by the time I set the last 3, I felt like I knew what I was doing. And I am so glad that I took a chance and tried again, because the snaps look so good! Here's a photo I posted on Instagram that I think shows them a little bit better.

IMG_7375

I love the pearl snaps, they look so nice. I ordered them from Snap Source (which I heard/read about from A Fashionable Stitch - Sunni has a wealth of information on her blog, seriously (yay sewing community!), which I never would have discovered without the Sewing Affair podcast - so Hooray for Corinne too!). I actually ended up getting their tool for setting to, and it works really well. Once you set two or three, it's pretty easy, plus if you have a small flat screwdriver (coincidentally like the one that comes with your sewing machine) you can carefully remove any snap mistakes without too much fabric damage, and re-set. So yay for snaps!

So there you go, that's my unselfish sewing for the year LOL. Seriously, it's so nice to make something for someone, and have them love it. My Mom wore this shirt for 2 days straight (she and Anne were visiting us in BC for the Thanksgiving weekend, so I know what she was up to).

Do you make things for other people? How do you go about keeping it a surprise, or do you?

Happy Birthday Mom! I love you bunches!

The Nettie Chardon Conglomerate

Get ready for a pretty picture heavy post guys! I thought I would give the blog an Archer break and share something a little different. Well different for me anyway. The Deer & Doe Chardon skirt and the lovely (what will I ever wear that with, but now I can't live without) Closet Case Nettie! IMG_5495

I say a little different because I hardly ever wear skirts (and I have never worn a bodysuit). I'm not sure why I don't really wear skirts, as they seem like a pretty versatile item, but for some reason, I have always thought that they don't really suit me. That being said, I really like this one! I think the highwaisted-ness suits my petite frame and I love the pleats and belt loops too! Plus it has pockets - woo hoo!

IMG_5491Hey look, I still have pink in my hair!

I've seen a bunch of Nettie/skirt combos popping up online and I thought that a Nettie paired with this skirt would be perfect! I wouldn't have to worry about always tucking in, or that my top was riding up and/or becoming untucked and I think it worked out splendidly.

IMG_5492

For the Chardon, I used Kaufman Brussels Washer Linen Blend (say that three times fast) from Fabric.com. I think it has the right amount of drape and body and it holds the pleats well. I made a size 44 and I used the length of version A without the contrasting piece - what can I say, I'm short. I used store bought bias tape for the hem and I love how that worked out too. I'm all about the bias tape hems lately.

IMG_5522

IMG_5489

For Nettie I used a striped cotton jersey from Girl Charlee, and I made the version with 3/4 length sleeves in a size twelve. I ended up shortening the bodice by about 1.5" and I did a small sway back adjustment as well. The leg bindings are supposed to be finished with self fabric, but I decided to do something a little different, and I finished them with lingerie elastic. I have never applied lingerie elastic, but I think it turned out pretty well. This pretty pink came from Sew Sassy, and it's super soft and not pinchy at all.

IMG_5521

I first attached it with a zig zag stitch and then used my coverstitch machine to topstitch it in place.

IMG_5518

This is the first project I have ever made that involved snaps. And I was a little naive about it. I thought, how hard can it be really? Well...here's what it looked like on my muslin.

IMG_7234

Snap fail!! (If you follow me on Instagram, you would have seen this already, with the caption Nailed it! My husband didn't understand the reference until I pointed him here. We had a really good giggle, and it still makes me laugh whenever I think about it).

I think my first mistake was using a scrap of jersey for the gusset. In my experience so far, setting snaps in jersey and having them look good is really, really hard! I think my second mistake was trying to set them through so many layers of fabric. After doing this, I re-read the pattern instructions and discovered that you are supposed to a) use a woven scrap of fabric, and b) set the snaps through one layer of fabric, then fold it over and stitch. My second try turned out so much better! When it comes to sewing, I tend to be one of those people that refuses to be discouraged by fails. I think you learn so much from your mistakes and I was so determined to master snaps, that I just kept trying. I have a couple more projects to share that involve snaps and I am so happy that I just kept on trying, because the effort really paid off.

Here's a look at my second attempt:

IMG_7244

Hallelujah! Not perfect, but much, much better. You are supposed to slip stitch, but I am way too impatient for hand sewing, and no one's going to see this but me, so I just machine stitched as well as I could around the snaps. It works. My cover stitching looks pretty messy too, but in sewing, it's not what's happening on the inside that counts, it's how in looks on the outside that's most important. Right?

Anyway, I was a little bit worried about what I would wear Nettie with, but I think she goes perfectly with skirts and will be a great layering piece during the colder months. She could be worn under cardigans, sweaters, Archers and perhaps even under an Alder Shirtdress. (Btw: Did you hear that Grainline is releasing a new sweatshirt pattern on Monday?? Eeeeee!) I am a little bit confused about how to wear this bad boy when tights are involved though. Do the tights go over or under Nettie? But I'll figure it out I'm sure, it's probably wearer's choice LOL.

What have you been up to lately? Have you had any epic fails (sewing or otherwise)? Did it discourage you or were you like me and even more determined to conquer the task?

PS: Happy Thanksgiving to all my Canadian peeps!! Hope you get lots of yummy turkey and remember all the wonderful things to be grateful for!

Archer #2 and Some Fitting Chat

Well, Hi Everybody! I feel like I haven't blogged in forever, but really it's only been about a week and a half. If you follow me on Instagram (and I may have mentioned it here), you might know that I have been struggling with some kind of tendonitis/repetitive stress injury in my right arm.  It's been a pain (literally) and it's really cutting into my sewing/blogging/knitting. I have found that sewing itself isn't too bad, but cutting things out, ironing/pressing, and knitting really aggravate it, and typing and using the trackpad on my laptop are pretty awful too. So I've been trying to rest it as much as I can, which means more Netflix (I'm currently hooked on the X-Files and Scandal) and dreaming about sewing, with way less actual sewing. I have yet to see a professional about it, but if it continues, I will. John says, my big problem is that I don't understand the concept of moderation, and you know what? He's probably right. I would sew all day everyday if I could (and I'd eat pizza, drink lattes, and down ice cream all day too!). 
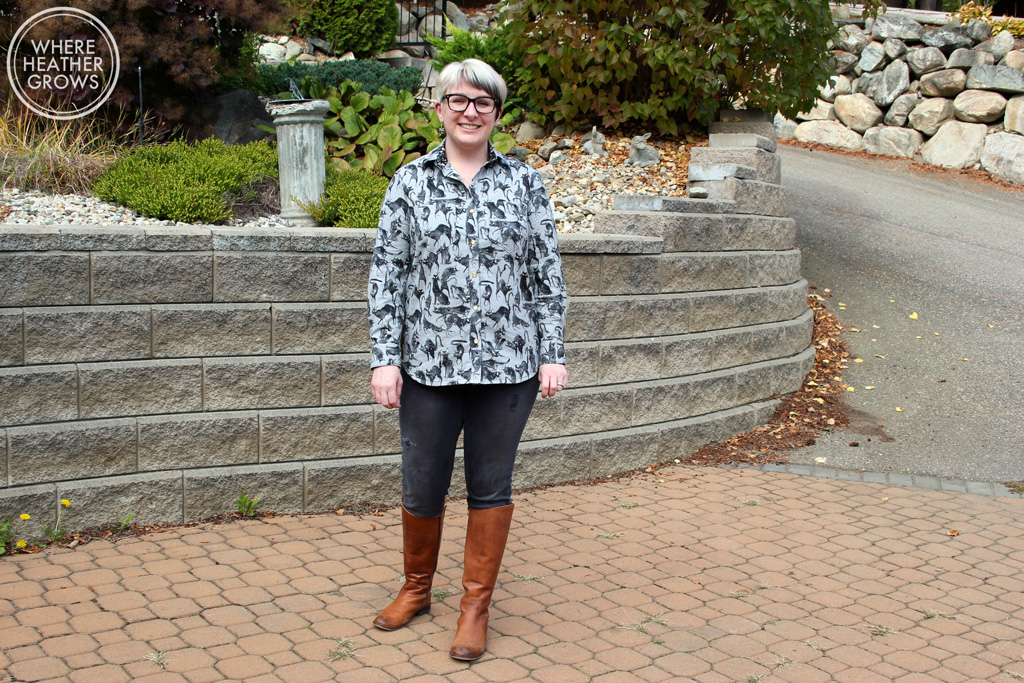
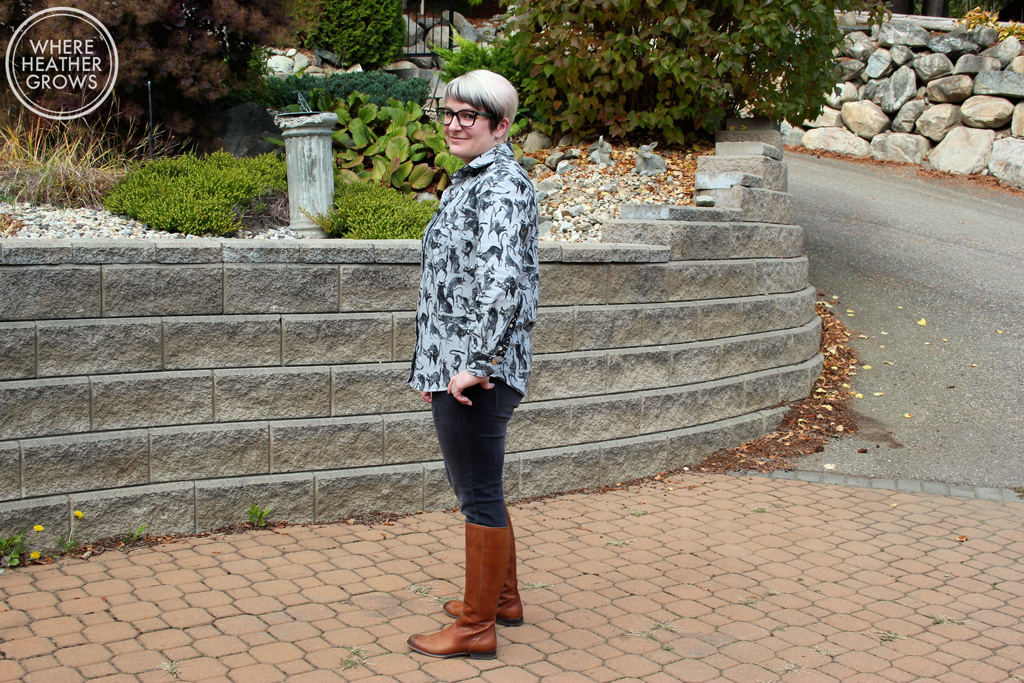
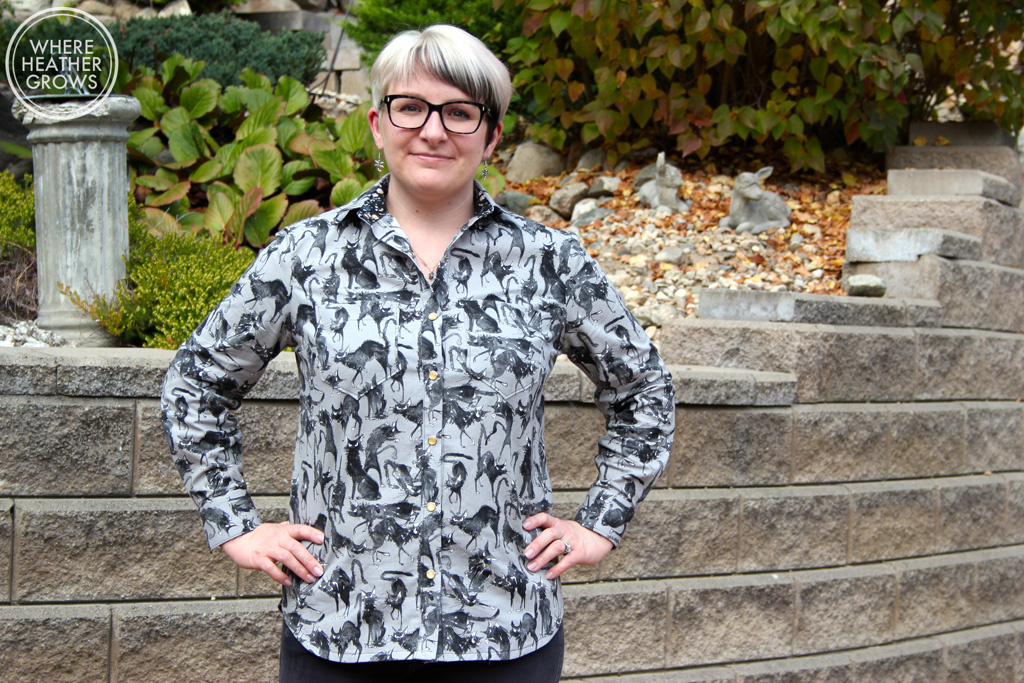
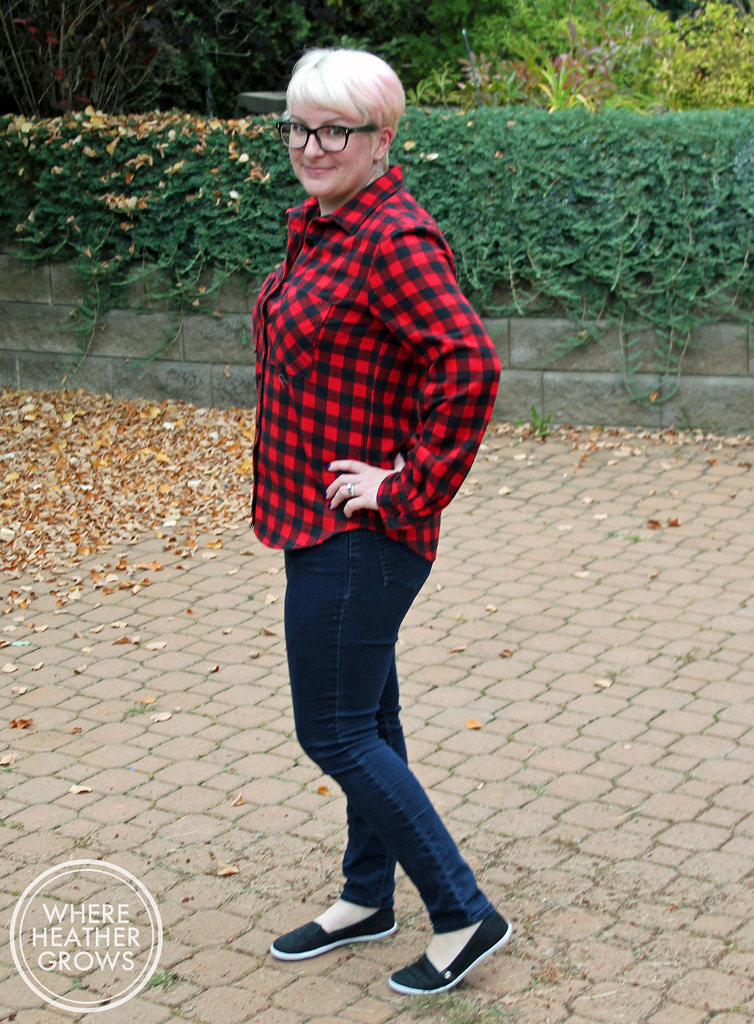
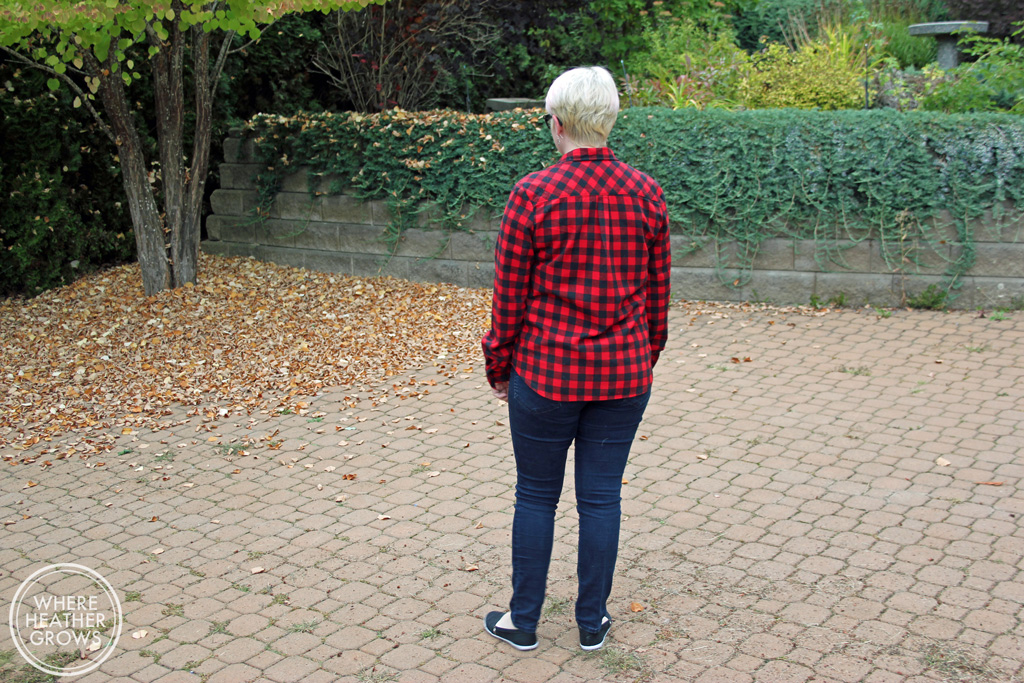
Anyway, enough about that. Let's talk about Archer #2. Have I told you how much I love this pattern yet. I love a good button-up shirt and this bad boy fits the bill! I realized after I made my first plaid Archer, that it's all I want to wear. A button up with jeans is the perfect fall  (and everyday) outfit as far as I'm concerned.

IMG_5459
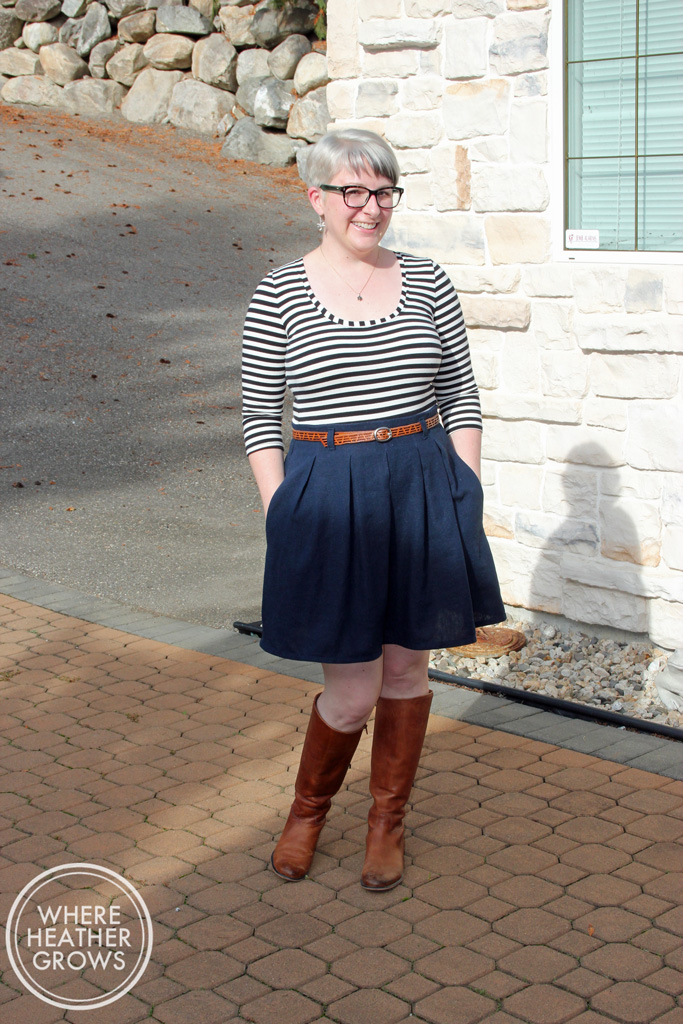
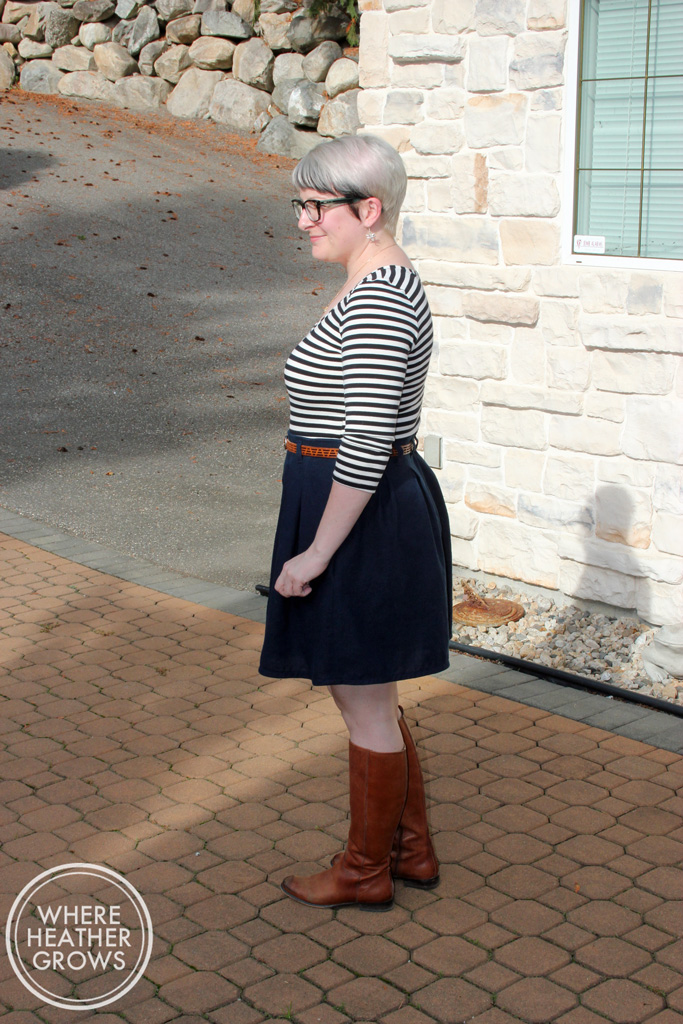
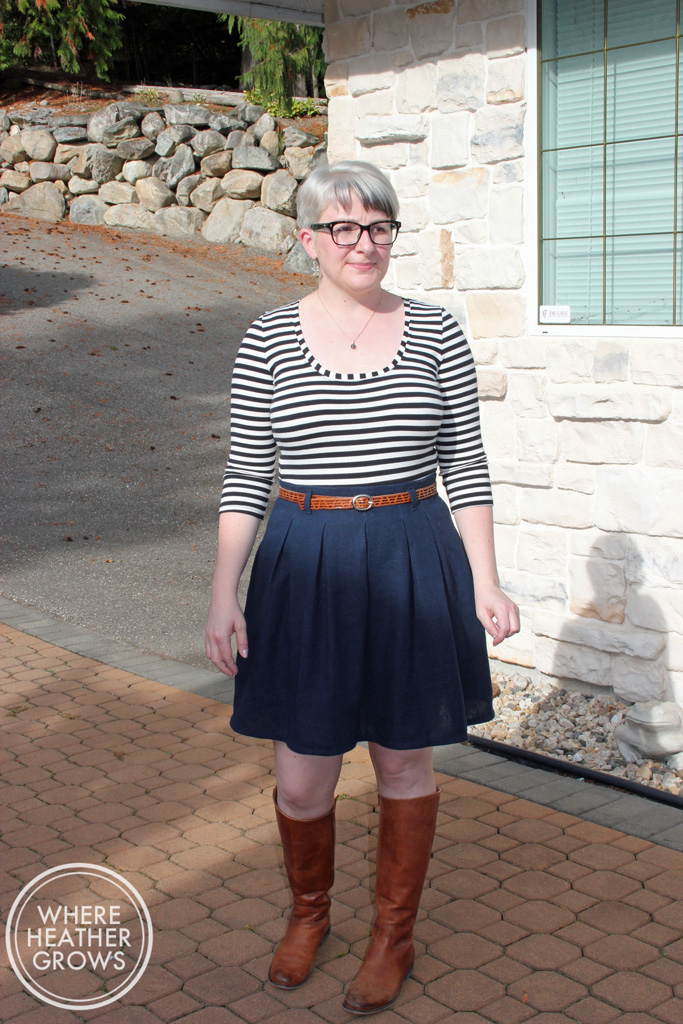
Yes, I have officially accepted that it is fall and pulled out the boots!

A couple of weeks ago, I asked you lovely readers for some fitting help. Do you remember? It was about my Scout, and I received lots of very helpful advice in the comments. One lovely lady, Lisa from Notes From A Mad Housewife, suggested that I add a dart and do a Full Bust Adjustment. As someone relatively new to garment sewing, I had heard of FBAs, but never really knew how to figure out if I needed one, let alone how to do one. What really confused me, and Lisa helped clear up, was: once you figure out that you need an FBA, how do you choose the correct size pattern on which to preform said adjustment? Lisa described in the comments, that you choose your size based on your high bust (or upper bust) measurement. Well, this was definitely news to me, and then I did some reading in my go to fitting book, Fit for Real People, and it was right there - choose your pattern size based on your upper bust measurement, and adjust from there. How on earth did I miss this? So really what you try to do, is get a garment to fit you well in the shoulders and adjust the pattern to fit you everywhere else. Hello, light bulb moment!

Note: Most commercial patterns are drafted for a B-cup (most, but not all), so essentially, if you are bigger than a B-cup, you need a Full Bust Adjustment. I had heard the part about most patterns being drafted for a B-cup, but what I didn't understand was how that affected pattern sizing. I mean if you choose a pattern based on your bust measurement, shouldn't it fit? Well, if the the cup size isn't the right size, there just won't be enough room for your jugs. Make sense? The same is true if you are smaller than a B-cup. Then you would need to do a Small Bust Adjustment as there would be too much space for your jugs.

IMG_5464

Anyway, a day or so after this epiphany, I was listening to the Sewing Affair podcast (have you listened to it yet? It is awesome! Corinne is a fantastic host, and she's had a bunch of lovely guests. I love geeking out and listening to sewing talk! And I learn stuff too!), and Sunni from A Fashionable Stitch was on. Of course after hearing about her shop and her blog, I had to go and check her out. On her site, I stumbled upon her Focus on Fit series, where she too talked about choosing your pattern size based on your high bust measurement. Okay universe, I get the message!

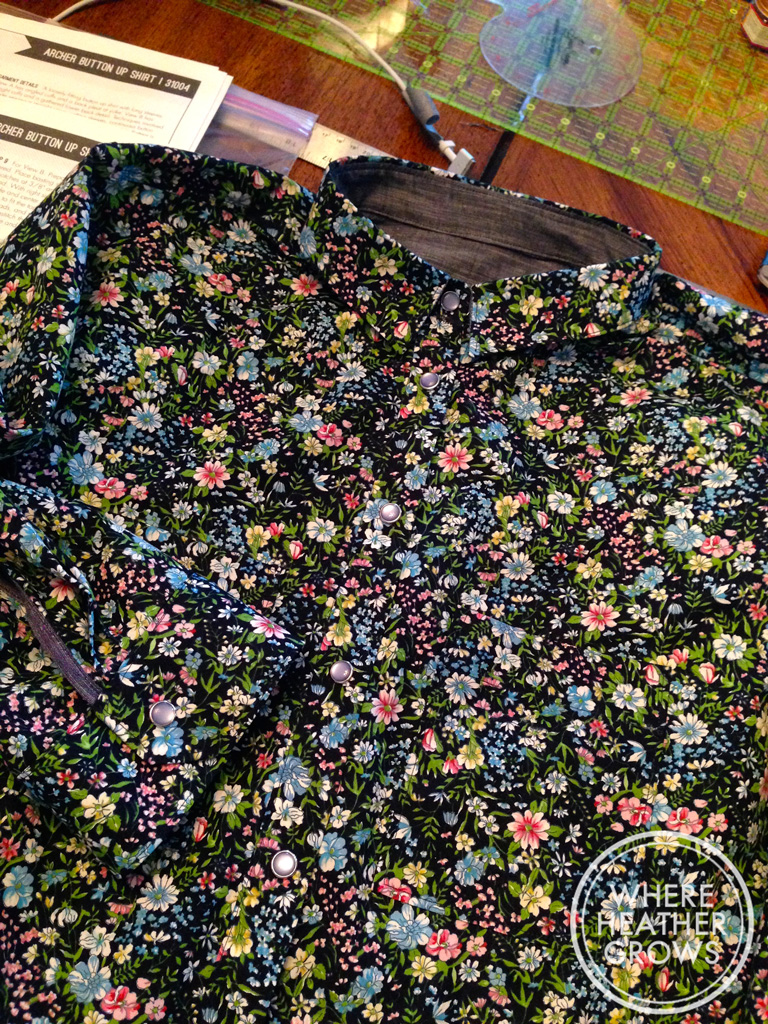
So to make a long story even longer, I used my Fit For Real People book, after reading several posts about it on the internet, to do an FBA. I used a size 8 as my base and then did an FBA which added a dart. I did find a couple of posts online about dartless FBAs, and I may try that too, but I really don't mind the look of darts, so I went traditional on this bad boy.

IMG_5479

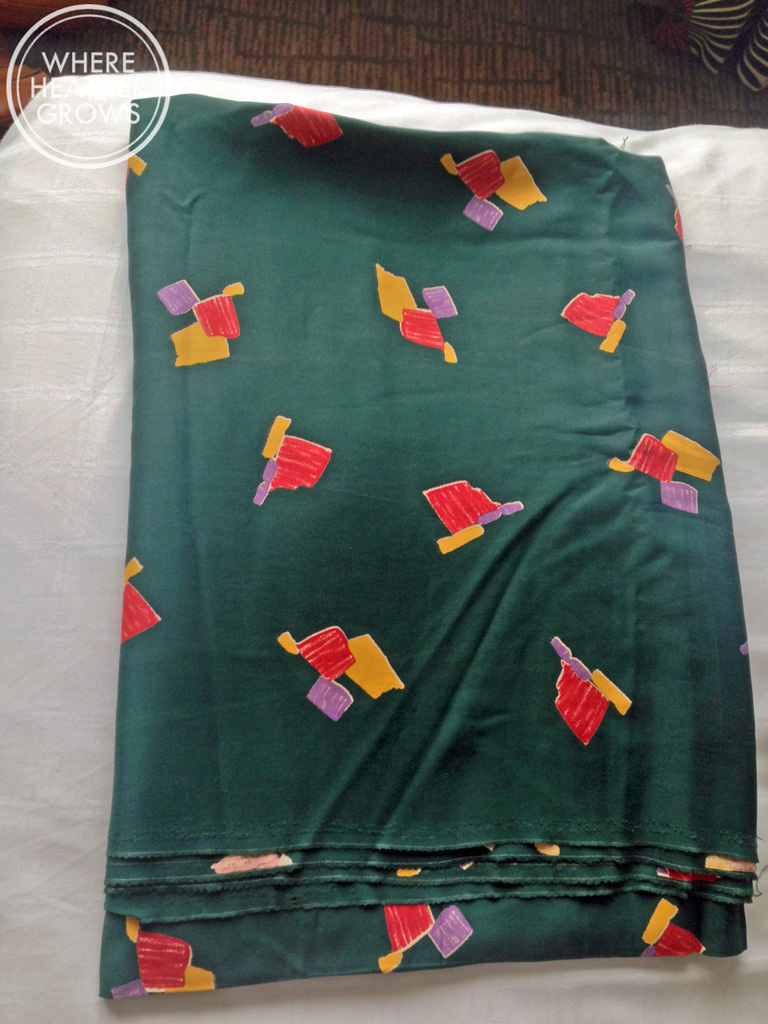
Really, you can hardly see the darts. This fabric is a tencel chambray from Fabric.com and it was lovely to work with. I love the colour and it drapes quite nicely too. At the last minute I decided to put my contrasting yoke on the outside, and I was too lazy to unpick everything, so the pleat is the opposite way that it should be, but I still like it. The polka dot fabric is leftover from my Juba Shorts and it's from Denver Fabrics.

IMG_5469

Now, looking at these photos, I think I  could probably use a sway back adjustment to get the back fitting better. Sometimes I get so focused on the front, that I forget about the parts that I can't see.

IMG_5458

The only other alteration I did to this version was to shorten the sleeves by 2.5''. I think that they are pretty much perfect now. I often roll my sleeves up anyway, but I like this length. I used Andrea's collar assembly tutorial again, and I really think it's the best way to do a collar. And I also used Rochelle's tutorial (speaking of which, why did it take me so long to find her blog? - it's so awesome and she has Archer fever too!) on bias binding the hem and I really like the finish of that too, unfortunately I didn't take a picture so you'll just have to trust me.

So, I'm sorry for the long post, but I'm excited and I really wanted to share what I have discovered. Maybe you're a fitting newb like me (and you don't read well, or are notorious for skimming books) and you are out there wondering where to start to make your garments fit better.

All in all, I am really happy with the fit of this Archer, it fits similar to my plaid one, but on purpose this time (I didn't shrink it in the dryer).  I think for a more fitted shirt, I could even go down to a size 6, something I would have never have imagined (or thought to try) in a million years. I am really enjoying the learning process of fitting, and now that I have this knowledge I look forward to making better fitting tops (and learning more of course), which was the whole reason I started this crazy hobby! Well that, and I love to sew.

One more thing, Maris, over at Sew Maris is just starting an Archer Sewalong on Monday, and I have learned a ton already from her prep for the sewalong posts, so if you are interested in sewing a button up shirt (or any garment really), her blog is definitely worth checking out.

Hope you are having a nice weekend! Happy Sewing! (Or whatever it is you are up to).
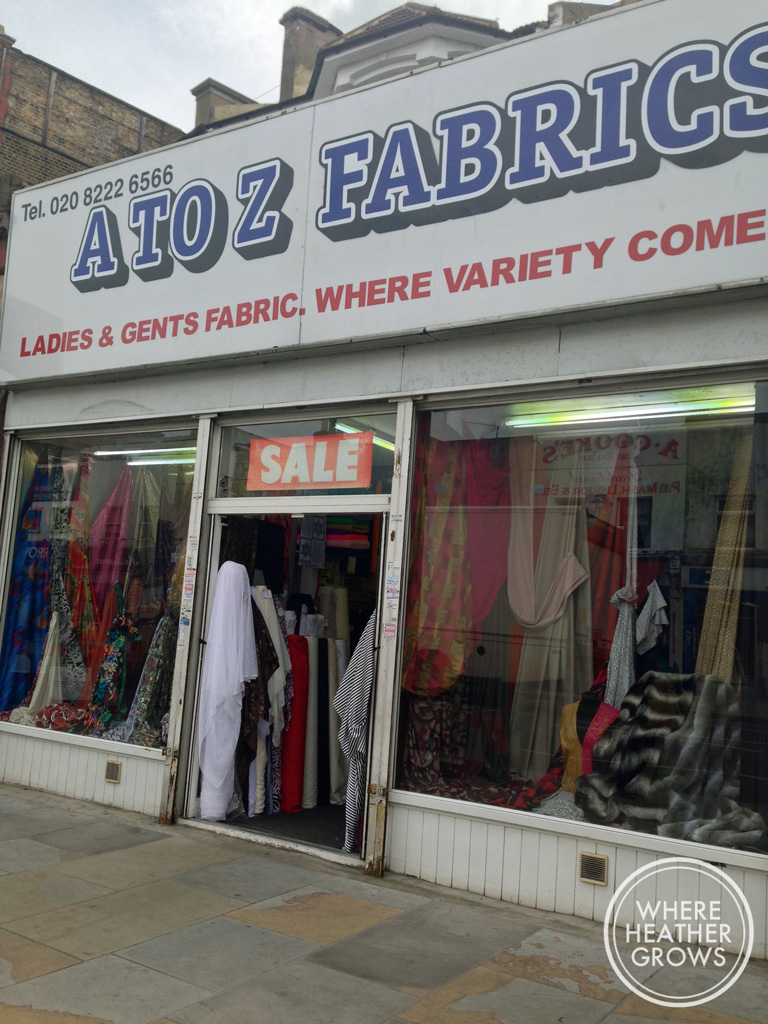
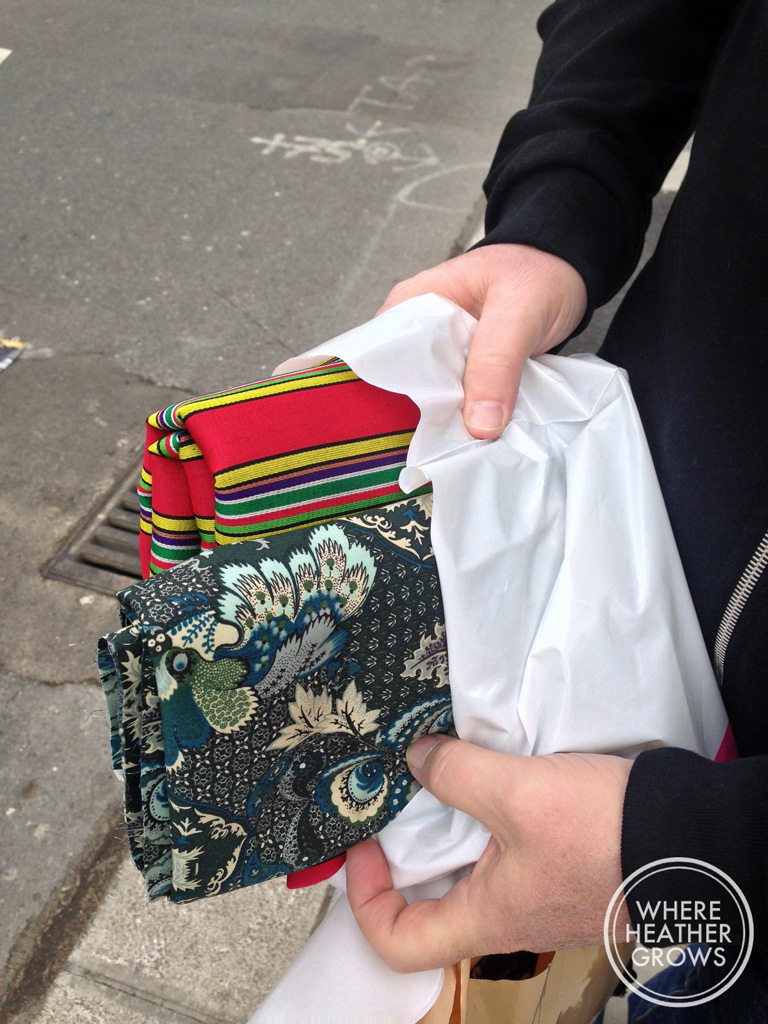
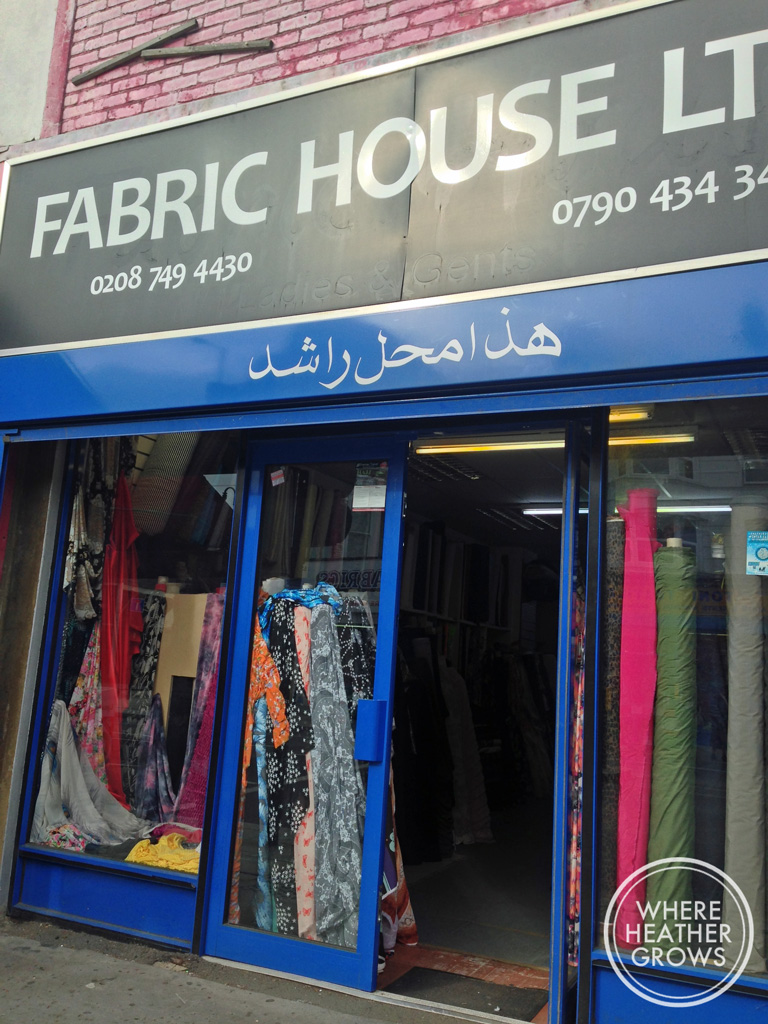
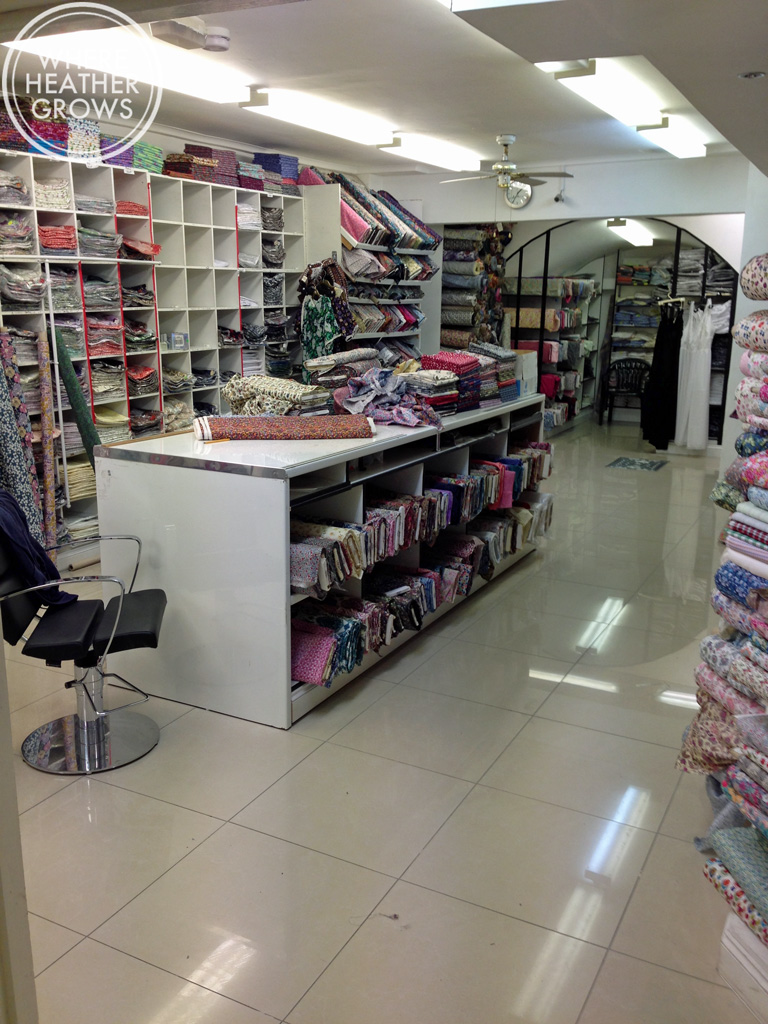
The Epic Plaid Shirt

Back when I was around 14 years old, the grunge scene had hit hard, and I longed for life in Seattle with Doc Marten boots, Bridget Fonda and Matt Dillion for neighbours, cool coffee and a Paul Westerberg soundtrack (of course that was completely unrealistic as I was only 14 at the time, but hey a girl can watch Singles and dream right?). I was always on the hunt for the perfect plaid  flannel shirt. Not to wear of course, but to tie around my waist as all the cool kids did. My best friend at time, let's call her Anni, and I searched thrift shops and Value Village for old worn in (Men's) jeans, cool concert tees, cords and ironic Bill Cosby sweaters. We managed to put together some grunge worthy outfits, but neither one of us could find that epic plaid shirt. IMG_5417

Then one morning before school, Anni had a brilliant idea: she would raid her dad's closet. Anni's dad was very strict and very "old country", but for some reason she decided that wearing his clothes would be a good idea. I was so incredibly jealous. Not only did Anni's dad have a huge collection of perfect plaid flannels - they all fit her - perfectly oversized for her frame. You see Anni's Dad was quite slender and how should I put it: wiry. So with a cool belt, she could totally pull of his faded old straight-leg jeans, add a t-shirt and a flannel around her waist and she was set. I guess the only catch was she had to race home from school and make sure she put everything back in his closet or in the laundry before he came home from work. I think she even had a spare outfit in her backpack in case he came home early one day. At the time, I guess I didn't find this that strange, but hello how scary was her dad? But I digress...the point of the story is, I was always jealous of her cool plaid shirts and how she always looked amazing in them. So of course, when I saw this cool buffalo check at Fabricland, I was transported back to the days of Kurt Cobain and Eddie Vedder, teenage angst and slacker fashion, so I knew it was destined to be an Archer.

IMG_5444

This is my first attempt at plaid matching, and I'm pretty happy with how it turned out. I used Jen's tutorial and it worked really well. I also cut my pockets, yoke, and button band on the bias, because I thought that would break up things up a little and make it a little more feminine.

IMG_5419

This is my very first Archer and a very wearable muslin. I decided to just go for it and cut into this buffalo check straight away. I figured that worst case scenario, it would be too big, but it would be comfy and I would wear it anyway. Also, I got this fabric for pretty cheap at Fabricland and I knew there was lots more there if I needed it. I didn't really use the written instructions that came with the pattern, but instead referred to Grainline's fabulous Archer Sewalong. I am a very visual person, so having those extra photos helped a ton! I also used Andrea's new order to sew a collar tutorial over on her blog Four Square Walls. It  makes the collar process so much easier, and the end result looks awesome!

IMG_5420

I chose a size 12 and made it up as is. I have to tell you that when I first tried this shirt on, I was not incredibly happy with the fit. It wasn't awful, but it was pretty big all over and the sleeves were super long. I also discovered that flannel is actually code for loose thread and pug hair magnet (look closely at these photos and you'll see what I mean). So once this shirt was totally finished, instead of wearing it or photographing it right away for the blog, I threw it back in the wash. I always pre-wash and dry my fabric at hot temperatures to make sure there are no surprises later on, and this flannel was no exception. So a couple of days later (today) when I put this shirt back on, I was shocked to find that it now fits pretty much perfectly!

tumblr_mwu2720SsK1rm4mpho1_500Source

It shrunk to perfection. I can't believe it! The sewing gods were with me on this one. From now on,  I think I'll probably wash all my flannels twice because I would have been super disappointed if this shirt had fit perfectly to begin with. But this time, it worked out well - so hooray!

IMG_5433

Size and shrinkage aside, I have to say that I absolutely love this pattern, and I can now see what all the fuss is about. It's fabulous and I see many more Archers in my future. A girl can't have too many button-downs, can she? (Button-downs? Button-ups?)

Do you ever get that way with a pattern? Love it so much that you just want to make it up a bunch of times. I fall in love all the time, and then I think, I'll be the girl in the woven t-shirts, or I'll be the girl in the fit and flare dresses, or I'll be the girl in the funky leggings...I'll have a uniform and that's what I'll be known for. But then I make another pattern and it changes. I think maybe there's a term for that, could it be OCD? Anyway, one thing is for sure, I am all about Grainline Studios right now, and I am beginning to obsess over fit so look forward to reading more about that. ;)

I think this marks the first of my Fall sewing projects. I never actually wrote a post about all the fall sewing I am planning or that I am going along with Sarah's Annual Fall Essentials Sewalong - but I am! I am very reluctant to post my list as it changes from day to day, but you know me, I like to mix it up.

Anyway, hope you all are enjoying the changing leaves, the crisp air, and the pumpkin spice lattes! (Confession: I hate pumpkin spice lattes - I tried to force myself to like them to find in, but yuck!). Happy Fall!

IMG_5430