Two for the Price of One: By Hand London Kim Dresses

Howdy peeps! How was your weekend? Mine was pretty good; lots of lounging around at the lake and enjoying life, so I can't complain. We had a big rain storm out here on Saturday, super windy and sideways rain - it was a bit nuts but didn't last long. Thank you all for the responses and help with my Shingle dress in my last post. I felt a little self-conscious about such a body-hugging style, so it was nice to get some feedback. I am very much looking forward to making another version that fits better based on all your advice.

Anyway, onto the matter at hand. Way back in the very beginning of 2014, I started sewing clothes and I was delighted to find sewing blogs and Indie Pattern Designers (I had no idea either existed until Google and Pinterest introduced me to many). I noticed that there were a lot of By Hand London Anna dresses out there, and they all looked lovely. That pattern seemed to suit everybody who tried it. So I hopped onto By Hand London's website and I ordered it. It was the second dress I had ever made (a Colette Laurel was the first) and I was thrilled to discover it fit me really well right out of the envelope, and it quickly became my favourite pattern. It was fun and easy to make, there were no sleeves to set in, and it fit me and was quite flattering. So when those lovely ladies came out with the Kim Dress pattern and it started to pop up on blogs everywhere, I knew I had to have that one too.
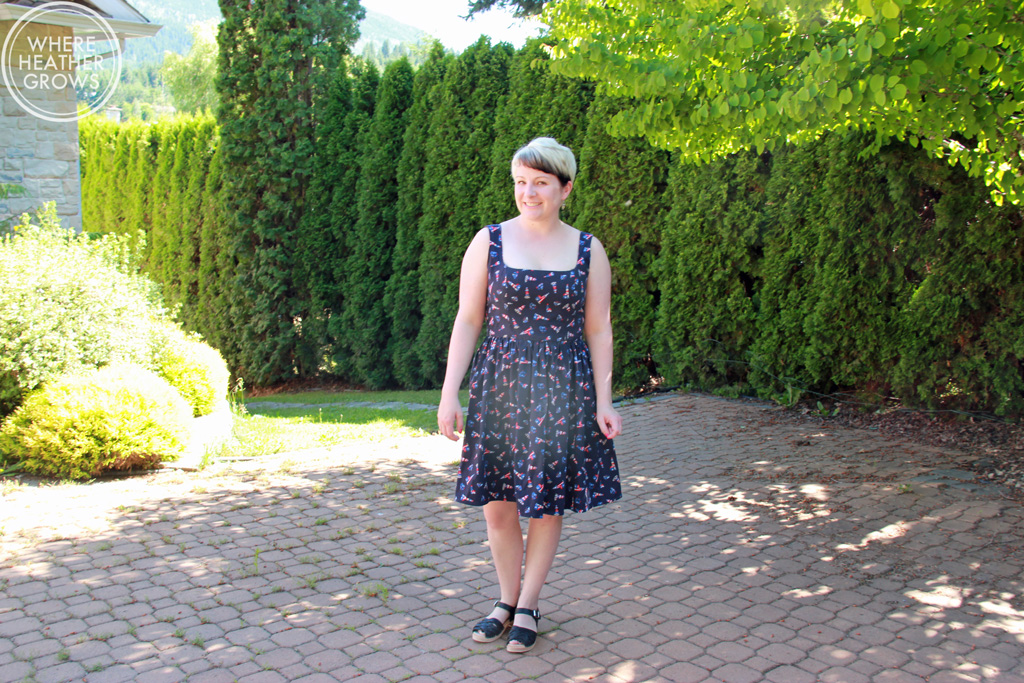
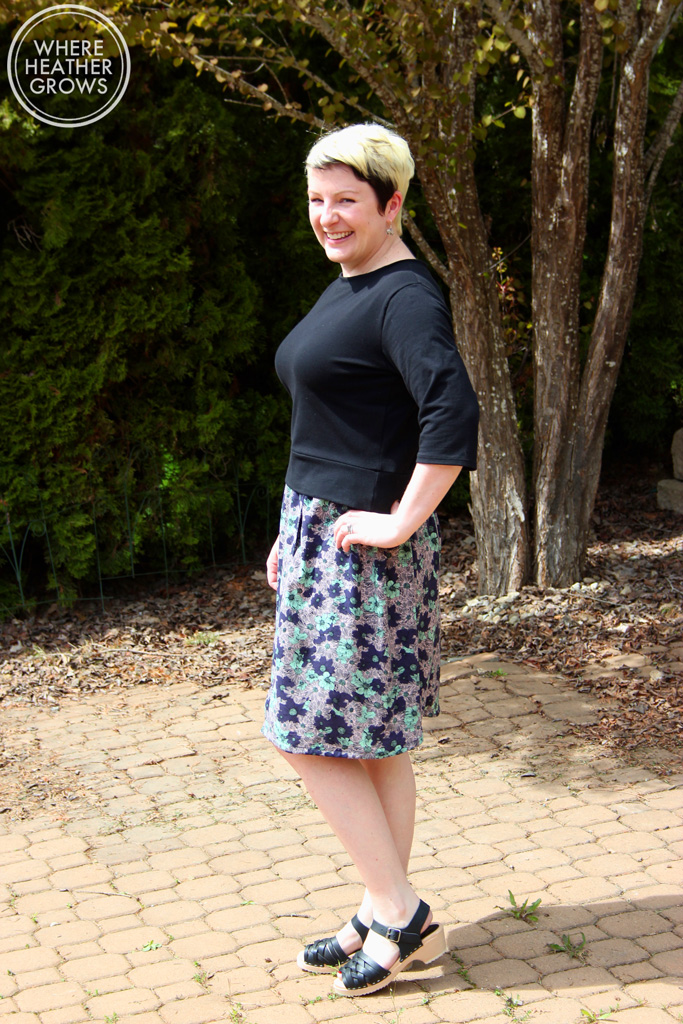
IMG_6953This pattern has two different bodice variations: a plain scoop neck and a sweetheart neckline, along with two skirt variations: a gathered, flared skirt and a more fitted tulip skirt. For my first attempt at this pattern, I decided to go with the plain, round neckline and the gathered, flared skirt.

IMG_6960I hummed and hawed as usual, about what size to make. My measurements are really close to the size 12/16 size, but I know that these patterns are drafted for a B cup and I am typically a D cup. So really I should have chosen a size 8/12 and then did an FBA, but I chickened out because of the princess seams. There are a lot of great tutorials out there, so I don't really have an excuse, except that I was too nervous and too lazy.
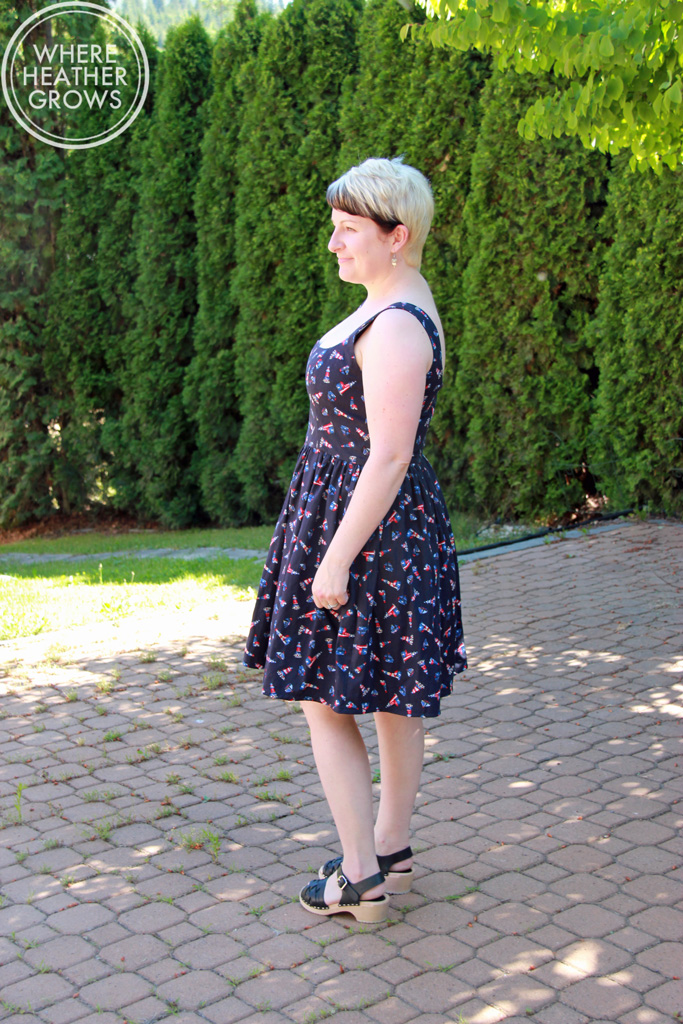
IMG_6954But all that being said, the fit is pretty good. My only real complaint is that I keep feeling like the straps are going to slide off my shoulders, and they do when I move around a lot. I should have added little ribbons to the straps to attach to my bra ala Kelli. If you make this dress, I totally recommend doing that - it's a genius idea.

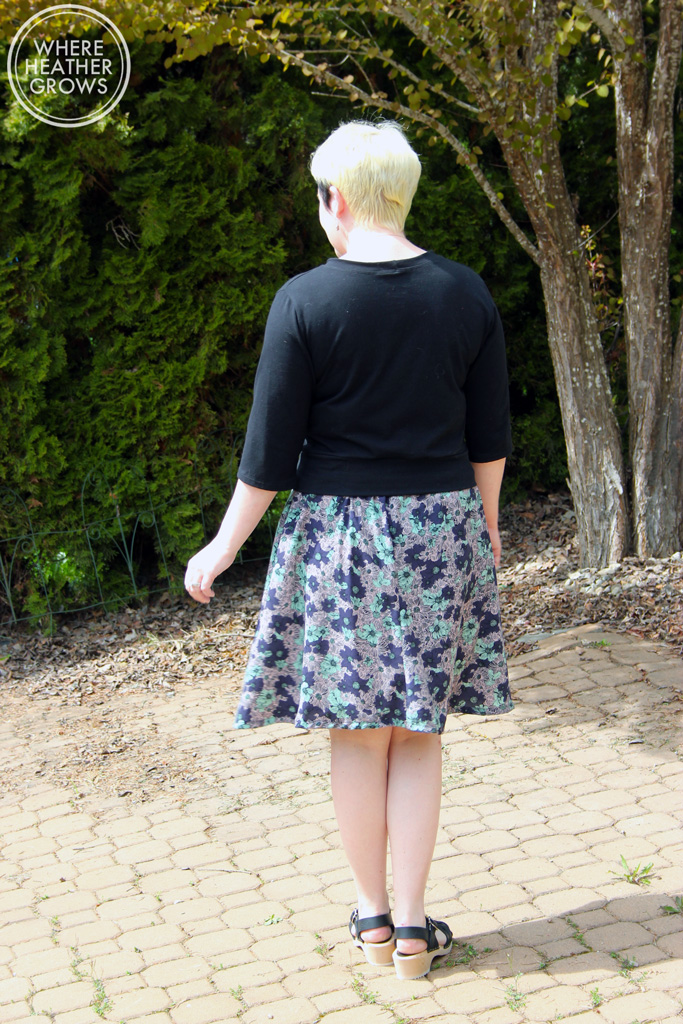
IMG_6956And speaking of bras, finding the right one to wear with this dress was a little tricky. Most of my bras are full coverage and I found that either the top of the cups would peek out at the front or the straps were too wide. I thought I was getting away with this little number, but here it is peeping out at the back. I guess I'll have to make one! ;)
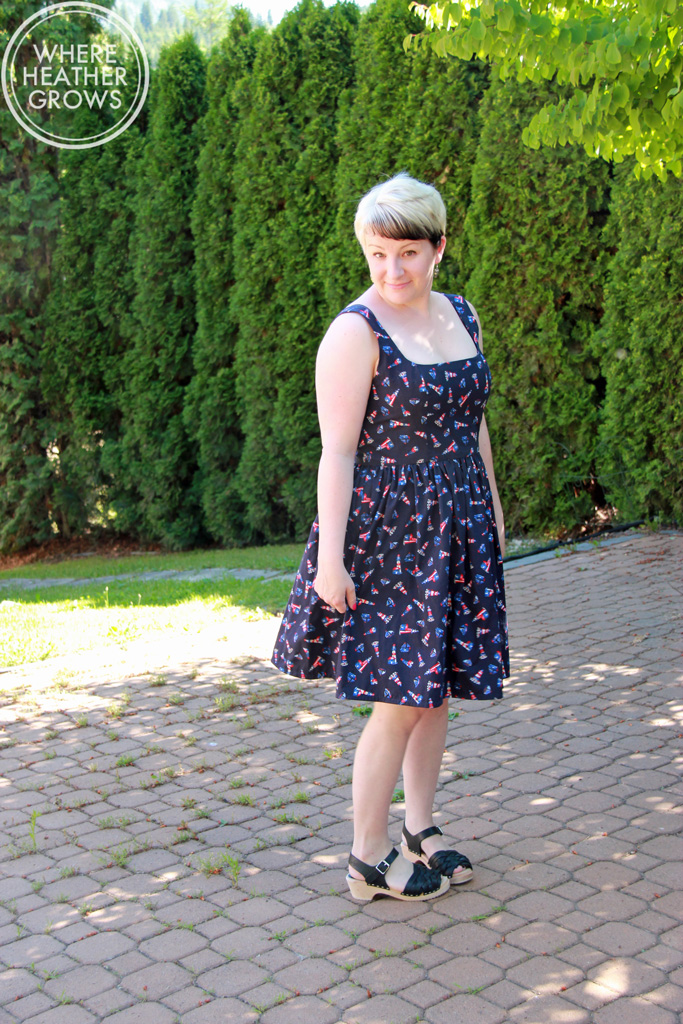
IMG_6958I skipped the pin tucks on the skirt, and shortened it by a whopping five inches! What can I say? I'm short! I hemmed the skirt using bias tape. I love how it looks and that adds a little bit of colour to the inside of the skirt.
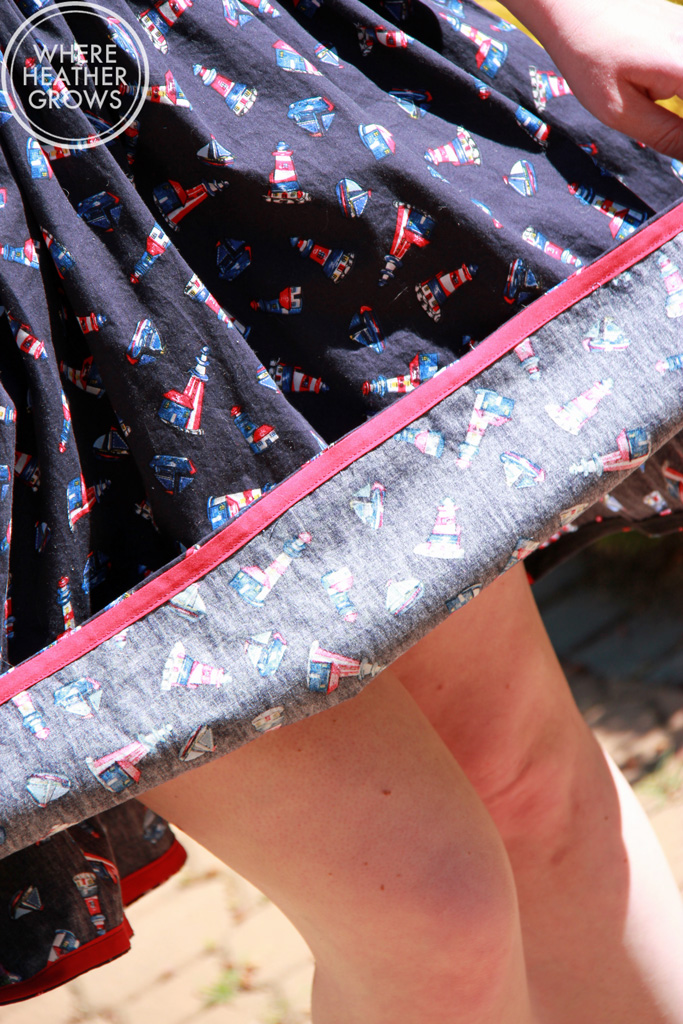
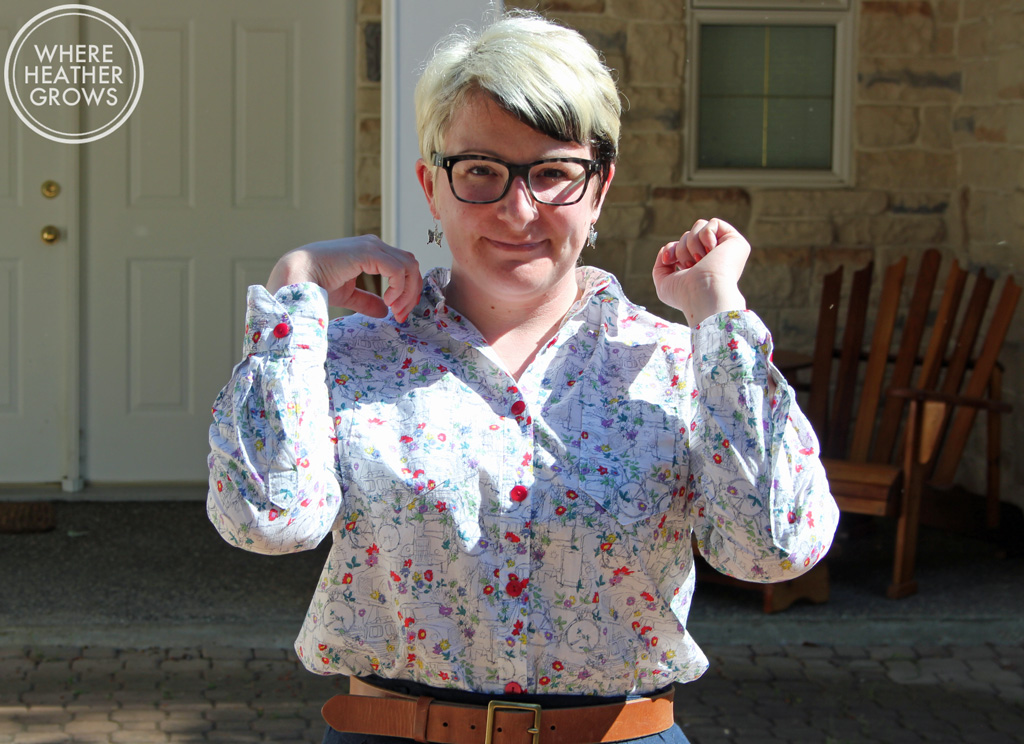
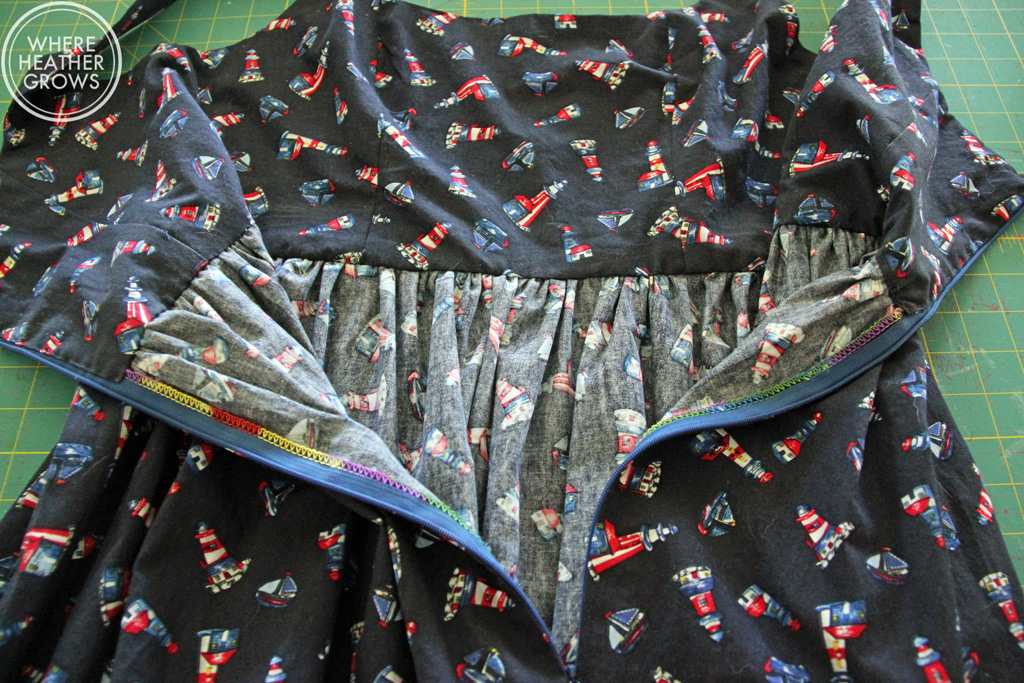
IMG_6972This fabric is a lightweight cotton from my local Fabricland, which I got on sale. Yay! I thought it was pretty cute with the lighthouses and I totally had this pattern in mind when I bought it. The bodice of this dress is lined which is how you finish the neckline and armholes and it gives a super neat finish on the inside. It does require a bit of hand sewing, but I quickly discovered that it is totally worth it. I am really proud of how lovely the insides of this dress look, so proud that I even took a photo.
IMG_7010For my second version, I went with the same skirt, but the sweetheart neckline.

IMG_6973This time I decided to shorten the straps to see if that would make a difference and keep them on my shoulders.
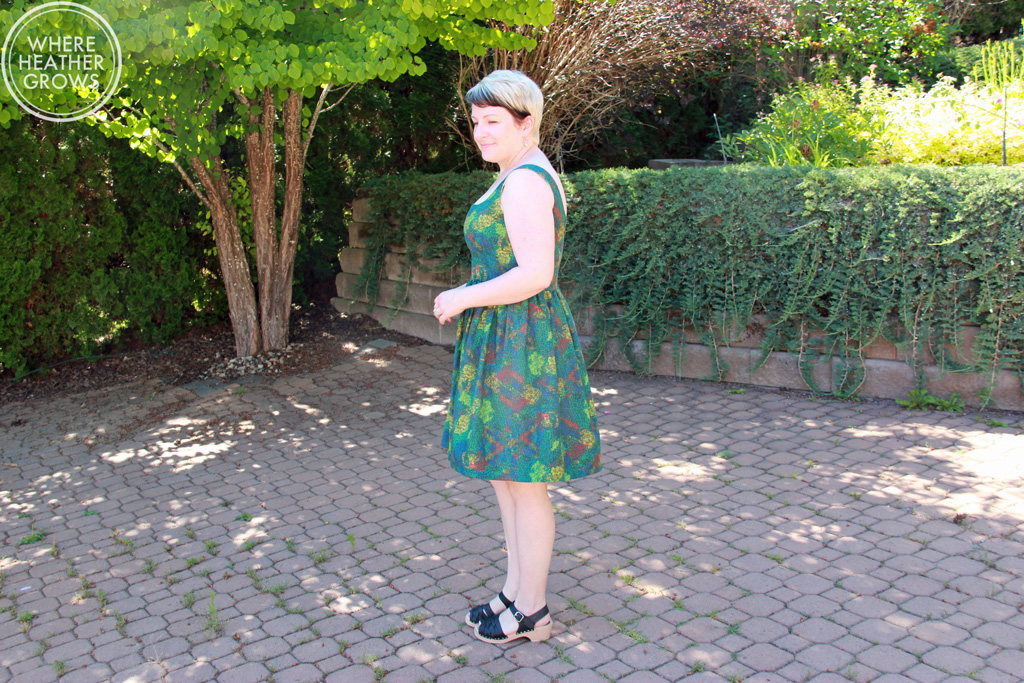
IMG_6977I just cut a 1/2" off the pattern pieces, so that removes an inch total. I think it helped, but I still think if I had done a proper FBA, the straps would be a little closer to my neck and that would resolve the problem.

IMG_6979Oops there's my bra strap again!

I totally screwed up the lining/finishing on this bodice, so the zip doesn't look nearly as nice as it should. After you finish the armholes and neckline, you are supposed to only attach the outer fabric to the skirt leaving the lining free, then you insert your zip, and hand sew the lining down. This gives a really nice finish, but I made the mistake of attached the lining and the outer fabric all in one go and I didn't realize what I had done, until I had serged everything. D'OH! Needless to say, no picture of the insides of this one. It's fine, just not nearly as pretty as my first one.
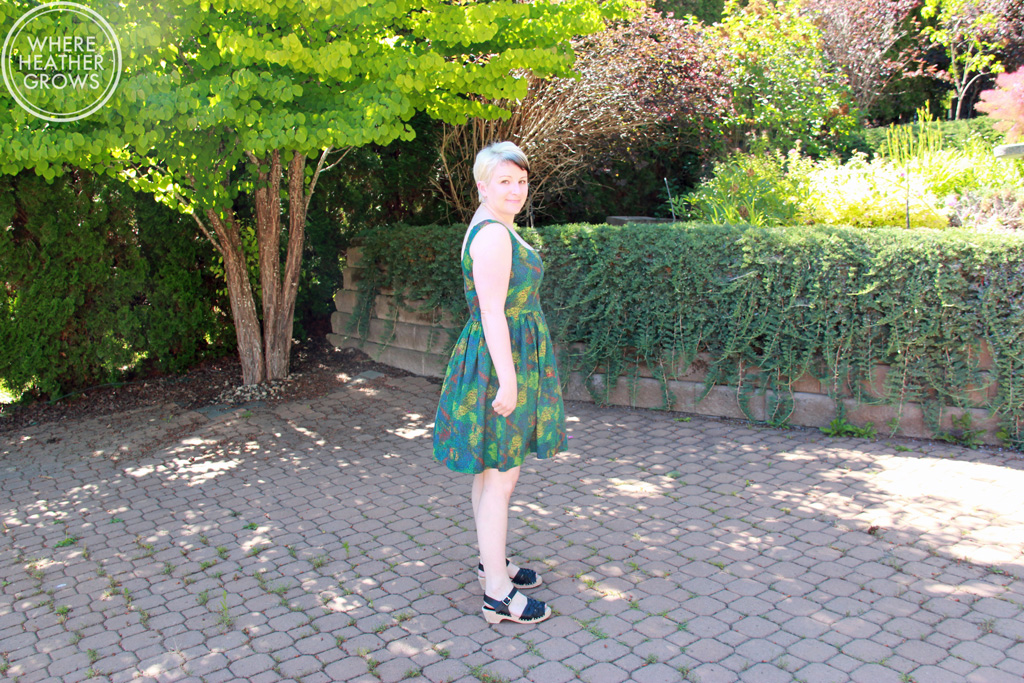
IMG_6981The fabric for this dress came out of the clearance section at this super cool store in Salmon Arm. It's got all kinds of quilting fabric, yarn, sewing notions, and scrapbooking stuff. It's really big and super fun to browse around. If you ever find yourself in Salmon Arm, I would recommend that you stop in. The lining is a pale yellow Art Gallery cotton I had in my stash.
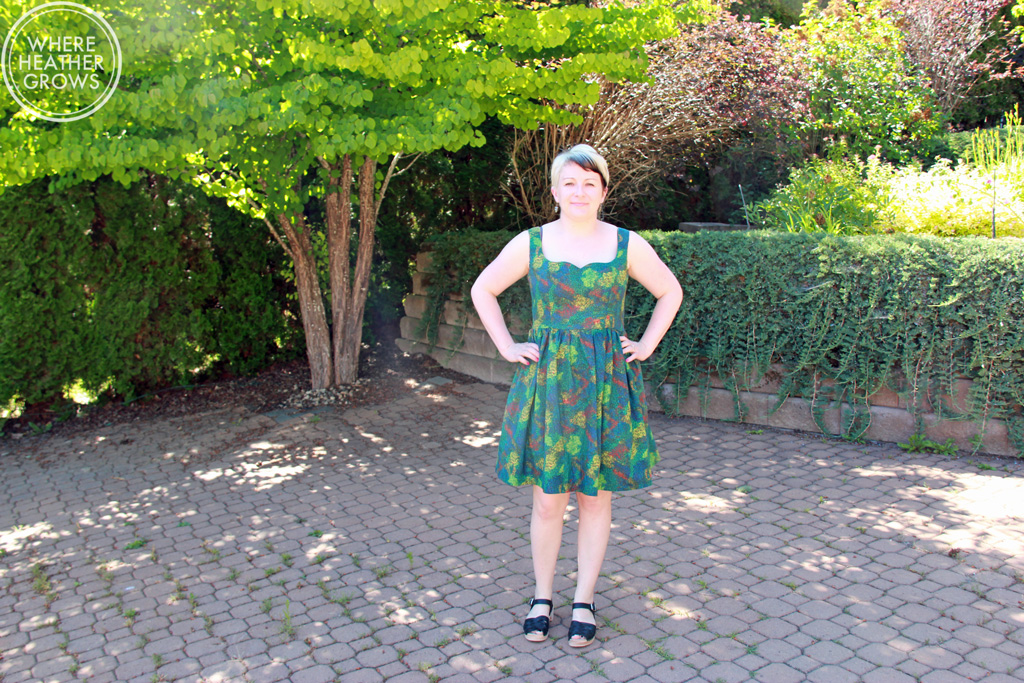
IMG_6975I think this dress is the perfect combo of sweet and sexy. For my shape, I love the fit and flare style, but I am interested in trying the tulip skirt version too. I just have to find the right fabric.

So my love affair with By Hand London dresses continues! I'm actually really kicking myself that I didn't buy Flora before they discontinued the paper patterns. I can still buy it as a pdf, but I really loved their packaging. Oh well, live and learn - this lesson only feeds my compulsive pattern addiction.

Have you tried any By Hand London patterns? Which is your favourite?

Oh, I almost forgot, one more thing: did you hear about the International Anna Dress party happening on Instagram? It's being hosted by my pal Elle (along with two of her friends) and it's a great excuse to sew an Anna if you haven't already and to join in the fun. Plus there's a chance to win prizes. Anyway, if you are interested head over to Elle's blog for all the details.

Hope you all are have a lovely week!

My #sewingdare: The Waver Jacket

A few weeks ago, Gillian over at Crafting A Rainbow, issued a little challenge to the sewing blogging community: a sewing dare. Just like Truth or Dare at a girlie sleepover, but without the truth and probably less humiliating than some of the things my adolescent friends came up with. Anyway, Gillian specifies that the sewing dare should be something challenging and out of your comfort zone, but still fun. I asked Gillian to give me a dare, and after a bit of thinking, she decided that a good dare for me would be to sew outerwear of some sort. She's good! This was the perfect challenge for me as I have wanted to take a stab at sewing (and lining) a jacket, but have been too chicken to do it. This was just the push that I needed. After a lot of humming and hawing, I finally settled on one of Papercut Patterns' latest releases: the Waver JacketIMG_6841To be completely honest, I wasn't overly enthused with the sample of this pattern on Papercut's website. It looks very lab coatish, but I decided to look past the sample and use the line drawings to visualize a nice spring/fall jacket. Because I was looking for a lighter jacket, I decided to go with the short, drawstring version of the Waver (although I may end up giving the other version a go in a more wintery fabric - it looks quite cute too).

IMG_6828I had some really nice cotton twill in my stash that I bought locally, and I thought it would work perfectly for this pattern. I've never worked with twill before and it's actually really nice to work with - a lot like denim. This stuff is the perfect weight for a jacket, and I can't really describe it, but it has this kind of natural smell to it. It's not a bad smell, just a distinctive smell, kind of like raw denim.  It reminds me of my Dad for some reason. I think maybe he had twill coveralls for working in the garage or a twill jacket or something, because every time I smell this fabric I feel really nostalgic for my Dad. I always find it so interesting that a smell can bring back a really clear memory, or even just a familiar feeling. But anyway, I digress, back to the jacket.

IMG_6830The pdf pattern went together really quickly, and easily ( I really should by stock in Scotch Tape). The only other Papercut pattern I've used is the Rigel Bomber, and I had the hardcopy for that. I am pleased to say that the pdf, was just as nice to work with as their beautifully packaged paper patterns. And there's nothing like the instant gratification of a downloadable pattern. The instructions are very clear and have nice diagrams too.

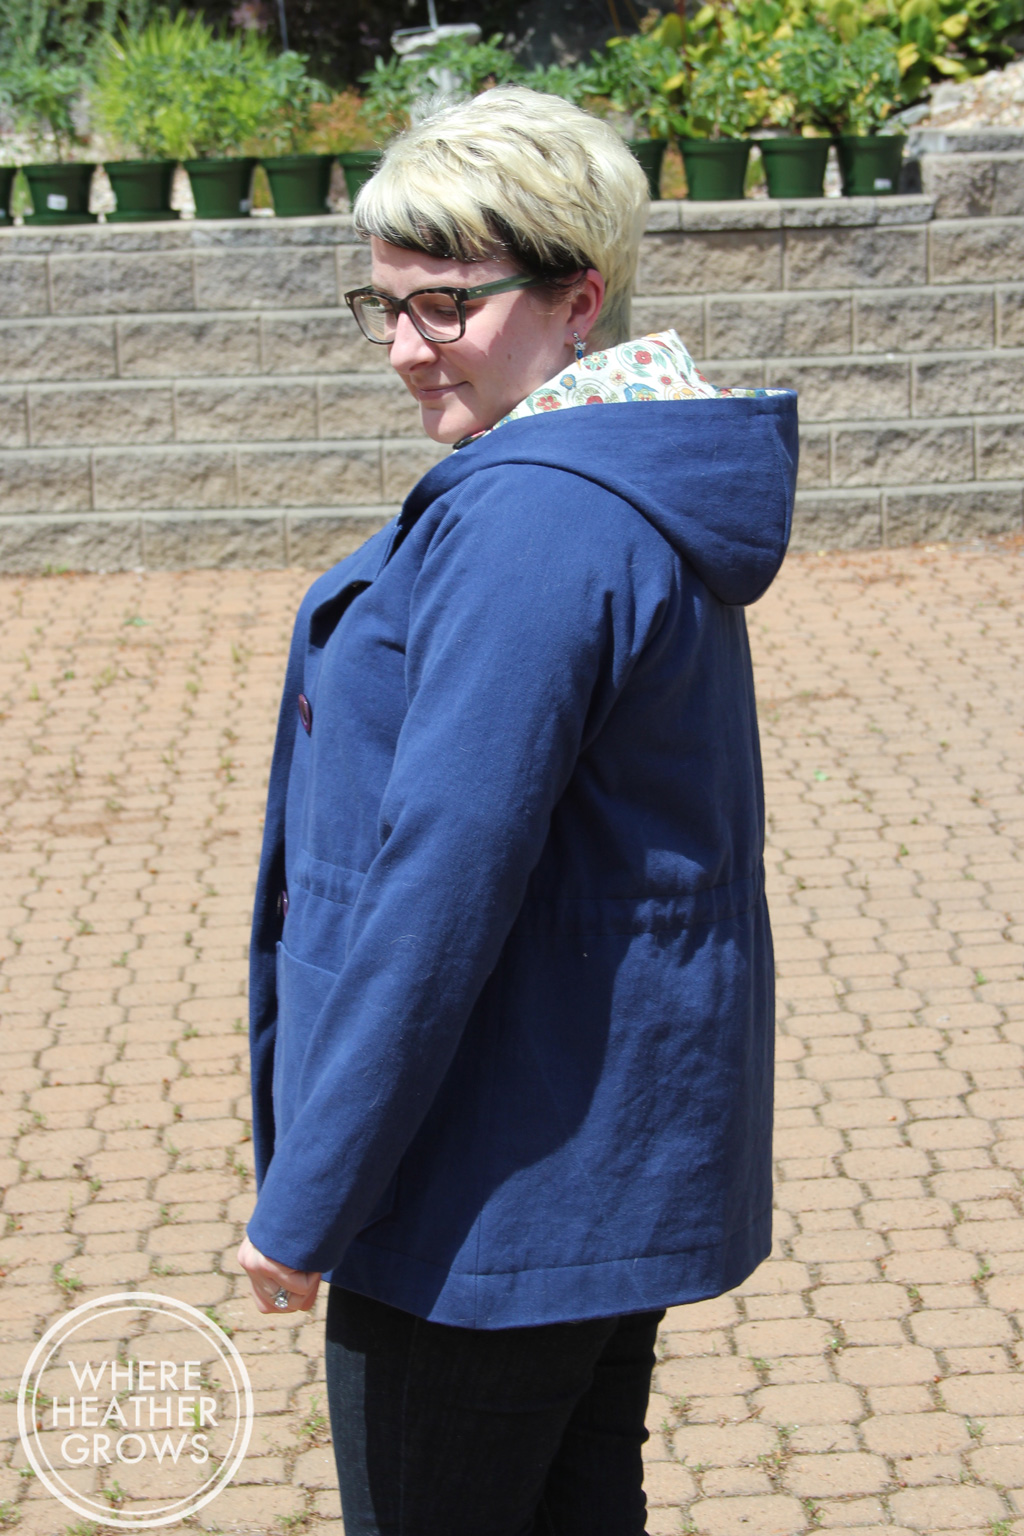
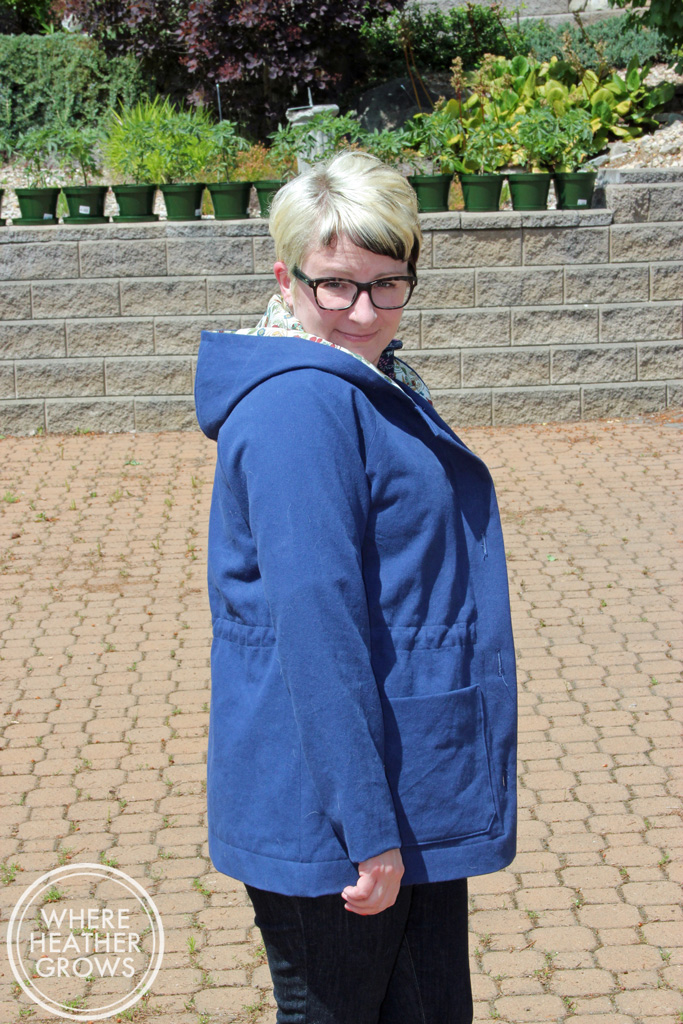
IMG_6844I chose my size based on Papercut's sizing chart (the medium), but once I had the shell made and tried on, I realized that it was HUGE! Like a massive tent - I'm not kidding!  I quickly asked my Instabuddies (I am such an instagram junkie and I love the little community of friends I've got going on there - so great for sewing questions and support), and most people that answered my call mentioned that Papercut Patterns tend to fit on the larger side. D'oh! Maybe I should have asked that question before I started. I ended up increasing the side seam and sleeve seam allowances by a whole inch! That seemed to work so I did the same thing with the lining pieces. Next time I make this coat (and I am sure there will be a next time) I will probably size down to a small or even (GASP!) an extra-small. I'll take the time to measure the pattern pieces and decide from there.

IMG_6834I think that the trickiest part of making this jacket was "bagging" the lining. The instructions that came with the pattern are really good, but I really wanted to machine sew the lining to the jacket at the sleeves too. The pattern instructs you to hand sew that part, but I hate hand sewing, so I hit up Google to see if there was another way. And of course there was. I used Jen's tutorial, and it worked out really nicely, although I was sweating while I was doing it. I still had to do a little bit of hand sewing to stitch up the opening you need to leave to turn the jacket through, but that was pretty minimal.

IMG_6836I used a Liberty lawn I had in my stash for the lining and it feels amazing, plus I think it goes really well with the blue outer fabric. As you can see, I don't have toggles for the inner drawstring yet. I just haven't been able to find any that I like, but I will. For now, I just cinched the drawstring and tied it in a knot. Not overly professional and it doesn't work quite as well as the proper toggles will, but for now no one really sees it, so I'm okay with that.

IMG_6848The construction of this jacket was straightforward and quite speedy. I think that aside from figuring out the lining bit, it didn't take me much longer than making an Archer. Gotta love those raglan sleeves - so much quicker than set in sleeves. Anyway, while the size isn't perfect I am really happy with the finished product and I am looking forward to wearing it a lot. I made a couple of minor sewing mistakes with this jacket (my seam ripper really is my most used sewing tool) as this was my first run through, but I expect things will go smoother next time around.

I wasn't completely sure this jacket was going to suit me right up until I finished it. I tried it on for John before I put the buttons on, and we were both like, "eh, it's okay...". But once I cinched up the waist and added the buttons we both changed our tunes. It's amazing how such a small thing can totally change the look of the jacket.

This jacket makes me really happy and has rekindled my love for Papercut. I now really want to make another (more attractive and properly fitting) Rigel bomber, as well as try out some of their other patterns too. Plus, this jacket reminds me that I am part of such a great community of sewing bloggers, and Instagram sewers, and I love that! You guys are so great!!

Anyway, thank you Gillian so much for the dare, it was a lot of fun, and I learned a lot too!

Have you participated in this daring challenge, if not would you like to? Gillian set the end date as May 31st (I'm squeezing in just under the wire) but I highly doubt that is set in stone. So if you'd like a dare, just ask. Thanks for reading along, I hope you are enjoying your weekend!

Heather's Tips for Sewing Jeans

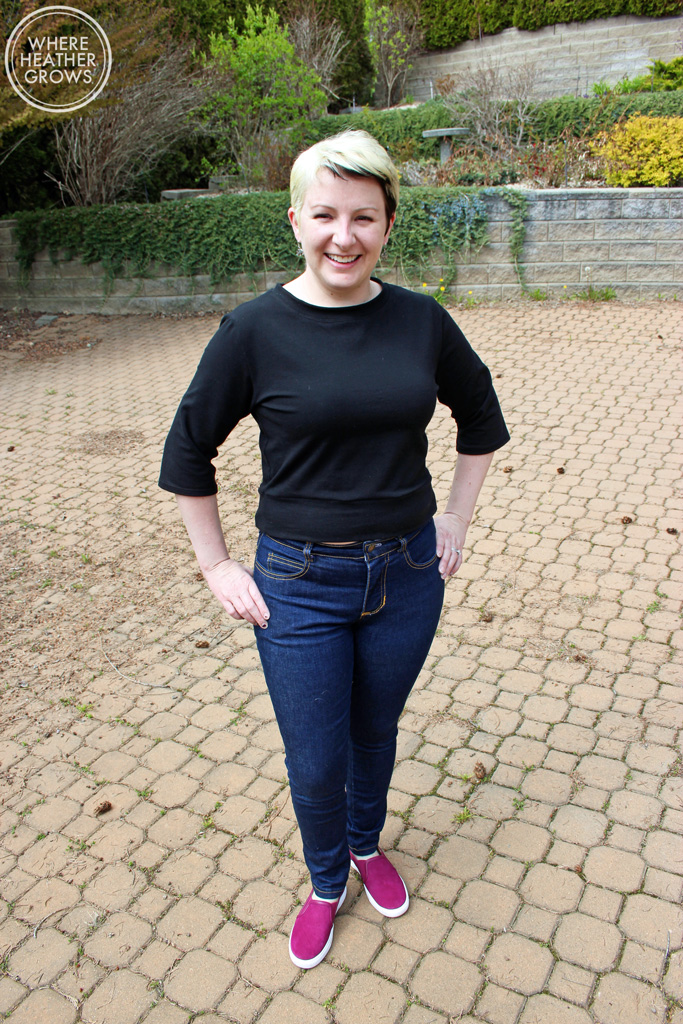
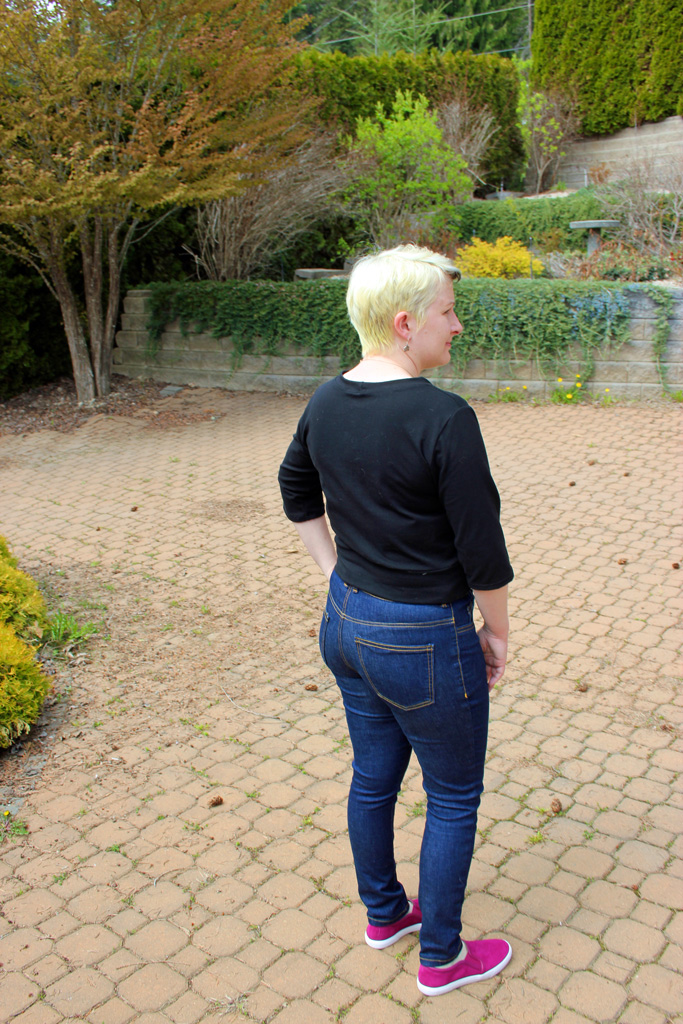
Hello my friends! I have been trying to write this post for quite awhile now, but I just haven't been feelin' it. I just can't seem to get into writing mode lately. My sewing mojo is alive and well, I have been sewing up a storm, but I just can't get my head into writing gear. Anyway, I have loads of projects to share with you, but I haven't really photographed any of them. The weather has been either way too sunshine-y for good photos or it's been raining. Plus I tried a new face cream and cleanser about a week ago, and I had a really bad reaction so I haven't feeling very photogenic especially not in front of my DSLR. Anyway,  my skin is finally starting to settle down, so I'll try to get some posts in this week. Note to self, change is bad. Anyway, that's what's up with me, now let's get down to business. I know that there are already a number of posts out there with tips for sewing jeans, but I felt like after making a number of pairs I should add my two cents. For myself, sometimes I can read the same tip written by a few different people, but it doesn't click until the writing makes sense to me, and I find that everyone has a different perspective, so I like having a few different articles out there to refer to. So here we go with mine:

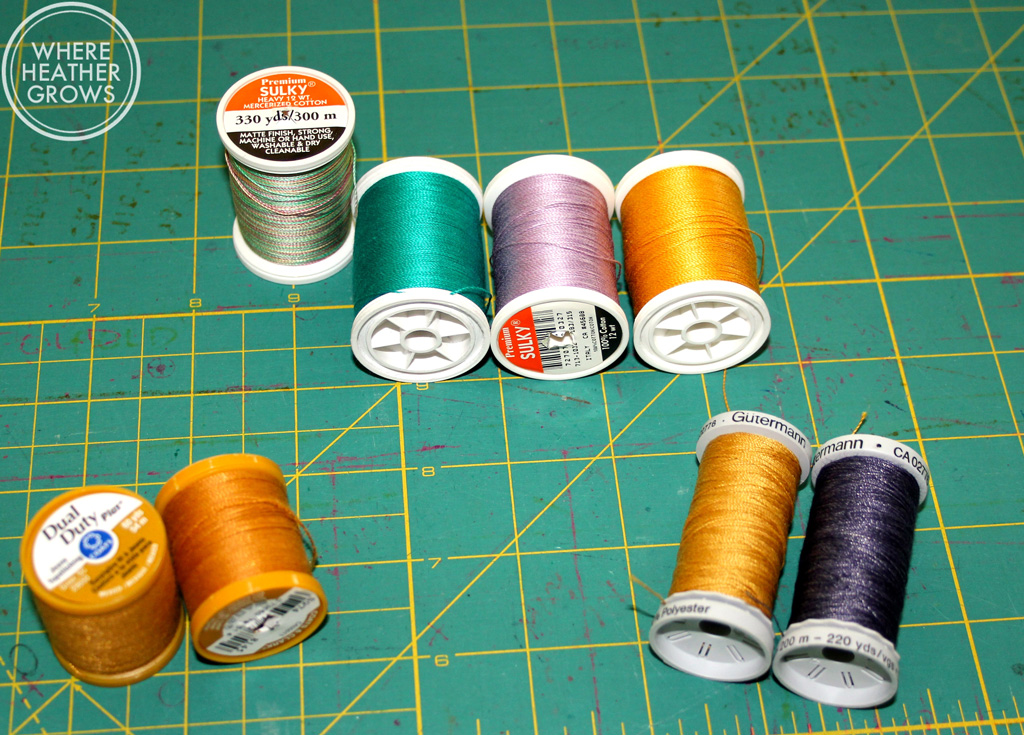
  • Topstitching Thread - try different weights and colours, and don't be afraid to try different brands. I love the Gutterman denim topstitching thread that you can find at JoAnn's or Fabricland, but there aren't a ton of colours available. I ended up chatting with the lady who sold me my Pfaff about it, and she suggested a heavyweight cotton quilting thread (Sulky 12wt.). It comes it tons of different colours and my machine loves it. It sews really well and I don't struggle to make bar tacks or button holes with it, plus it comes in variegated rainbow so you gotta love that! I have also tried the Coats & Clark denim thread and had lots of luck with it too. I should also mention that I use navy thread in my bobbin, or sometimes I use the Gutterman denim thread that is a little bit lighter weight than the topstitching thread and it works really well too. Also, bear in mind that you may have to play with your machine's tension, so it's a good idea to have your machine's manual handy and try some test stitches before you start.
IMG_6811
IMG_6811
  • Needles - I have found that a dedicated topstitching needle works the best. And I try to use a new one for each pair of jeans I make. I have tried sewing jeans with a denim needle, and a larger universal needle, but neither seem to work as well as a  proper topstitching needle. So if you are finding that you are having troubles, changing your needle is an easy thing to try.
IMG_6813
IMG_6813
  • For beautiful looking topstitching, lengthen your stitch - at first I really didn't want to do that. I don't know why, but I just thought a 3.5-4mm stitch looked way too long. But after making a of couple pairs now, I know it's not. It might look weird at first when you are sewing, but once you have your jeans constructed, and you put those bad boys on, a longer stitch length looks better. Check out a pair of RTW jeans, and compare. Once you have your machine set to where you want it for topstitching and your stitches look the way you want them too, take a quick cellphone pic of your settings. It's an easy and quick way to refer back to your settings. When you are going back and forth with changing thread, or maybe you are sewing over a few days or weeks, you know exactly where everything was set. Maybe it's just me, but I've forgotten exactly what length I've set my machine to, and then I've had to waste time figuring it out. It's also nice to do for your bar tack stitch setting too.
  • Slow down - This is something I am constantly working on with pretty much everything I sew. Sometimes I just get into "must finish this right now" mode, and I put the pedal to the metal, and zoom away. With topstitching, you really need to take your time to be accurate and straight. My sewing machine has an option to slow the speed down, so when I'm making jeans, I always turn the speed down.
  • I think one of the trickiest parts of sewing jeans, is topstitching the fly front. I have found that if I mark my lines with chalk (or whatever removable marking tool you would normally use), and then start from the centre front at the bottom, things go more smoothly for me. I don't know if it's because I get the curve out of the way, right away, or if it allows me to see better. But starting from the bottom seems to garner the best result for me. Don't be afraid to play around with the direction of things and find what works best for you. Oh and really try to make sure you catch that fly facing underneath too, that helps things to stay in place better when you wear the jeans.
  • Bar Tacks - I am lucky enough to have a machine that actually has a bar tack stitch (although it doesn't always work as smoothly as I would like), but if you don't, a tight zig zag stitch is usually what's recommended. Recently I have discovered that a really narrow satin stitch works really well too. I really like how it looks and it's really strong. I used it for all the bar tacks on my last pair of jeans, and it worked really well.
  • Interfacing - do you really need it? There is a bit of a debate about whether or not you really need interfacing for denim. I have tried it both ways, and my finding: use it! I like to use a lightweight interfacing so things don't get too bulky, but you should probably judge it by the weight of your denim. For my Cone Mills denim pair I used a really lightweight interfacing, but for my Girl Charlee denim pair, I used a medium weight interfacing. It helps everything maintain structure and it keeps your waistband from stretching out too much.
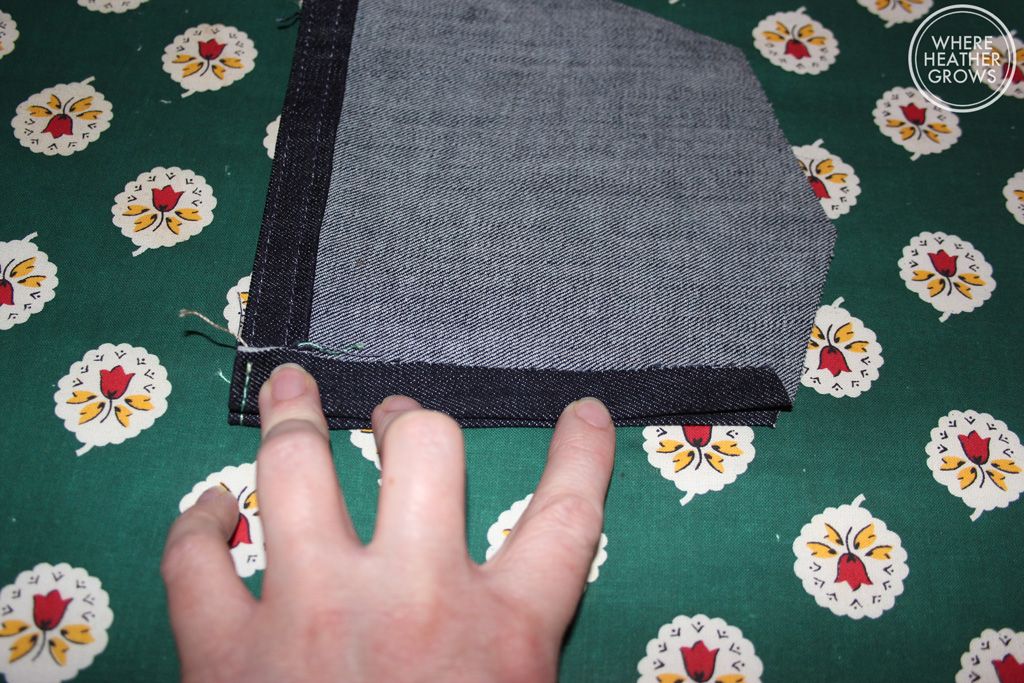
  • I always sew my back legs together, do the middle lines of topstitching and then attach my pockets. This allows me to use the topstitching lines to place my pockets evenly and then things look a bit more centred. If you attach your pockets first, I find one always looks slightly off, or too close to the centre.
IMG_6659
IMG_6659
IMG_6657
IMG_6657
  • I also use my tailor's ham to pin the pockets in place before I stitch them on. I find that because they will be against a curve when you wear the jeans, positioning them on a curve before you sew them helps them to lay better when the jeans are finished.
IMG_6656
IMG_6656
IMG_6655
IMG_6655
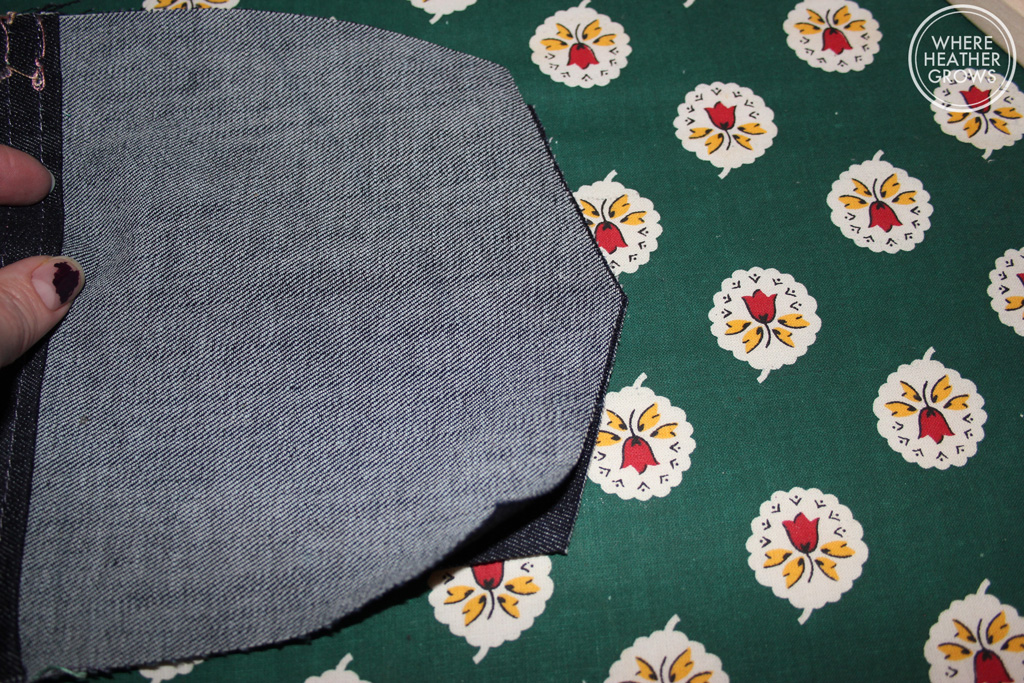
  • And while we are on the subject of pockets, when I am pressing the edges in, I usually eyeball it (Gasp!), but I always line the two pockets up to make sure they are exactly the same. So I fold and press one pocket and then put it underneath the other one as a guide. Does that make sense? Here are some photos so you can see what I mean:
IMG_6653
IMG_6653
IMG_6654
IMG_6654
  • Another thing I like to do is I lengthen the belt loops a little (about 1/2" to 3/4" each) and attach them before attaching the waistband. I feel like it just gives them a little more strength, especially if you are someone like me who habitually uses them to pull up her jeans. I'm not entirely sure if it really does add strength, but it makes me feel better so that's how I do it. Here's what it looks like:
IMG_6492
IMG_6492

So you sew them to the pants, then you attach the waistband, and finish off the belt loops.

IMG_6507
IMG_6507
IMG_6510
IMG_6510
IMG_6513
IMG_6513

If you find that your belt loops are too long, you can always trim them off at this point.

IMG_6511
IMG_6511
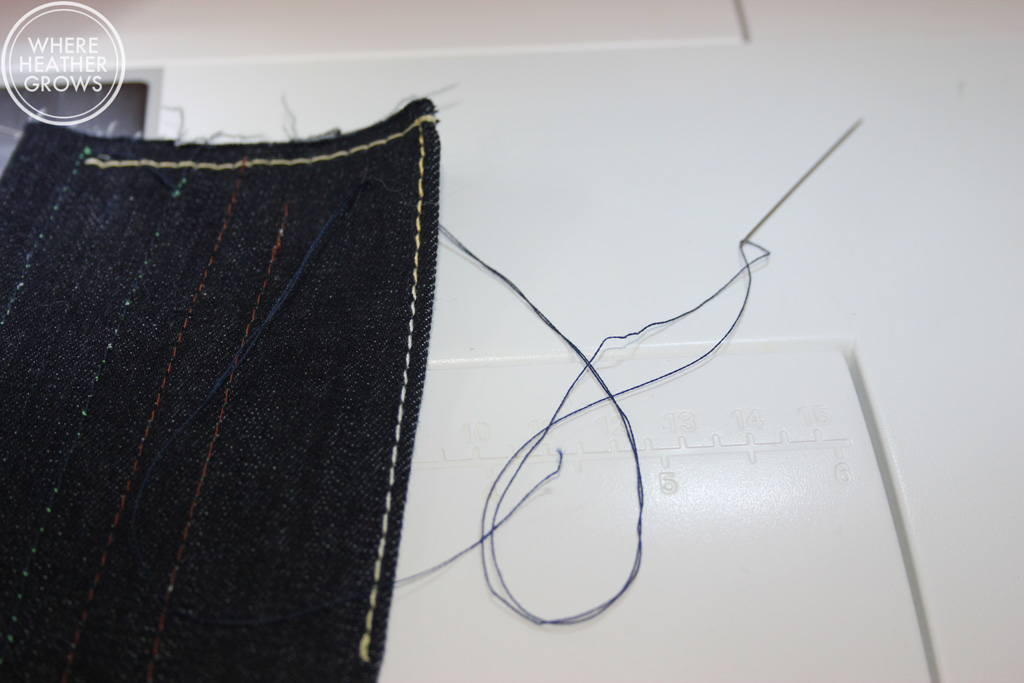
  • And finally, one more thing: sometimes when you are topstitching especially at the corner of the waistband, your machine can kind of "eat" your fabric or the feed dogs don't quite feed it properly, and normally you might pull your threads to get things moving (like at the beginning of stitching a seam), but in this case you won't have those threads to pull. So what can you do? Take a separate needle and thread, and thread it through your fabric near the corner, and use that to pull things along. Then you can just remove it, when you are done. You can totally get away with this with denim, but I wouldn't try it with delicate fabrics. Here are some pictures that I hope make this a bit clearer for you - I'm just using a scrap of fabric with some test stitches on it, but I think you can see what I'm doing:
IMG_6851
IMG_6851
IMG_6852
IMG_6852
IMG_6854
IMG_6854
IMG_6855
IMG_6855

Does that make sense? You are just using that thread to pull or guide the fabric so it doesn't get eaten by your machine.

So there you have it, my tips for sewing jeans. I hope you take away at least one thing that might be helpful to you. I really want my blog to be helpful, as well as a place for me to share my projects and communicate with all of you lovelies.  Anyway, if I come up with anything else that might be helpful when I make my next pair, I will be sure to let you know.

I hope your week is going well, and that you having lots of fun with the final days of Me Made May!

Have you made jeans yet? Do you have any tips to share? I would love to hear/read them if you do!

A Couple of Seamwork Patterns & A Giveaway!!

So way back at the beginning of March, Funki Fabrics contacted me with the offer of free fabric in exchange for a blog post mentioning their name and linking to their website. I have never been approached by any company  to do something like this before, so I was extremely flattered to be noticed, but a little apprehensive. It did feel good to have a company say that they value my opinion as a sewist, but I do understand that they are getting the benefit of free advertising as well.  I hummed and hawed for about a week about whether or not to do it. I mean there seemed to be a number of Funki Fabrics posts out there already (although not nearly as many as there are now), and honestly, it's not the type of fabric I normally would use (they specialize mainly in athletic and dancewear fabric - and let's be honest I'm not a good enough dancer to need dancewear and I am definitely not an athlete. Gym? What's a gym?). But in the end, the offer of free fabric and curiosity of what it might be like won out, and I decided to give it a go. I know that a lot of people have been made the same offer, so I'm sorry if this post is a bit redundant. A number of bloggers have made leggings and that seemed like the natural choice for me too, until I spotted this amazing cotton stretch fabric. I wasn't entirely sure what it would be like, but I requested it hoping it would be more my style, along with two other lycra  prints for leggings (Funki Fabrics offered me 4m in total). Anyway, weeks went by, and no fabric. It seemed like it must have been lost in the mail or something. It was kind of weird, because I have never had anything go missing in the mail, plus around the same time that FF sent out my order, I had ordered some denim from Ditto Fabrics in the UK and it arrived in just over a week with no problems. Luckily, the lovely people at Funki Fabrics were kind enough to send out another package, and it arrived about a week later. I was pleasantly surprised by the cotton stretch fabric, it is super soft and has a great 4 way stretch. I've only washed it once, but it washed up well and seems like it won't pill over time. I was going to make a dress out of it, but I didn't have quite enough fabric for the pattern I had in mind (poor planning on my part). Anyways, as I was browsing through my pattern stash, I was also reading the April issue of Seamwork. So far, I haven't found very many of the Seamwork patterns super appealing, but there was something about that Astoria pattern that finally made me want to try one.  And coincidentally, this Funki Fabrics cotton elastane flexlite was perfect for it. #winning

IMG_6543I had no idea what I would pair the Astoria with, so I decided I would just make the Bristol skirt from Seamwork too. It looked like a pretty good outfit on the model.  I wasn't super in love with the skirt at first glance, I mean it has a kangaroo pocket - interesting detail perhaps, but not necessarily the most flattering. Anyway, it seemed like it would be a quick and easy sew, and sometimes you have to try something to know if you like it.

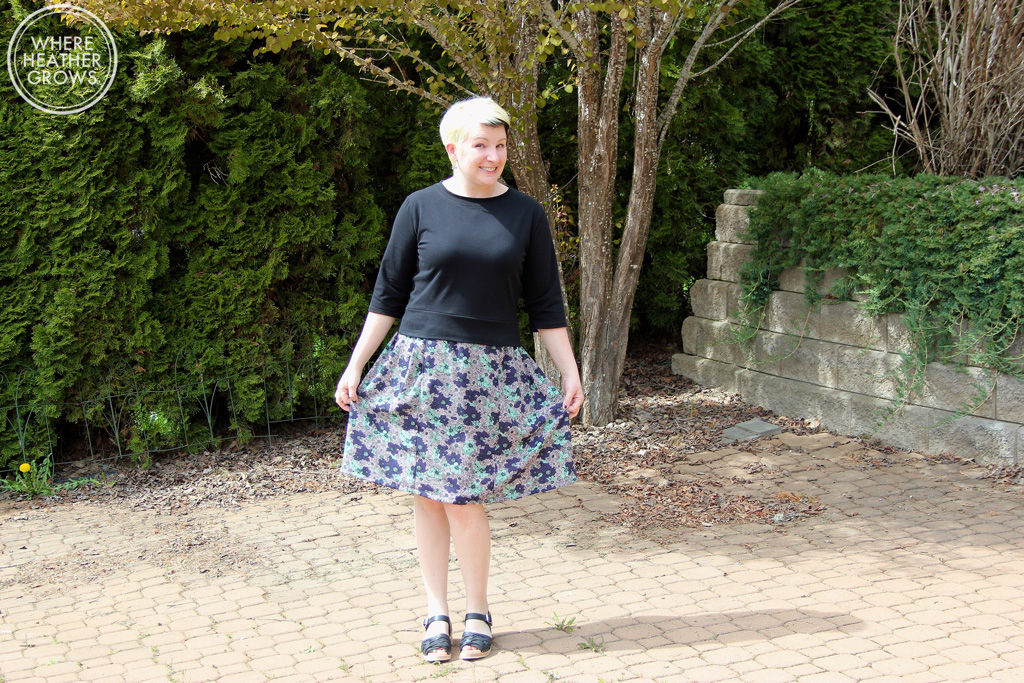
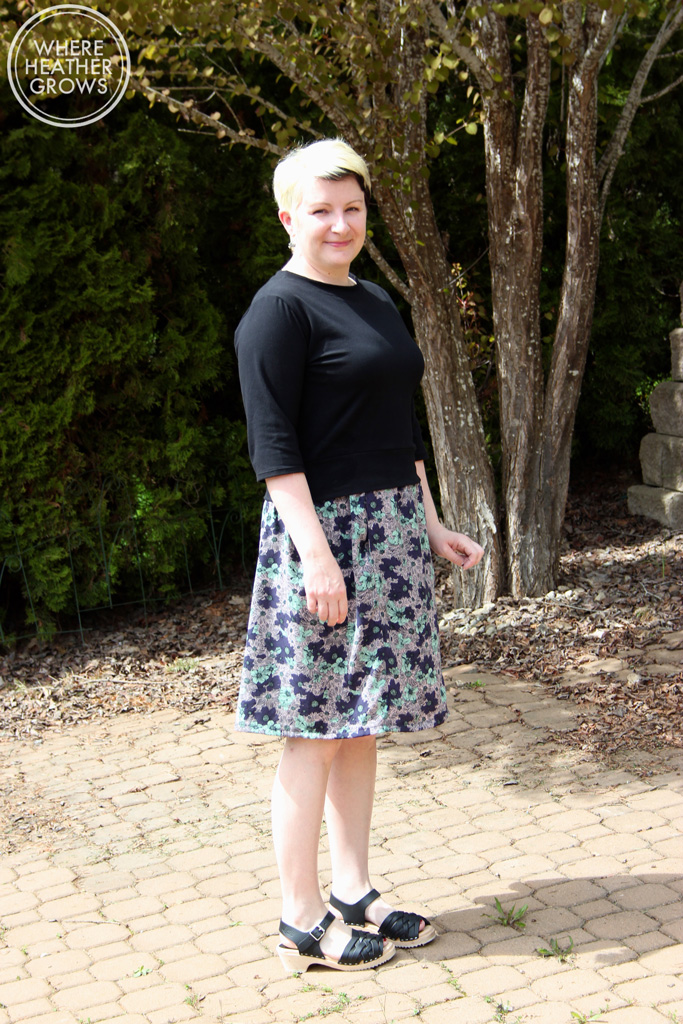
Both Seamwork pdfs went together okay, I had a bit of trouble getting the lines to match up on a few pages, but for the price, I'm not complaining too much. The Astoria was a super quick sew, constructed with my serger and then topstitched with my coverstitch machine. The fabric performed beautifully, and was a perfect match to this little crop top.

IMG_6549When I first tried on this skirt, I wasn't overly keen on it, but looking at it now in these photos, I think it's actually quite cute. I think that it would be better with side seam pockets on my figure. I have a tummy, so the pocket in front kind of accentuates that, rather than flatters, and I'm not 100% thrilled with the elastic waistband either. It's really comfy, but for some reason I find it a bit bulky. I did not like the way the pattern instructions had you attach the waistband. You sew up the back seam, then press it in half, then you put the elastic inside, stretch and pin it in place, then you attach the waistband to the skirt, whilst trying to stretch everything to match. Um what?? That was so ridiculous to me. Why not attach the waistband, leave an opening, insert the elastic, and stitch up the opening. The end result is the same. So weird, and lots of unnecessary struggling - I even broke a needle!! Ugh! Anyway, if you decide to make this skirt, you might want to change that bit of construction.

IMG_6546For Astoria, I made a straight size Large, and I think it fits really well. I am in love with the neckline, the length, and the hemband. For the Bristol skirt, I made a size 12 (based on my waist measurement I should have made a 14) and I would probably would have been happier with a size 10. I also had to shorten the skirt by 3 inches.

IMG_6545The fabric I used for the skirt is a nice rayon challis that John picked out for me at Walthamstow Market. It's nice and drapey and perfect for a summery skirt. I'm not sure how much I will wear this skirt. I'm trying to be a skirt person, but I just don't seem to be. The Astoria on the other hand will probably get lots of wear. I think it will be perfect over dresses and I think it will even work with high-waisted Gingers. I also think you could lose the band and add a skirt for a Moneta-like look.

So back to Funki Fabrics. I also chose two really cool lycra prints to make leggings out of, and I used my trusty Cake Espresso Leggings pattern. I love wearing leggings for lounging around the house, and I wanted to see what this dancewear fabric was really like. I am happy to report that it's super stretchy with amazing recovery, and it wasn't at all hard to work with. I thought lycra would be slippery and hard to cut, but this wasn't at all. I think if you are looking for cool fabric to make a swimsuit out of, or maybe some kind of athletic outfit, or  even leggings, then this is the place for you. My little sister used to be obsessed with gymnastics when she was young, and she lived in spandex outfits because of her dream of becoming a gymnast. She would have loved and outfit made from this type of fabric. It's a little bit pricey (especially with shipping), but in my opinion, worth it for a speciality garment. They also have lots of stretch velvet, and I'm kind of kicking myself for not getting some of it. I may still, we'll see.... Anyway, here's my leggings:

Leggings-CollageYou guys know I have a bit of a batman obsession right? That's what really sucked me in - Batman leggings? Yes please!!

And now what you've all been waiting for: THE GIVEAWAY. Just after I finished up my Astoria, the original package from Funki Fabrics arrived (I know because they sent one via Royal Mail/Canada Post and one via DHL). I'm not sure where it was, or why it took so long to get to me, but it finally came. I offered to send it back to Funki Fabrics as they had already been so generous with letting me try their fabric for free, but they decided that I could keep it and do with it what I see fit. I decided I would do a giveaway.  So if you would like to win an exact replica of my order: 2 metres of a delicious cotton jersey-ish fabric, along with 1 metre of crazy Batman print lycra, and 1 metre of a psychedelic butterfly kaleidoscope lycra print, leave a comment below and I will enter you into the draw.

IMG_6626

I will leave the draw open until Monday May 4th, and announce the winner on Tuesday May 5th. Seeing as it will be me footing the bill for the shipping, I will ship to anywhere in the world so you can enter from anywhere - yay for no restrictions! Good luck everybody and happy sewing!

****This giveaway is now closed - to see who won click here.****

The Southport Dress by True Bias

Hello everyone, and happy Friday! It's bright and sunny here today in #yyc but still quite cool when the wind hits you. The air is fresh, things are turning green and starting to bloom, so it feels like spring. Bring on the light floaty dress weather! As you have probably heard/seen/read, Kelli (of True Bias) has released a new dress pattern! I was lucky enough to be asked to be a pattern tester for this dress, and it was a welcome break for me in between all my jeans sewing. I have been fortunate enough to have pattern tested for Kelli once already, and I really loved the experience. It's pretty cool to get a sneak peek of a pattern before it's released, but it's also cool to see how a pattern is re-adjusted after the designer has gotten a bit of feedback. I really like being a part of the process. Plus I have loved all of Kelli's patterns so far, so I had no doubts that I would love this one too! Anyway, if you are anything like me, you are probably wanting to see what it looks like on as many bodies as possible, so I made sure to get some photos last week so I'd be ready to post shortly after the launch.

IMG_6525
IMG_6525

It was pretty chilly outside when John took these picture of me, plus the sun was in my face so I'm a bit squinty-eyed. Once again that didn't bother Shanny a bit, and she was happy to get into the photos too.

IMG_6524
IMG_6524

The fabrics suggested for this pattern are lightweight wovens; my first instinct was to reach for a light-weight cotton, but I decided to up the ante a little and go with a rayon challis. I don't have a lot of experience with sewing slippery fabrics, so I'm trying to challenge myself a bit in that area. Plus rayon makes for a lovely, flowy summer dress. Anyway, this particular fabric came from "the Man Outside Sainsburys" at Walthamstow Market in London. Not only was I a little out of my comfort zone with sewing this fabric, it's also not in my usual colour palette (do I even have a colour palette? Good question.). I don't wear off-white or cream very often because it washes me out, but this fabric with the bright coloured flowers is really growing on me.

IMG_6531
IMG_6531

I made a straight size ten, which I chose based on my measurements. I didn't make any alterations at all (I didn't even have to shorten it!), and I think the fit is pretty spot on. In looking at these photos, I think it might be just a touch big in the shoulders, but I'm not sure it's really worth messing with as I think it's pretty close. For reference my Sutton blouses are a size 8.

IMG_6528
IMG_6528

I really love the drawstring waist, and how it gives some shape and blousey-ness to the dress. I also love the little button placket and the pockets. Kelli is always really great at adding in little details that make a simple garment special. One of the coolest details, which you can't really see in the photos, is that there are bartacs above and below the pocket opening for extra security. It's a small thing, but I think it looks really neat and professional. If I make this dress in a solid colour, I would be tempted to match the button colour, buttonholes, and bartacs in a contrasting thread, and if you wanted to get really bold you could do the topstitching in the same colour. I think that would just add a little something extra.

IMG_6533
IMG_6533

The instructions for this dress are very clear and straight-forward, although I did space out a little when making my drawstring casing. Looking back at it though, I know that was my lack of reading, not the instructions. Kelli had done a really thorough job with the instructions and definitions of techniques, and it's great that she always includes diagrams. This pattern is rated as Intermediate, and I would agree with that suggestion. It's a bit tricky working with slippery fabrics and making buttonholes and what not. That being said, I definitely think an adventurous beginner could tackle this dress (especially with the upcoming sewalong). Besides, I look at ratings as just a guideline, if you break everything down into small steps it becomes much easier, and intermediate patterns become less daunting. Whenever I am a bit nervous about a new pattern, I give it a practice go. Sort of like a muslin because it allows you to see fit issues, but I like to do all the finishing too so that you can try out any new techniques. And with any luck it will turn out to be wearable (but that's not always the case). There are some cheapie/clearance fabrics in my stash solely for this purpose.

IMG_6516
IMG_6516

I should also mention, that since I made this version, Kelli did some fine tuning with the fit. She lowered the armholes and the bodice a touch and then she lowered the hemline for version A (this version) by about an inch. As you can see the length is perfect on me, but would probably be a touch short for those of you without lollipop guild status.

IMG_6518
IMG_6518

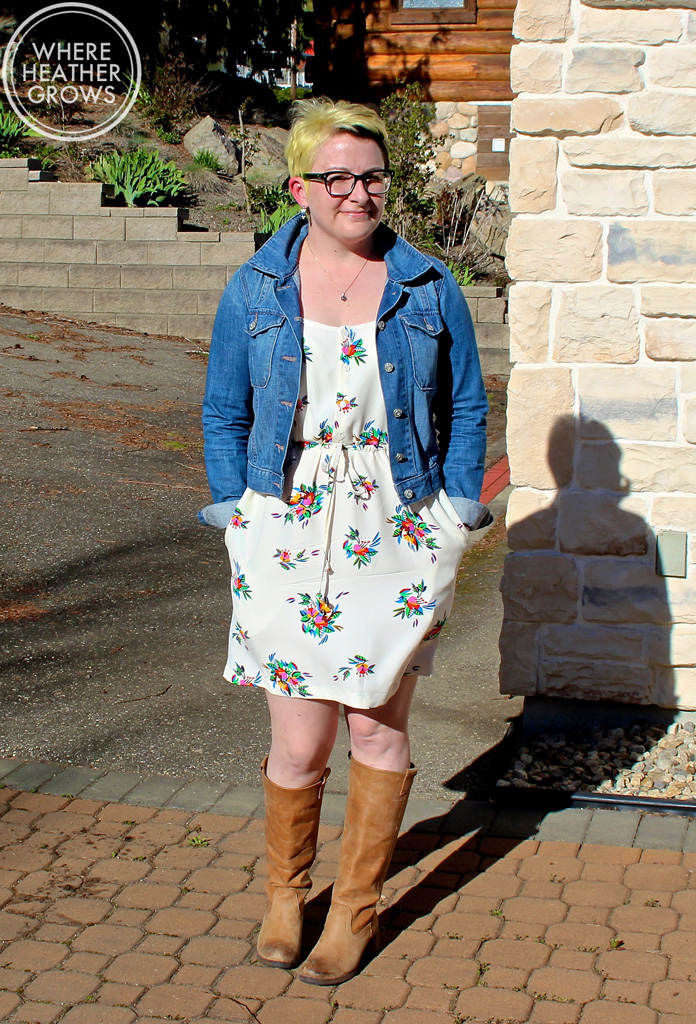
I see this dress as being an easy summer staple with sandals or clogs, but for now I'm pairing it with boots and my favourite cropped denim jacket (which in my opinion goes with everything - although the hubs does not feel the same). And to be honest, the weather here still calls for tights. I was also thinking that you could layer it over a Nettie for an added layer of warmth in the fall/winter. Just a thought...

So this post has gotten a little fan-girly, but what can I say? I love True Bias patterns! Also side note, and total coincidence: I used to be a dental assistant, and the office I worked at (and still go to for dental work) is called Southport Dental. Anyway, right now Kelli has this pattern on sale for 25% off. I think the sale goes until April 26th, so if you are interested in this pattern head on over to her website for more details and the discount code.