I Made Shorts!!

I know, right? I can hardly believe it myself! I made shorts and they even fit!

IMG_4739My goodness, do I look fine in photos. That girl can pose. LOL

IMG_4742Stop you're blinding me with your white legs - please...noooooo.....

IMG_4743Can you tell, John is taking these pictures and I am having too much fun?

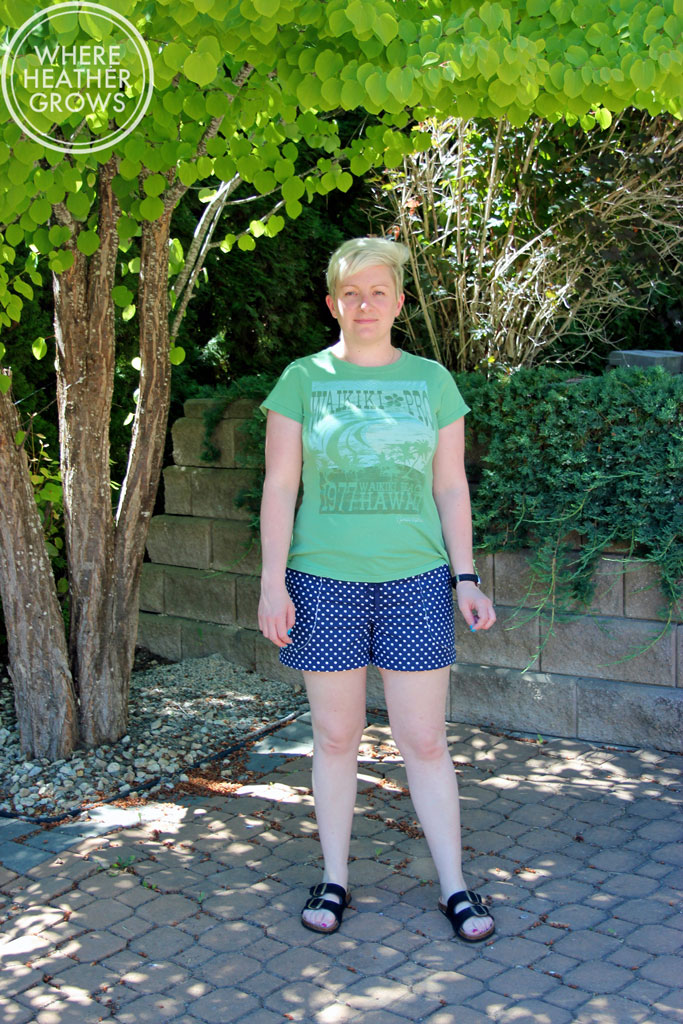
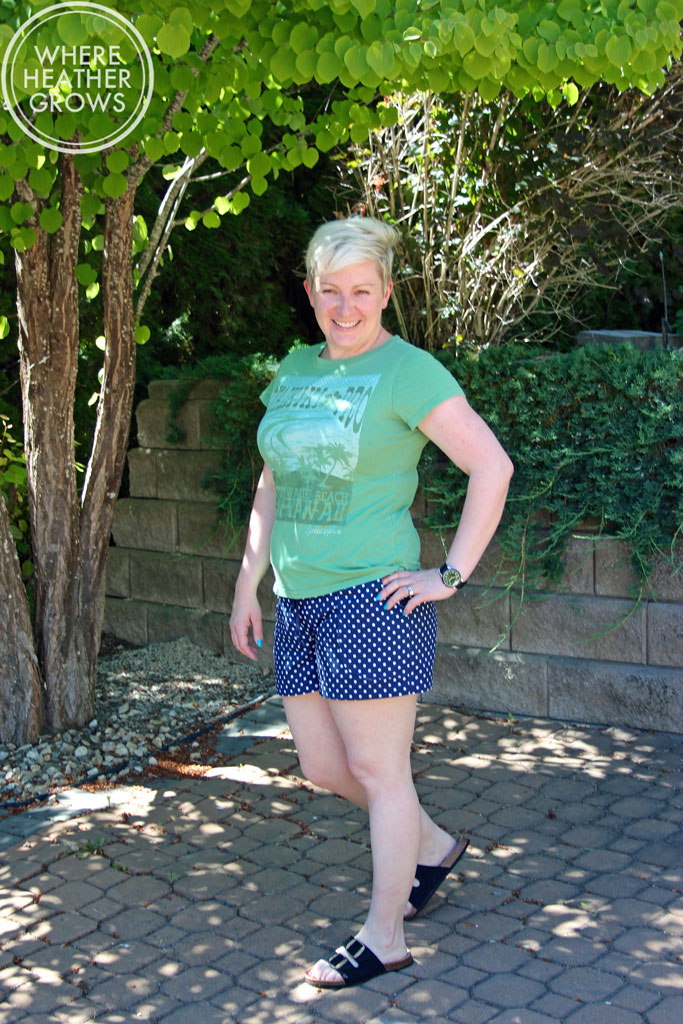
Okay, but seriously, down to business. These are the Juba Shorts by Imagine Gnats. When I first saw this pattern hit the net, I thought, oh what a cute pair of pyjama shorts. And then I thought, not for me, I have too much lounge wear already (and plans for more). But then I saw some other versions cropping up, and Rachel posted a couple of pocket tutorials on her blog, and I thought, I could make these and wear them out of the house! And I could make them the right length and they might actually look good on me. And it soooooo hot right now. (Side note: I have struggled with shorts FOREVER! Every time I try some on they just don't look right, and John crinkles his nose and says, maybe shorts just aren't right for you. At first I thought it was just John being hyper-honest, but then I took the boys shopping with me too, and they said the same thing. I don't know what it is, maybe a proportional thing.)

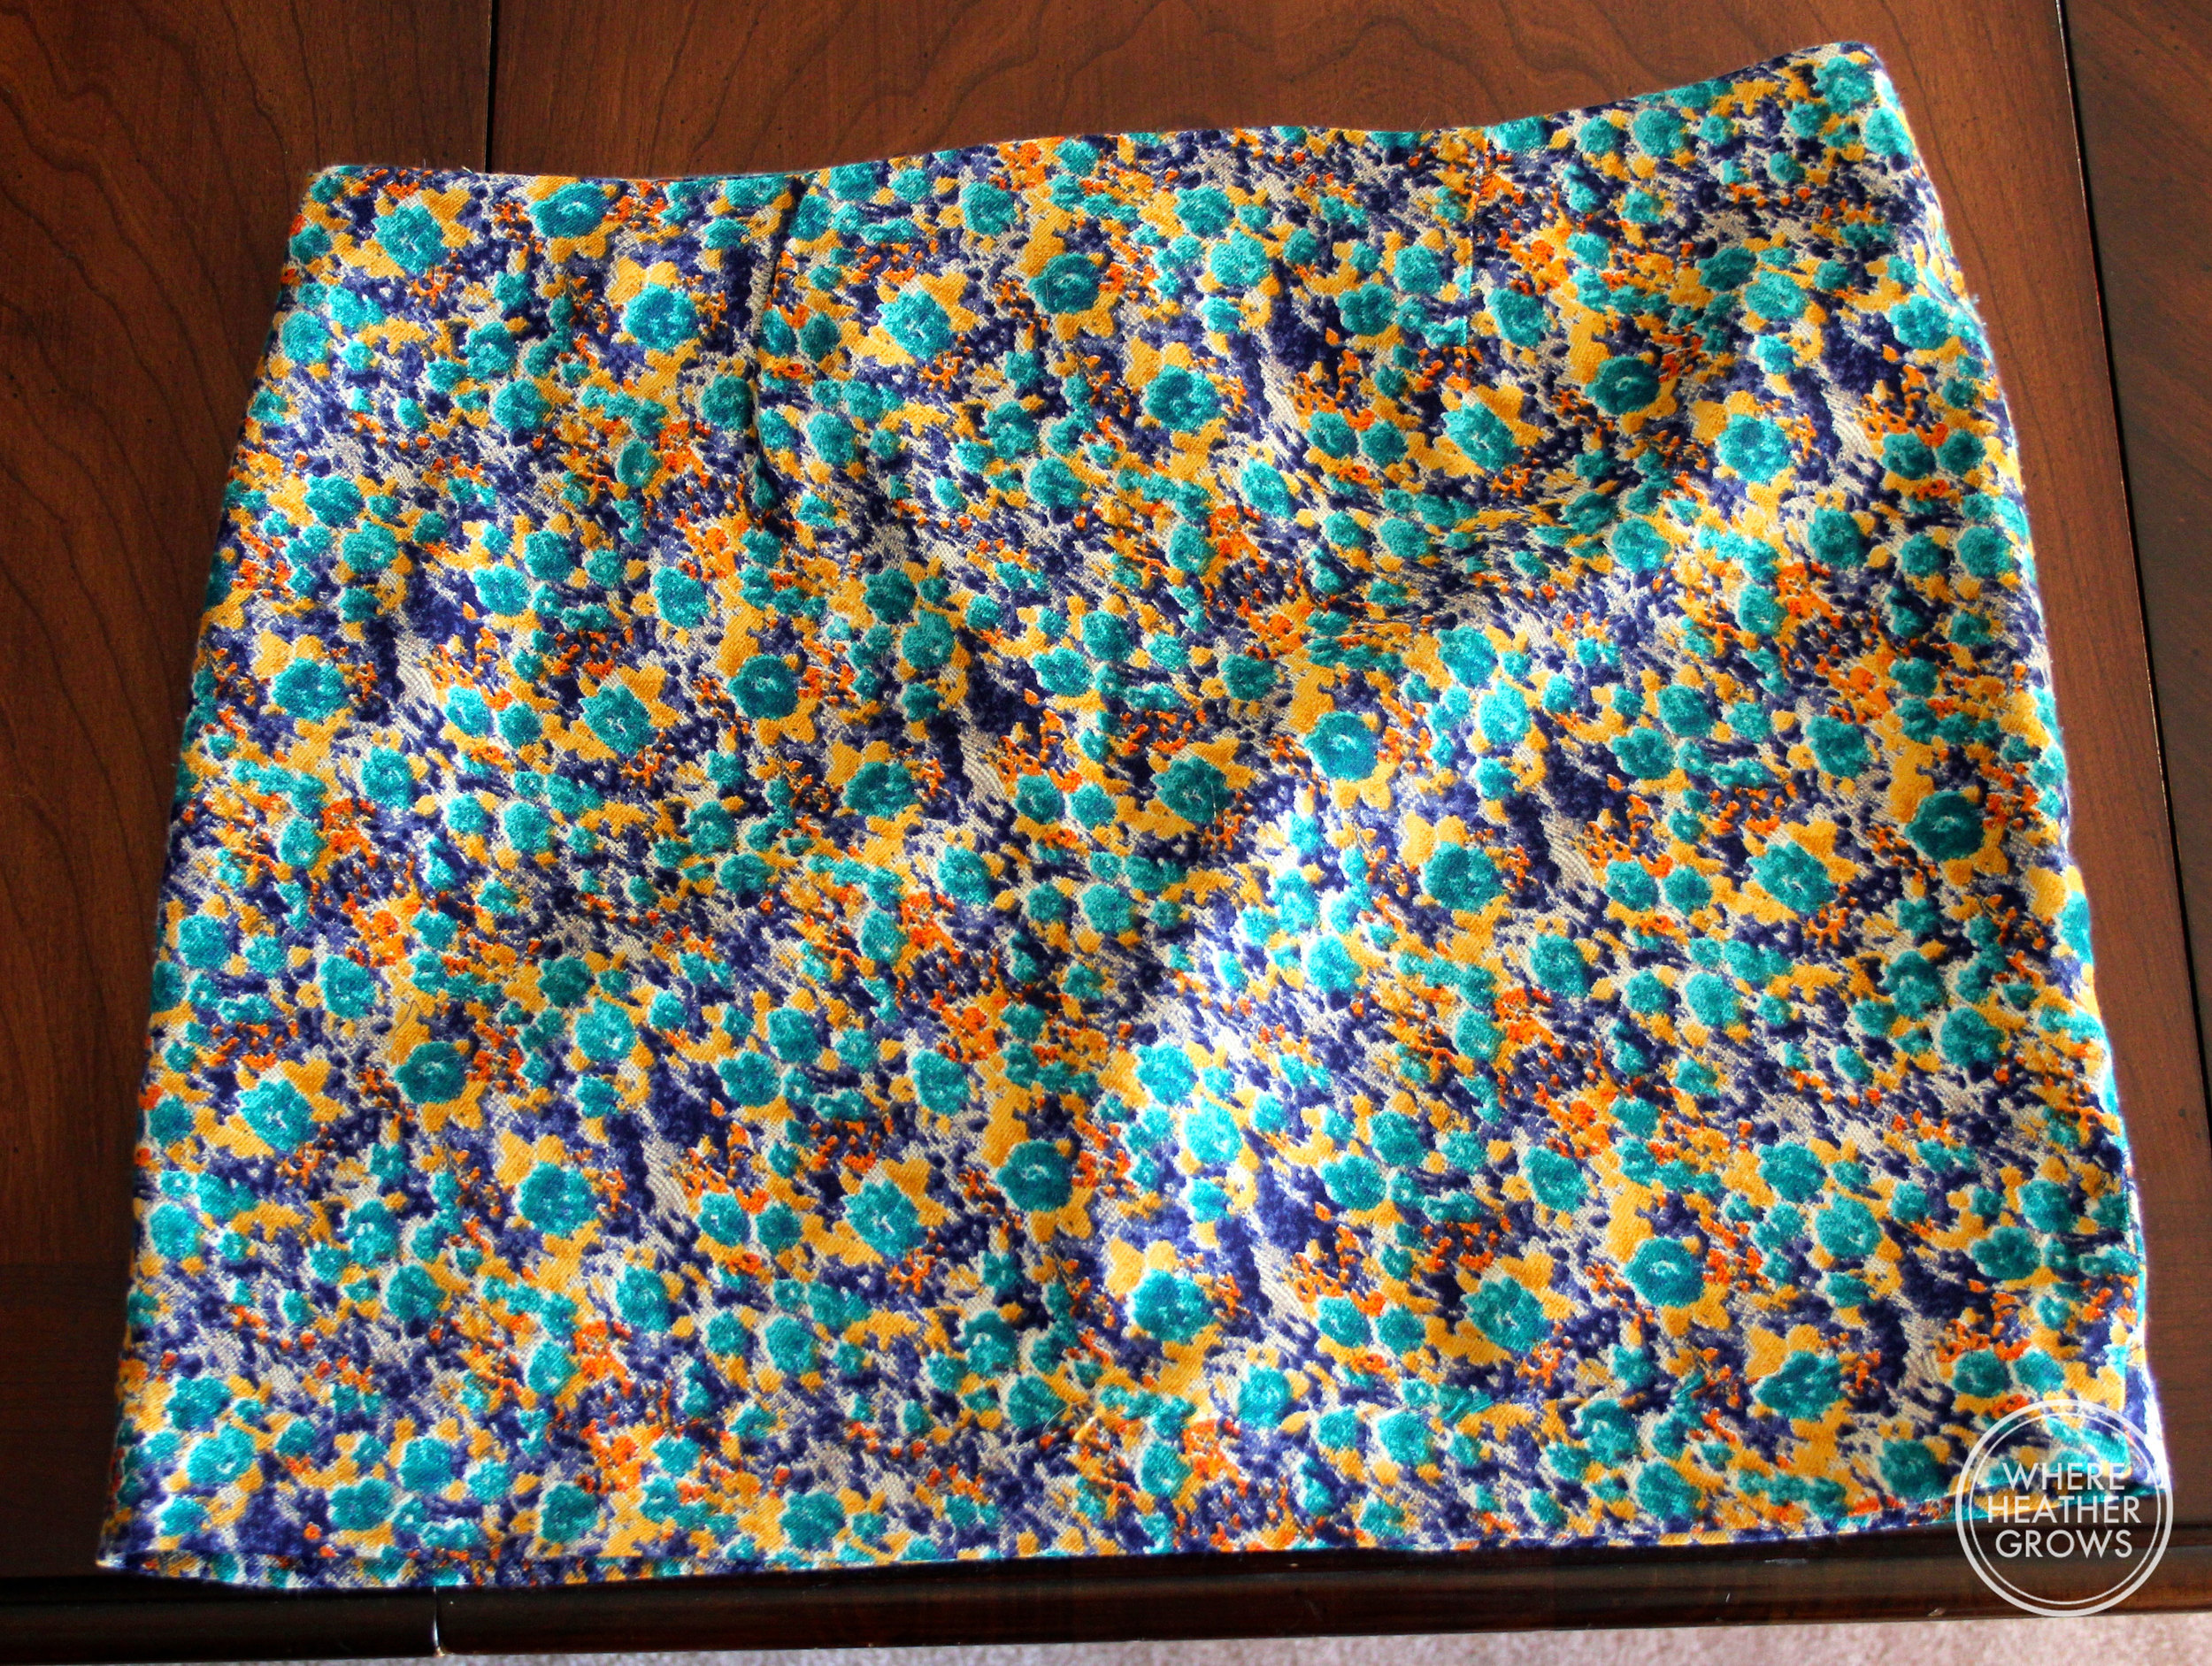
Anyway, I am super happy with how this pair turned out. I used a super cheap, supposed to be cotton, but I think it's polyester, fabric from Denver Fabrics. And while the fabric is kind of rough and scratchy, they turned out so well (and the polka dots are so cute) that I have been wearing them. They're a teensy bit big in the waist, but I think that might be from my choice of tricot elastic (you don't always know until you try right?). It seemed like a good idea at the time.... Anyway, of course I had to make a second pair. And they turned out even better (if I do say so myself).

IMG_4727
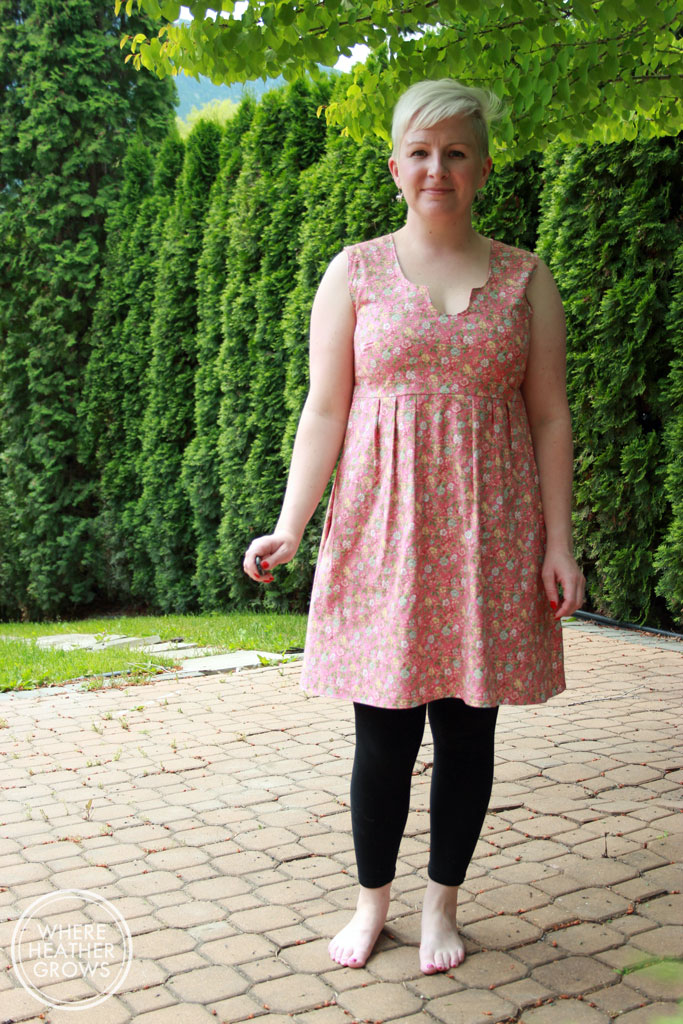
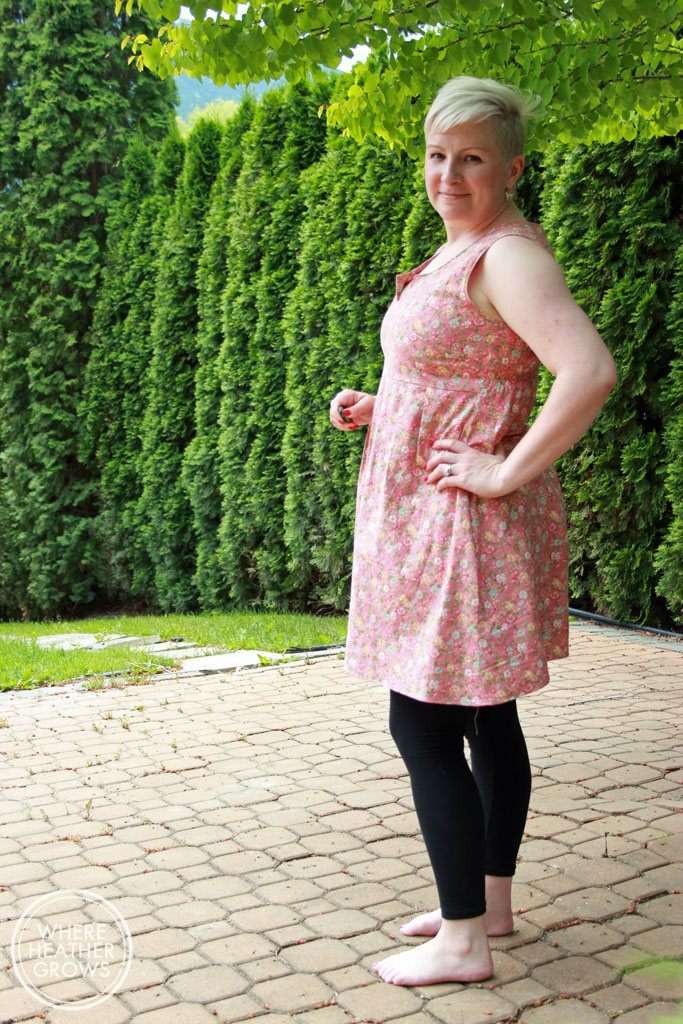
This would be a pretty typical Summer House outfit for me. Sorry for the old t-shirt, but it's one of my favs. I got it at Lucky Brand in Montreal back in 2009 just after John and I got married. I don't know why I love it so much. I think that it's just soft and comfy and it fits well - maybe I need to figure out how to copy it......

IMG_4728And check out those cute shoes. They have little anchors on them, and when I saw them at Walmart for $12, I couldn't resist!

IMG_4729

IMG_4730

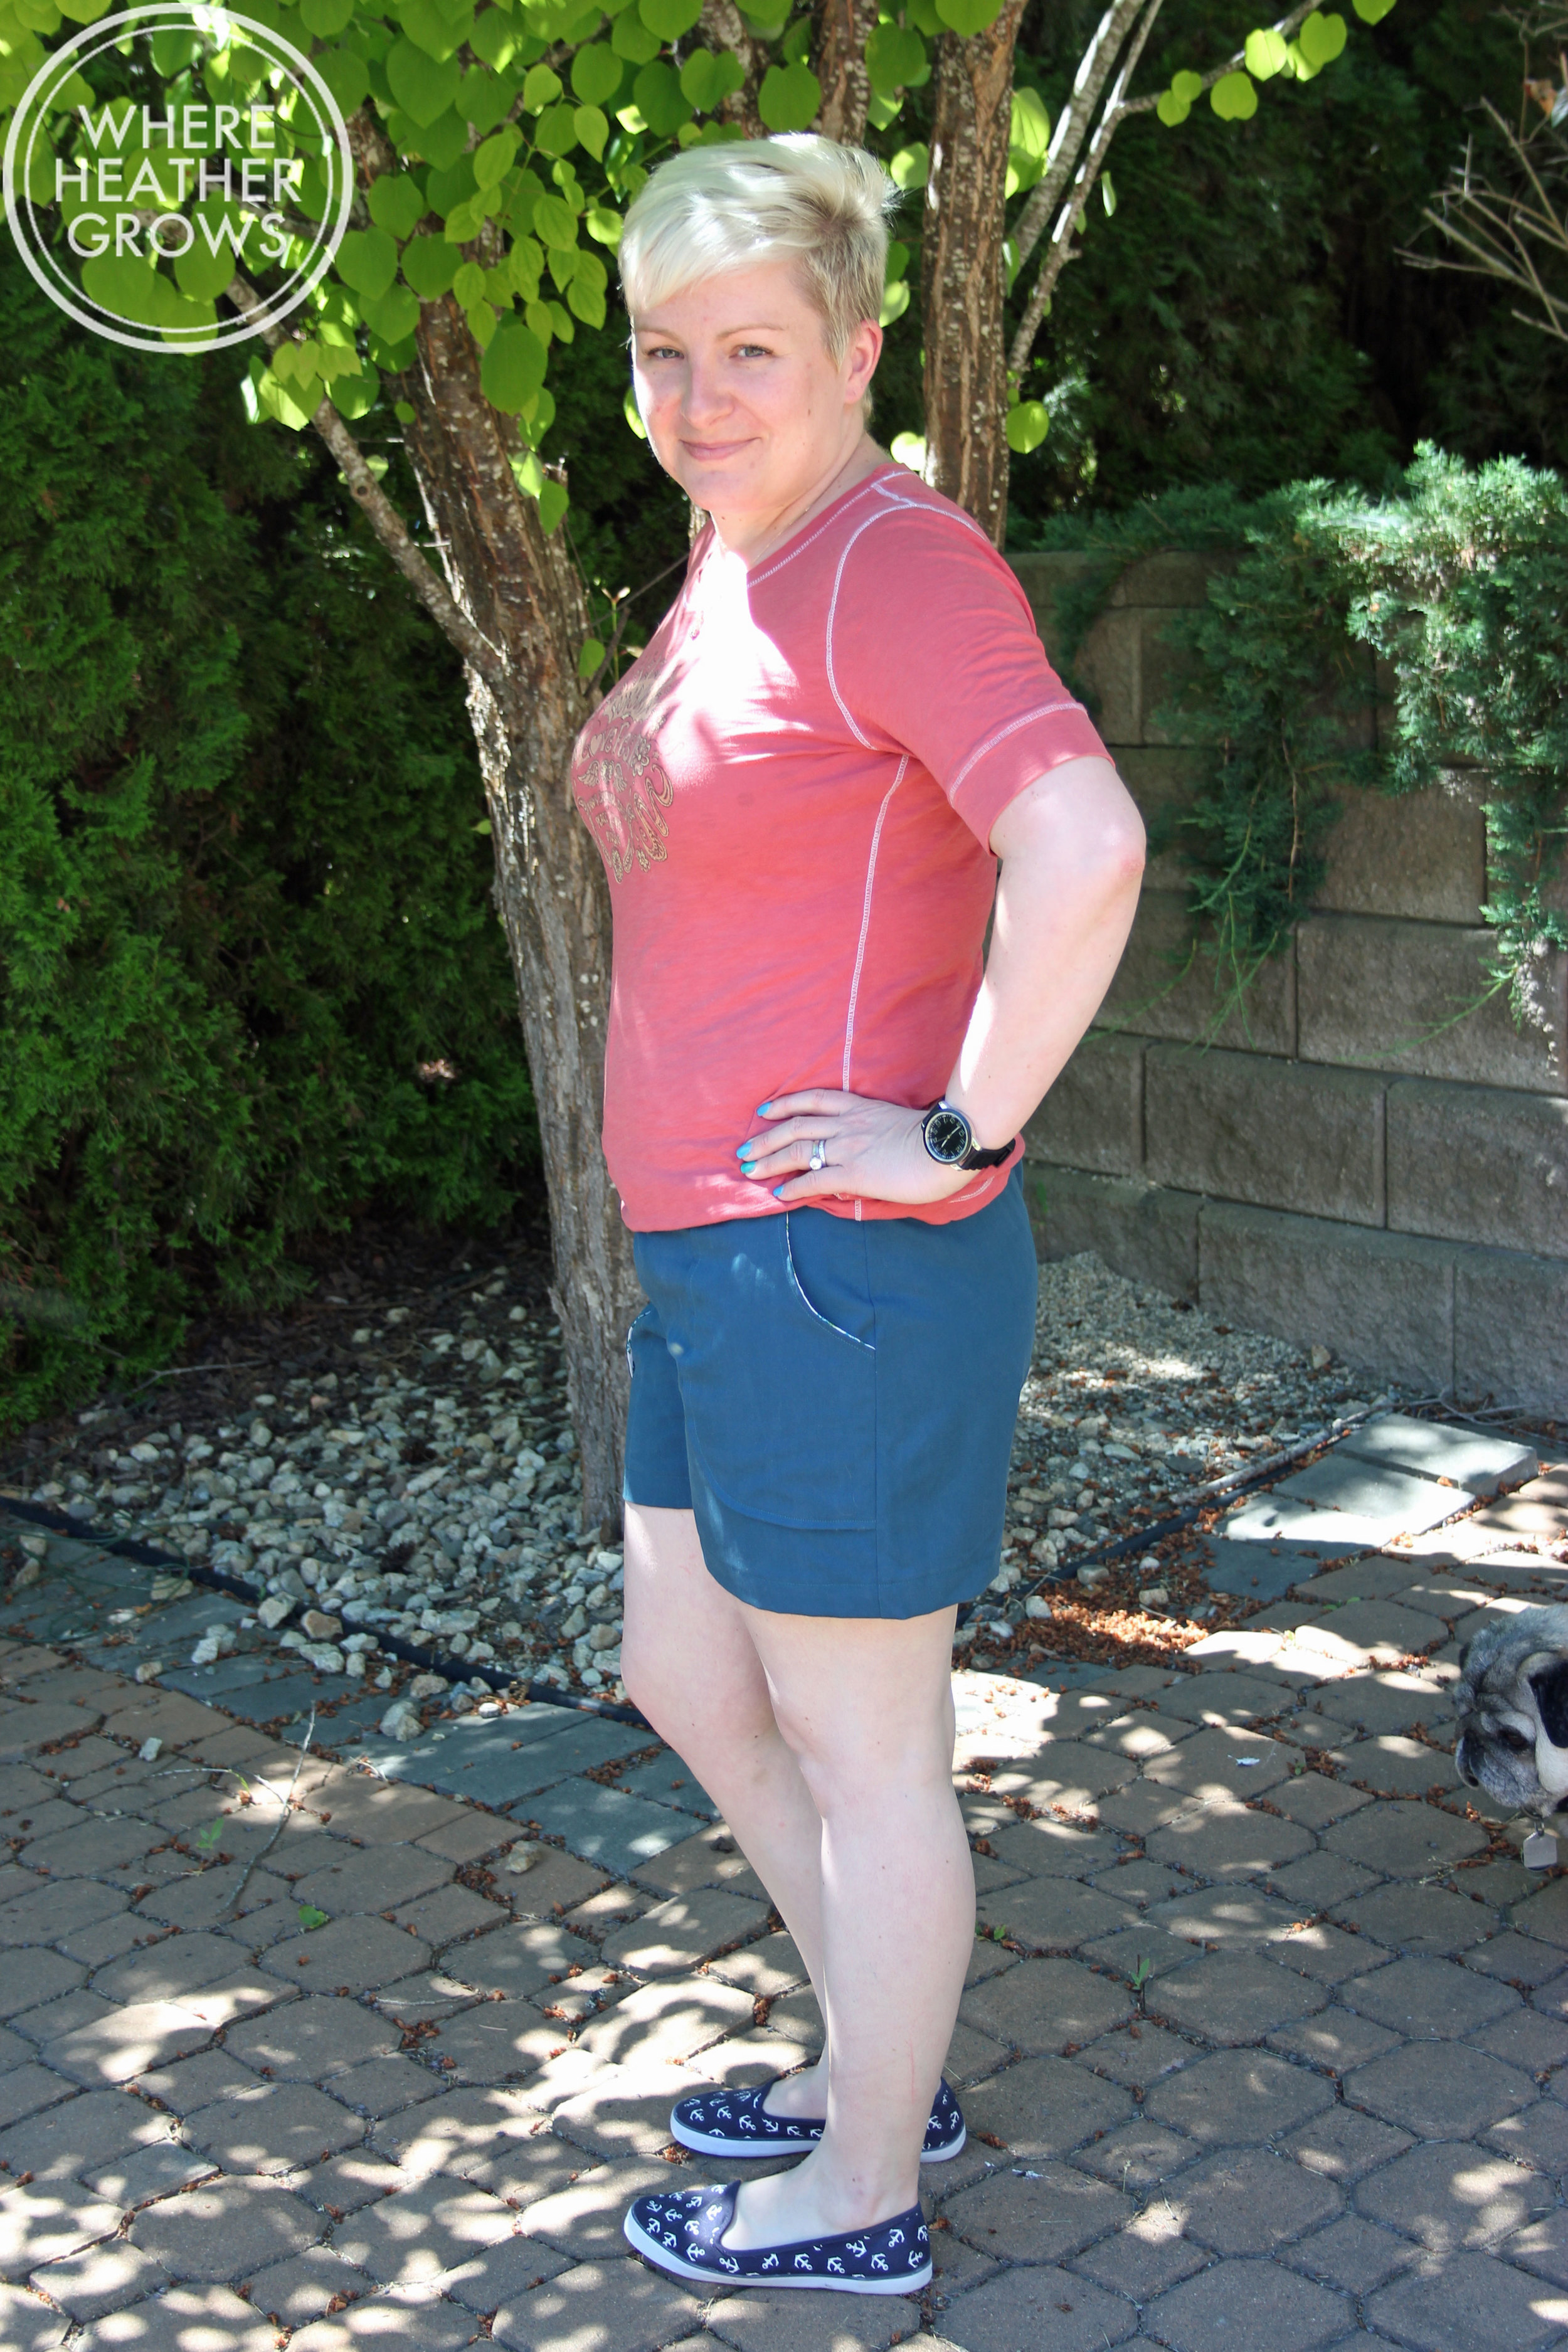
For the second pair, I used a super soft and lightweight cotton twill from the clearance department at Fabricland. I am super happy with how they turned out. A cute casual short. The awesome thing about this pattern, is that it is simple and comfy, and endlessly customizable. I have plans to make another pair with side seam pockets and I am even playing with the idea of trying welt pockets for the back - but welt pockets kind of scare me.

Anyway, how's your summer going so far? Do you wear shorts, or are they on your no no list too?

The Summer of Washis Continues

Are you sick of hearing about this pattern yet? Good, cause I am definitely not sick of sewing it. I have plans for a few more. For this lovely dress, I used the Washi expansion pack to add a pointed Peter Pan collar and pointed cap sleeves, and I LOVE it! IMG_4619

I was in Fabricland the other day to buy some thread, and saw this adorable apple covered cotton and I just had to have it. It's a pale pink in the background and deliciously soft.  I decided to go with a black collar, so I used some black cotton batiste from my stash. I'd like to tell you that I came up with this combo all on my own, but I was inspired by this dress here.

IMG_4609

IMG_4612

I could probably get away without leggings with this one, but I think it looks really cute with my black espresso leggings too, so I know I will get a lot of wear out of this guy year round.

For this little baby, I went a size down, but it ended up being a little too tight across the bust, and it didn't fix my neckline problems. So my neckline is a little wonky especially when I am not standing up straight, which who am I kidding, is most of the time. So for my next Washi, I will have to bite the bullet and adjust the pattern.

IMG_4621

Cutesy pose, for a cutesy dress! Sometimes its good to embrace the inner cuteness.

IMG_4622

I am so in love with this dress! Neckline aside, I am super happy with how it turned out. I also learned a new lining technique sewing this version. The collar is attached and then the lining at the neck, and then you do this crazy inside out pulling thing, sew one armhole, then the other,  and voila, neckline and armholes finished. It's really quite ingenious, but I don't think I could have done it without Rae's amazing video tutorial. I am discovering that I am very much a visual learner. So that's it, third Washi complete!

Also, I feel like I should tell you that I have joined in the Summer Stash Bust by the Quirky Peach (isn't she adorable?), and also the Summer Sundress Sew-a-long by Handmade with Heather B (one of my favourite bloggers). I am really loving the sewing blogging community, so I was happy to find a couple of ways to connect with my fellow sewists.

The Summer Sundress Sew-al-ong is a great way to keep motivation and do some great summer sewing. My Washis all qualify, and I am anxious to get sewing some other sundresses I have planned, and excited to see what everyone else who has joined in sews.

As for the Summer Stash Bust, well that's another story. It really only requires one thing, but it's a really big thing: no buying any new fabric until September 21! September 21st!!! I have to sew only from the large amount of fabric I already own?!?!? (heavy breathing, panic and anxiety ensue - pass the paper bag).

Anyway, despite my apprehension, I know I need to do it. I have tons of beautiful fabric taking up all kinds of space all over the place, and I know my pocketbook will be happier too. Plus, if I sew up all the fabric in my stash (or most of it), then I'll have to buy more, right? Right? So I can't promise I'll make it, I mean September is super far away, but I will promise you that I am going to try. I even made sure to tell John about it, so he can hold me accountable. I do have to confess something though, on June 20th, I ordered some more knit fabric from Girl Charlee to pad out my stash (I had too, I NEED knits!). But that's it, no more! Wish me luck!

Birthday Dresses for Dani!

So I think it's quite obvious that I am in love with Made by Rae. I think I am borderline obsessesed with the Washi, not only because I love the dress, but also because the pattern and instructions are so amazing. So when I was looking for a cute dress pattern to make for my niece, I was thrilled to discover the Geranium. It's basically a girl's version of the Washi. Anyway, my niece is a hardcore girlie-girl. She loves shoes and dresses, and fashion. She's seven and I think she puts better outfits together than I do. Since she could walk, she's raided my shoe stash every time she comes to our house, and she walks better in heels that she does in barefeet. Since she was about 2, she's been wearing my shoes. So, I thought she would love a couple of new dresses (and she'll probably end up with some new shoes to go with them too).

For the first one, I used a floral print cotton that I bought months ago from Fabric.com. It turned out to be a bit more hawaiian in real life that I thought it would be, but I thought it would be perfect for a little summery dress.

IMG_4550

IMG_4544

IMG_4541 IMG_4539 How cute is that? I am so happy with how this dress turned out. The instructions where amazing again, and so was my new Pfaff. One of the things I was looking for in a new machine was an automatic buttonhole feature. I have only ever made buttonholes once before this, and they didn't turn out really well, so I was a little nervous doing these ones. Especially because they are one of the last things you do when making this dress, and I didn't want to screw the whole thing up. I am happy to report that the Pfaff's (I really should give her a name) buttonhole feature is super easy to use, and the end result is gorgeous.

For the second dress, I made the same version but I used a quilting weight cotton from Fabricland. It has little ruby slippers on it which is very appropriate because not only does my niece love shoes, but she also loves the Wizard of Oz and her favourite colour is blue. Perfect!

IMG_4642

IMG_4636

IMG_4639

Aren't the buttons gorgeous? I found them at Fabricland in Salmon Arm and I couldn't resist. Ruby slipper buttons!! Both bodices are lined with a light batiste cotton in navy that also came from Fabric.com.

I couldn't be happier with how these two little dresses turned out. They were super quick and easy to sew up, and it was nice to sew something for someone else for a change. I really hope Dani likes them, and also that they fit. I think they will, but that's always my worry when making something for someone else.  We just got home tonight from the lake, so I am hoping to get a visit in with my little lady  in the next day or two, so I'll let you know how it works out.

The Anniversary Washi

Yup, I made another Washi. I seem to do this. I make up a pattern, and then want to make tons and tons of them. Okay, well maybe not with everything, but with the things that turn out well, like my leggings, and my plantains, among other things, but those are the ones that I have blogged about. Anyway, for this version, I made a round neck and no sleeves again. IMG_4592

This fabric came from Goldhawk Road in London and it is super soft. It's 100% cotton with little grey, yellow and teal flowers. It's really pretty. I finished this dress on John and my anniversary, and it was the last project I sewed with my little Janome. I finished it in the morning and John took me to buy new Pfaff that afternoon. Awesome anniversary gift, right?

IMG_4590

I am really digging this photo location. The only problem is that I set the camera on the retaining wall of our garden, and I guess some of the plants got in the way. Sorry about that, but I didn't want to redo this photo shoot. The neighbours already think I am crazy enough.

IMG_4583

I love this version even more than the first. The fabric is super dreamy and has a really nice drape and weight. The neckline still isn't lying flat and I am actually wondering if I could go down a size to resolve this issue. I ended up taking this one in about 1/2'' on the side seams, so I might be able to get away with sizing down.

IMG_4591

I think this dress will look great with sandals for the summer and awesome with a cardigan, boots and tights for the winter. So it's pretty versatile. Plus I have discovered Made by Rae's Washi Expansion pack too, so I can make even more variations. Yay!

IMG_4582

The construction of this dress was really easy, and I feel like I have a good handle on the shirring now. My little Janome handles the elastic thread really well, fingers crossed my new Pfaff will do the same.

We've had another lovely week in the Country Place. The weather has been great, and John has enjoyed fishing and I've enjoyed sewing. Things have been a bit stressful, as Solomon is really starting to struggle. He is having more and more trouble walking if he has to go more than a few steps, and he can't stand for very long. I think his age is getting the best of him. He's almost 13 and he's had a really great life, but it's so hard to see him struggle. He is still very alert and is still eating really well, but I fear he is fading quickly. And I dread making the decision. I have always hoped than when his time came, he would just lay down for a sleep and not wake up. I'm no sure we're going to be that lucky.  So needless to say it's been an emotional week, and I have been happy to have the distraction of sewing. My Mom and Stepmom are coming to visit later on today (they are staying for the weekend), so I'm looking forward to that too.

How has your week been? Are you a summer dress person?

My First Washi Dress

I found this pattern from Made by Rae, way back in December. Just after Christmas when John had gifted me the serger that started this whole crazy obsession. Anyway, I liked the look of the dress and it seemed to have a real cult following, but I was unsure of how it would look on me. Sometimes emprire waists can be extremely flattering, but sometimes they can be the exact opposite. Anyway, after much deliberation and googling, I decided to bite the bullet and try it. There are tons of cute Washis out there, and it appears to look great on all shapes and sizes. For my first attempt, I decided to use a flowered cotton I bought at Walthamstow Market in London. It is a bit heavier weight than I usually like for dresses, but it was really cheap, so I thought that if it didn't work out, it wouldn't be the end of the world.

IMG_4577

I made the sleeveless version with the U neck, because I thought the U was a really neat detail, unfortunately I couldn't get the neckline to lay flat. I'm not sure if that is because I stretched out the neckline while sewing it, or if I need some sort of neckline alteration.

IMG_4579

Oh my goodness, am I white! Sorry for the lack of shoes. I took these photos while we were at the Country Place so I didn't really have any shoes on hand that went with this dress. I also made it a little too short (oops!) so I don't really feel comfortable without leggings. It's fine if I'm just standing there, but it's very dangerous when I bet over. Plus my I could blind people with my legs, they are so white.

IMG_4578

I really love these shape of this dress. I think it flatters in the right places and still gives a nice feminine shape. This wearable muslin turned out quite well. Other than the neckline, it fits well and is super comfortable, and I also think the empire waistline hits in the right place and is quite flattering. What do you think? I now know what all the fuss is about.

IMG_4580

The back also has elastic shirring which makes it nice and fitted, but also really comfortable. And the best part about this dress? It has pockets! I love it! It might be hard to tell, but I am actually standing on a slant, so my hem isn't really that off, it's just the angle of my feet.

The pattern and instructions are fantastic. This dress was quite easy to put together and the instructions are detailed and clear, plus Rae has several tutorials on her website if you need extra help. I'm not in love with the fabric to be honest, it's quite stiff and I wish it had a better drape, but I love the colour and pattern. I see more Washis in my future.

Are we getting sick of the sewing posts yet? (I hope not, cause I am loving it!)

The Tale of Two...Aprons?

Well, long time no post. I have been busy sewing away, but I just haven't gotten around to photographing and writing very much lately. My poor little Solomon is getting nearer to the end of his days I think. He is having more and more troubles with his balance and with his paws. I am doing my best to keep him comfortable and happy, but that seems to involve more work and a lot of tears on my end. I find myself stopping what I am doing and taking time to give him an extra cuddle. Whatever I am making, writing, doing can wait. I don't ever want to feel like I didn't spend enough time with him. Anyway, enough talk about that (if I keep going I will turn into a blubbering mess!). Sewing has actually been a welcome distraction. It keeps my mind off worrying about the future, and keeps me present. Plus it also keeps Solomon in one spot - right at my toes. Onto the aprons. I was lucky enough to reconnect with an old junior high school buddy of mine and even better she is now a phenomenal nail technician. I am serious you guys, no one does nails like this lovely lady. I love going to see her because we are very like-minded and we always have a good visit. Anyway, when we started to chat about sewing, and my insane obsession with it, she started dropping hints about needing a new apron. You see, Conny (that's my friend) wears a really cute apron while she works to protect her clothes, but because she is such a petite little lady (and adorable by the way), it's hard for her to find an apron that fits. I was a little hesitant at first, because I have never really sewn for anyone but myself, but I decided to give it a go. She really liked her current apron, so I took some measurements and drafted my own pattern (If you really want to call it that, I mean it's just one piece with straps - hardly difficult).

IMG_6309

Anyway, this was my first time with a lot of techniques. I have never done a bias binding on a garment (only on quilts), I've never made and attached ruffles, and I have never made fabric covered buttons. So needless to say, I learned a lot making this little number.

IMG_4551

IMG_4525
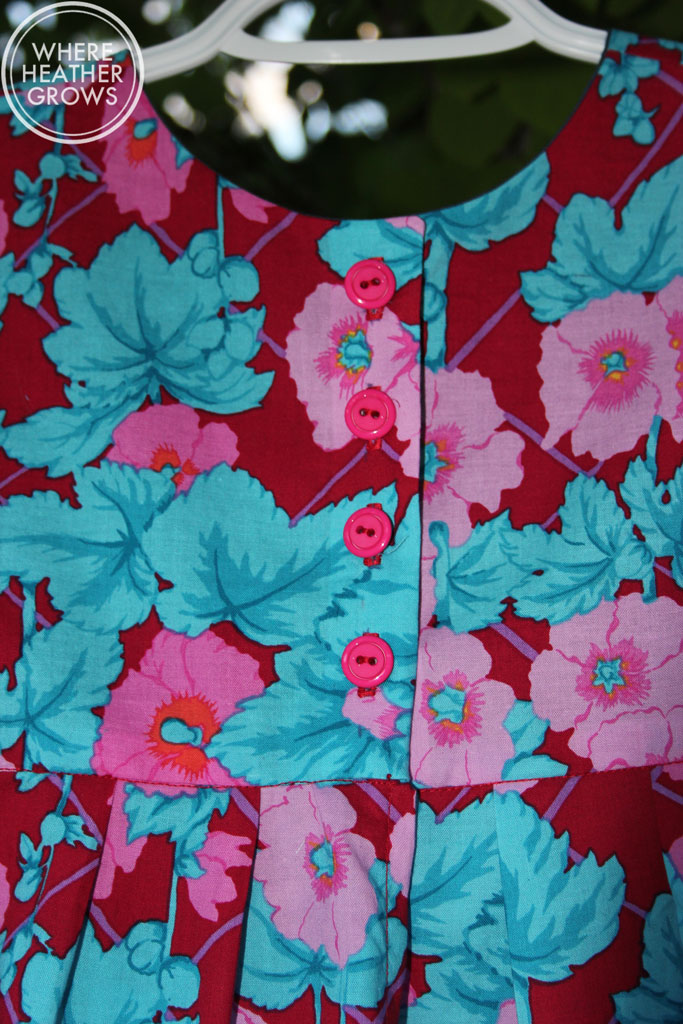
Look at that button! I'm pretty proud of how the buttons turned out, but it was dead easy. You buy this little kit (for about $5) and you just cut a circle of fabric, pop it on the little tool and snap the button together. I love how it adds a cute little detail.

IMG_4526

I bought the fabric, thread, button kit and pre-made bias binding at Fabricland. I was hoping to find a stiff polka-dotted cotton, but for some reason there wasn't any, so I went with a softer cotton. To make it a bit more durable, I lined it with some cotton batiste from my stash. I think it turned out pretty nicely. When I was all finished, I tried it on, just to see what it would look like on a body, and that's when I noticed it. It was really small. I don't know why it didn't really occur to me the whole time I was working on it, but I must have measured something wrong, because this apron was tiny (it still fit me - perfect in length actually, but it didn't really offer the coverage I was going for). DOH! So back to the drawing board. I made a new pattern to make the apron wider and started over.

IMG_4527

It was actually a good thing, cause I perfected a few techniques and made a couple of changes a long the way to make it that much better. Anyway, I have been debating about what to do with the smaller one, but I think I will give it to Conny too. She has an adorable little step-daughter who I think it will fit nicely. Then they can be twins when working on messy projects!

With being in BC, I haven't had a chance to give Conny her new apron(s), but I'll see her next week and give them to her then. Fingers crossed she likes it and it fits!

Where Heather Quilts?

So at long last, I finished John's quilt! And just in time too (LOL). I finished it late Tuesday night, as I wanted to have it for his birthday on Wednesday. IMG_4509

IMG_4510

IMG_4513

About 3 years ago, John asked me to make him a quilt, so off to Fabricland we went, and he even picked out all the fabrics! I was so happy to finally be able to make him something. He doesn't often make requests. I had originally planned this super complex Canasta pattern (by Elizabeth Hartman of Oh Fransson), but it involved so much cutting and piecing! I started it with gusto, but then it got thrown in the corner one day so I could work on something else, and  it became super intimidating every time I thought about it. I'm not sure why, it's just a bunch of straight lines, but anyway, I found I just could not go back to it. Everytime I thought about picking it up again, there were pantries to be straightened, carpets to vacuum, and sock drawers to organize.

IMG_4514

IMG_4513

So at the beginning of this year, I thought, this is stupid. I have tons of fabric, let's change the pattern, and I came up with this. It's the biggest quilt I have ever made; somewhere in between a Queen and a King. I was going to piece the back together, but then I found this awesome fabric made especially for quilt backs at Fabric.com. Who knew they made fabric just for this purpose?

IMG_4519Aren't the planes cute?

IMG_4520

I saw a tutorial for a similar quilt block somewhere, but I can't remember where (Oops!). Anyway, here's how I did it.

First... cut out a bunch of squares (you need nine per block and the size depends on how big you want your finished block to be - mine squares were 8"x 8").

IMG_4131

Then you sew them together:

IMG_4125

IMG_4130

IMG_4140

Then you cut them:

IMG_4141

IMG_4142

Then you rearrange them in a pleasing manor (just by turning the cut blocks) and sew them back together:

IMG_4143

And Voila! A fancy quilt block.

IMG_4147

IMG_4148

One you've made a bunch of these, you sew them together and you have a quilt top. Easy peasy!

While I struggled a lot with this quilt. I am super happy with how it turned out. I didn't do any fancy free hand quilting or anything, mostly because I don't know how, and the prospect of screwing up everything I had done up until the quilting point freaked me out. So I used my old stand-by stitch in the ditch method and while it's not perfect, I think it looks pretty good. It's the sixth quilt I've ever made. I'm pretty proud of it, can you tell? (It passes Solomon's inspection too!)

IMG_4518

IMG_4515

John is pretty happy with it too. He made some lovely fabric choices, which I supplemented with a few of my own choices from the Maui Quilt Shop. I had to replace the fabrics I cut up for the original Canasta blocks (which I may still sew up into a little lap quilt).

It feels so good to have this baby done! It's weight off my shoulders and I am so happy to be able to give my husband something that I've made (and that he likes).

Have you ever made a quilt? How about a handmade gift? 

Blue Hair, Quilting and Sewing Seams: The Things That Dreams Are Made Of

Did I tell you that John bought me a serger for Christmas? We don't usually give each other Christmas gifts as a rule, but this year John broke the rule and bought me a beautiful serger. I have no idea how to use a serger, but I remember seeing one long ago when I was a child and being mesmerized by it. It sews and cuts? What?!? Anyway, I have mentioned a few times over the years that I would like one, but had mostly forgotten about it until now. (My husband really is the best gift giver ever!) To be honest, I am a little intimidated by it and it took me a couple days to take it out of the box. But I have finally unpacked it and have been planning, reading and preparing to make amazing things with it (youtube has lots of great videos about sewing and serging by the way). I have played with it a bit, and set up a time with the lady who sold it to John, so that she can show me how it works (how cool is that?!). Unfortunately that won't be happening until Friday - only two more sleeps.

In the meantime, I have been working on the quilt that I promised John two years ago. I have no real good excuse as to why it's taken me so long. We had even gone and picked out all the fabric for it and everything. I actually started it two years agao, but then got intimidated by the pattern I chose and kind of stuck everything into a corner in my office and pretended it wasn't there. I then got it out again about 6 months ago, after much prodding from John, and realized again, that the pattern was just too much for this beginner - so back into the corner it went. I have felt really guilty about not finishing it, but did my best to forget about it. Anyway, while we were in Hawaii, I searched online for an easier pattern, and found one, so now I am bound and determined to get this baby finished! Here's a peek at how it's coming together:

IMG_4125

IMG_4131

IMG_5449

IMG_4130

IMG_4147

I think it's going to look really cool when it's all done, and it's actually really easy (it looks much more intricate than it actually is). John picked out pretty much all of the fabric. I had to supplement it a little because I already used some of the fabric when I was attempting the original pattern. I may end up making a nice little lap quilt out of those original blocks too. I would have added them into this quilt, but I think it would look funny.

The serger has gotten me really excited about making my own clothes. It's something I have always wanted to do, but just never attempted.  Well, actually I did make some pyjama shorts back in junior high home-ec class, and a top with the help of a friend's mom, but that's it. I'm not entirely sure why I haven't ever tried, but the serger has rekindled my love for handmade things. Anyway, in between quilting and waiting for my serger lesson, I was able to whip up a couple of skirts. 

This first one is a very simple, elastic waist band skirt. I used this tutorial to make it and I am quite happy with how it turned out. I bought the fabric from the clearance section at Fabricland and it cost me a whopping $3.20/metre.

IMG_4170

IMG_4171

I really like it, and I think it turned out well for my first try. I think if I make another one, I would like to add pockets. It will be a great little skirt for summer.

My next project was a straight skirt from the DK Dressmaking book. It also turned out really well and it was my first attempt at an invisible zipper and also following a pattern. It's super cute with tights, and the fabric is very soft. It was kind of slippery to work with so maybe not the best for beginners, but I am still happy with how it turned out.

IMG_4167

IMG_4168

IMG_4169

I took these pictures after wearing it all day so it looks a little stretched out. I also apologize for my headless shot, but I'm a little self-conscious when it comes to full body self-portraits. Anyway, you get the idea:

IMG_4159

I also have to share this shot of the pugs:

IMG_4152

This is what they look like while I am sewing. I'm not sure where Solomon was when I took this, probably snoring under the table LOL.

And finally:

IMG_5448

Yup, I have blue hair, or rather teal hair. I have always wanted to do something really funky, so I finally did. I was waffling between pink and teal, and finally decided on teal. When I first got it done, it was really dark, but it has faded quite a bit now. Here's what it looks like about a week and a half later.IMG_5473

IMG_5475

I like it, but I don't think I love it. The colour is absolutely beautiful and it definitely turns a lot of heads, but I'm not sure if it's me. I think I might have been happier with pink to be honest. The blue is a bit dark, but I am liking it more and more as it fades.

So anyway, that's all that's been happening in my world. I hope to keep sewing up a storm and to get better and better with practice (and to also finish John's quilt LOL).