Alder the Second

Ba da da da.....(prepare yourself for some super sunny pics, super white legs and silly, derp faces, oh and pug butts.)! IMG_5011


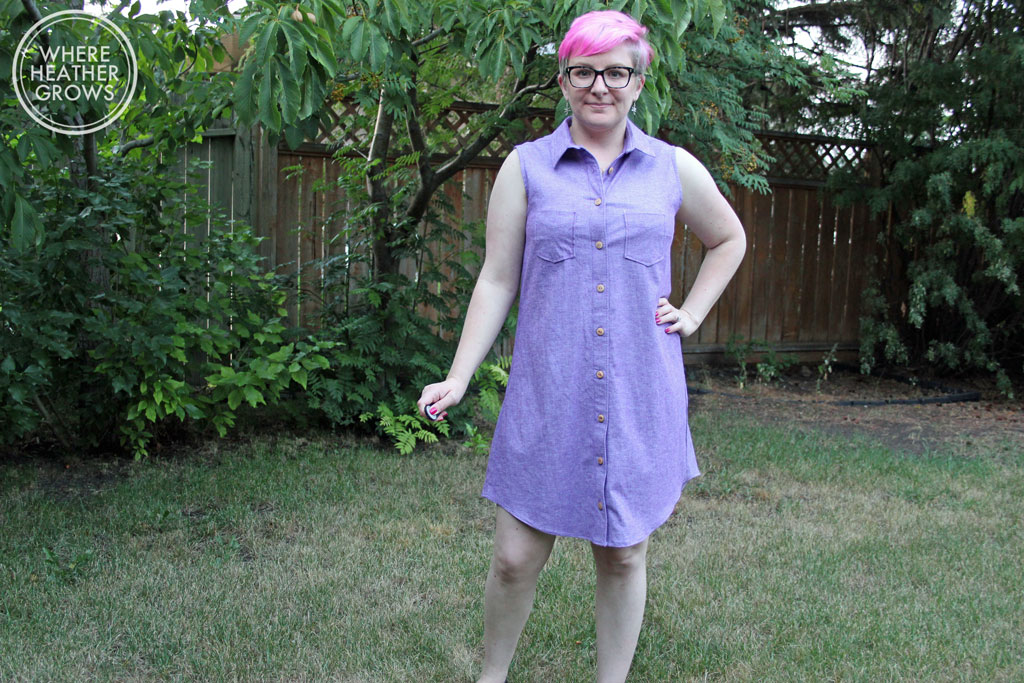
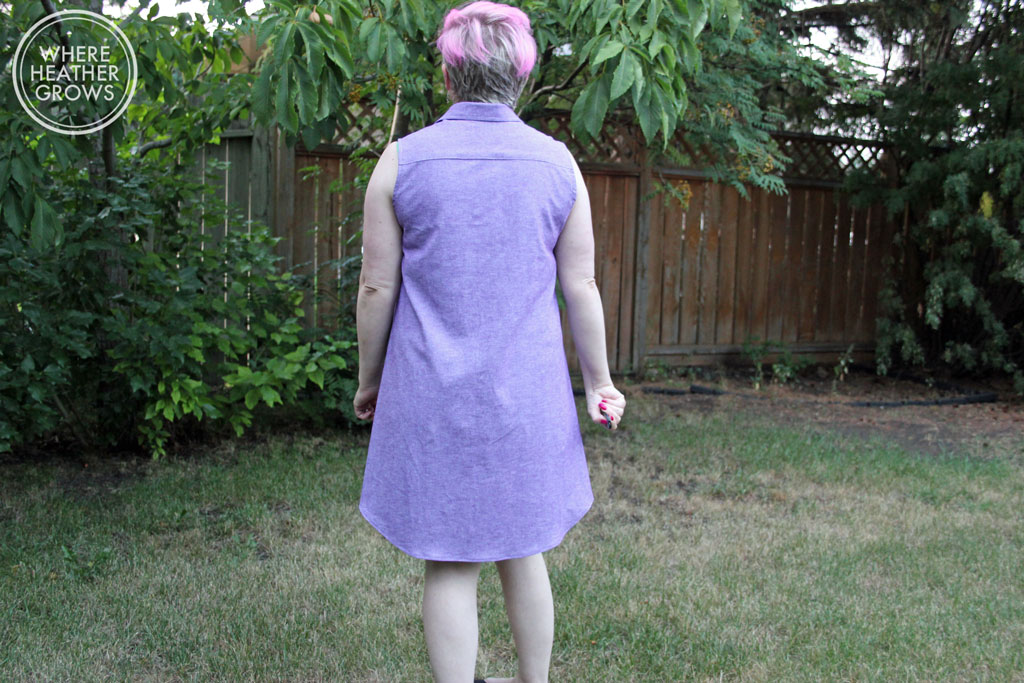
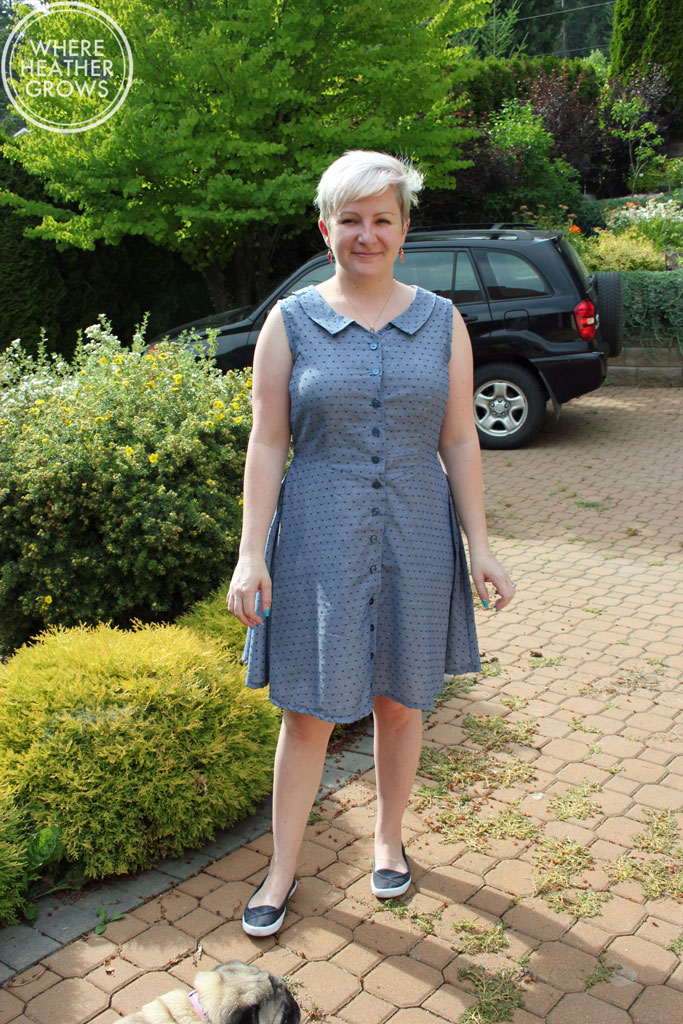
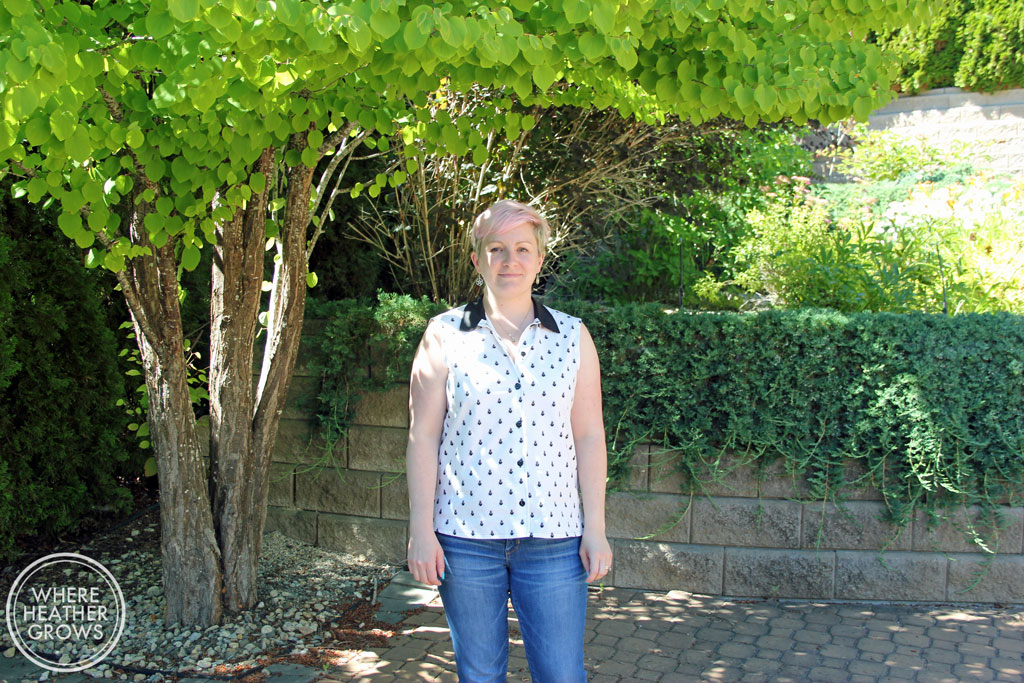
This is my second attempt at Grainline Studio's Alder Shirtdress, and this time I am in love. While I really liked the purple chambray, it was not what I had envisioned for this dress. I had always intended the chambray to be a wearable muslin/practice garment, and this lovely cotton paisley to be the actual dress.

IMG_5015

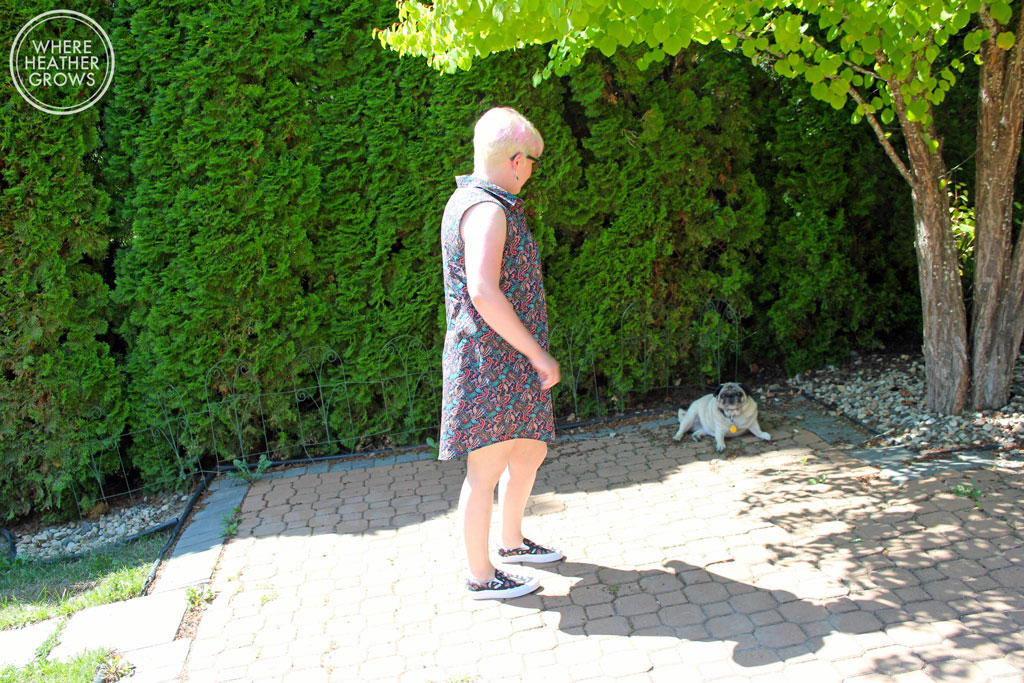
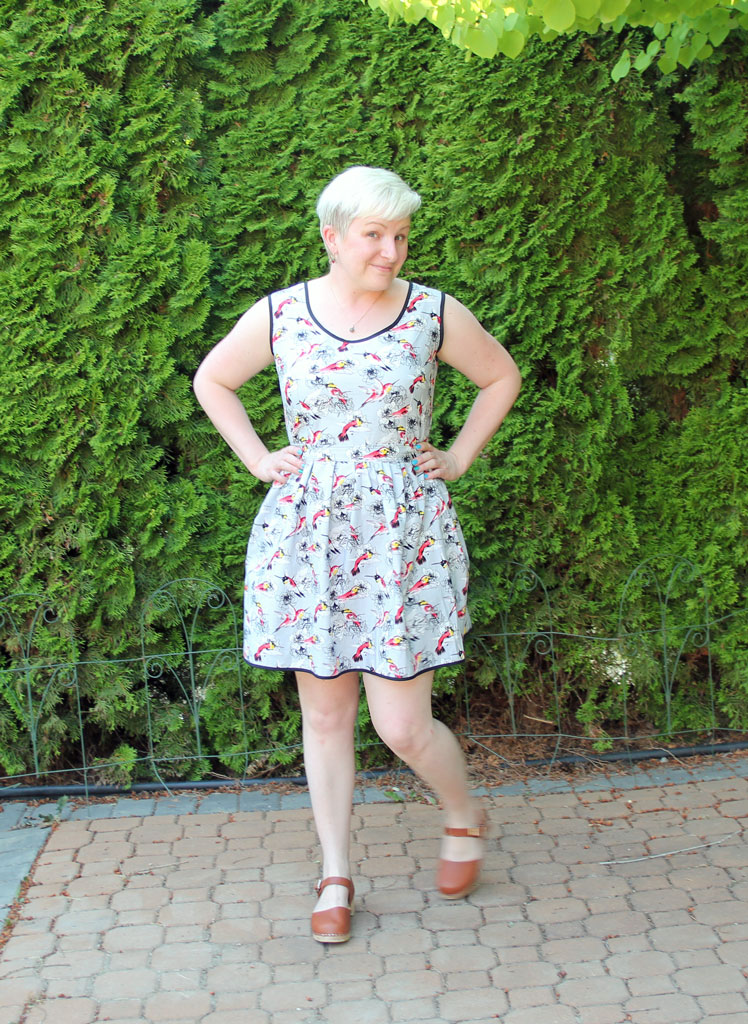
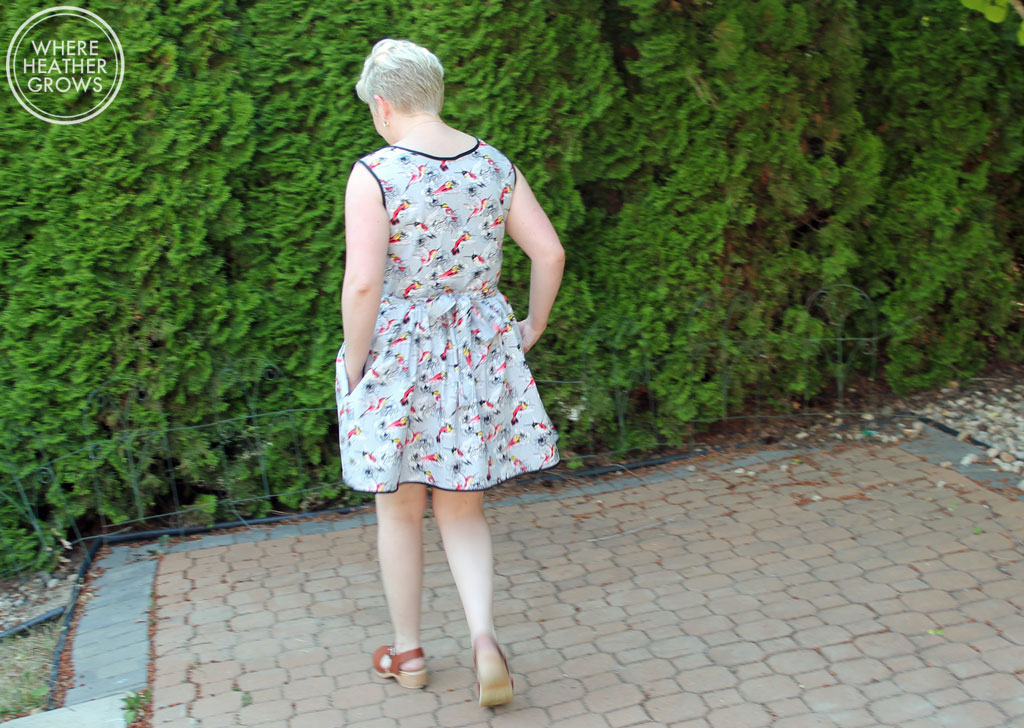
I made a straight size 14 (gasp! now you know my size), with no alterations except to shorten the pattern by 2.5 inches (I think that we have already discussed that I'm short!). I am really happy with the length and I think it's closer to the length it's meant to be. I apologize for the super sunny photos, but I have been very anxious to get this bad boy blogged about.

IMG_5017

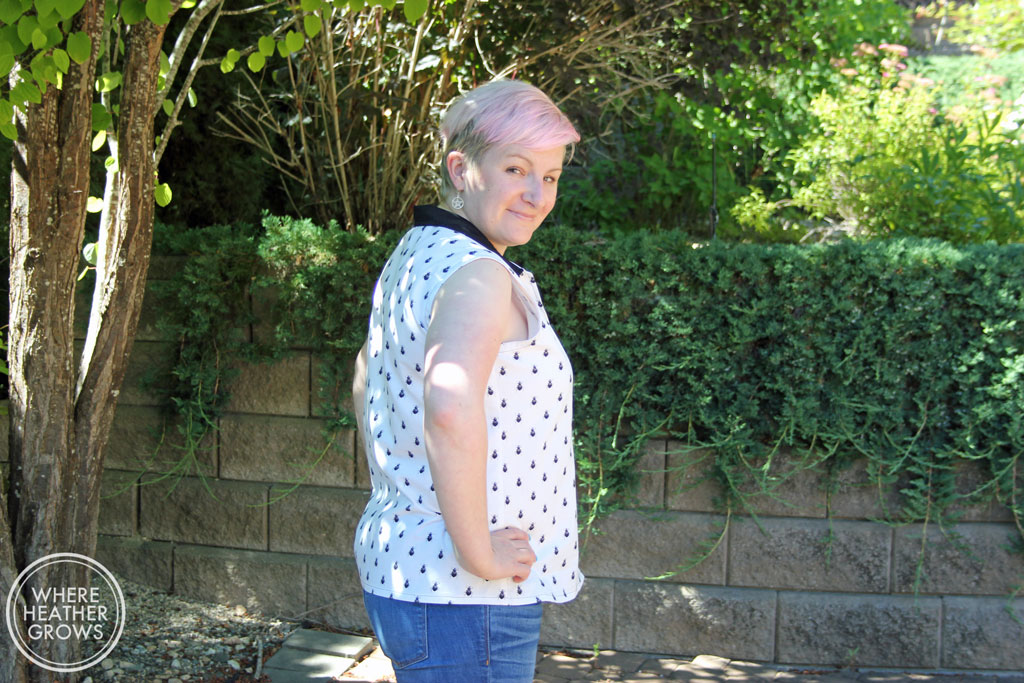
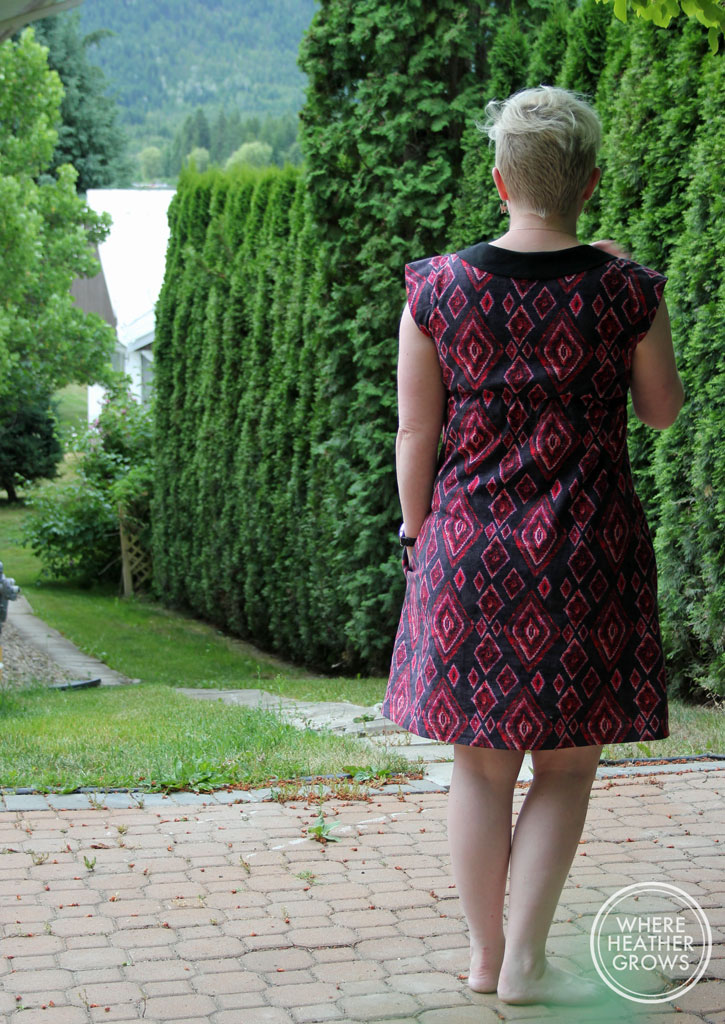
What do you guys think about the fit? I think it fits how it should although it's a touch wide at the hips for me, but then my stepmom (who is staying with us right now and knows nothing about sewing I might add) said it's too wide in the shoulders for me. I think she's out to lunch but I can't help but second guess myself.

IMG_5018

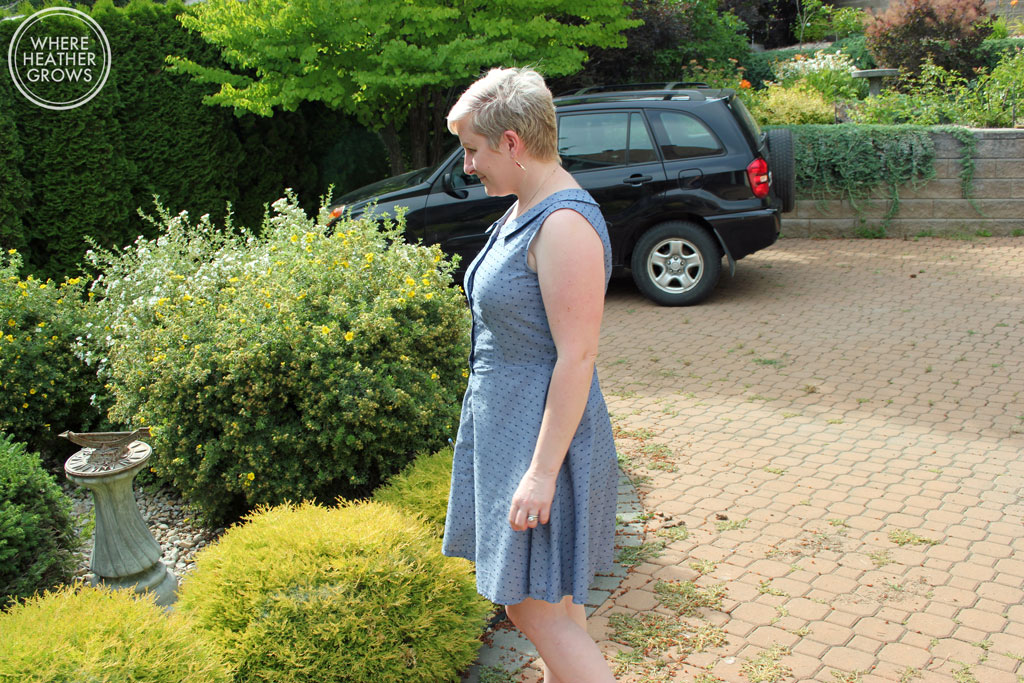
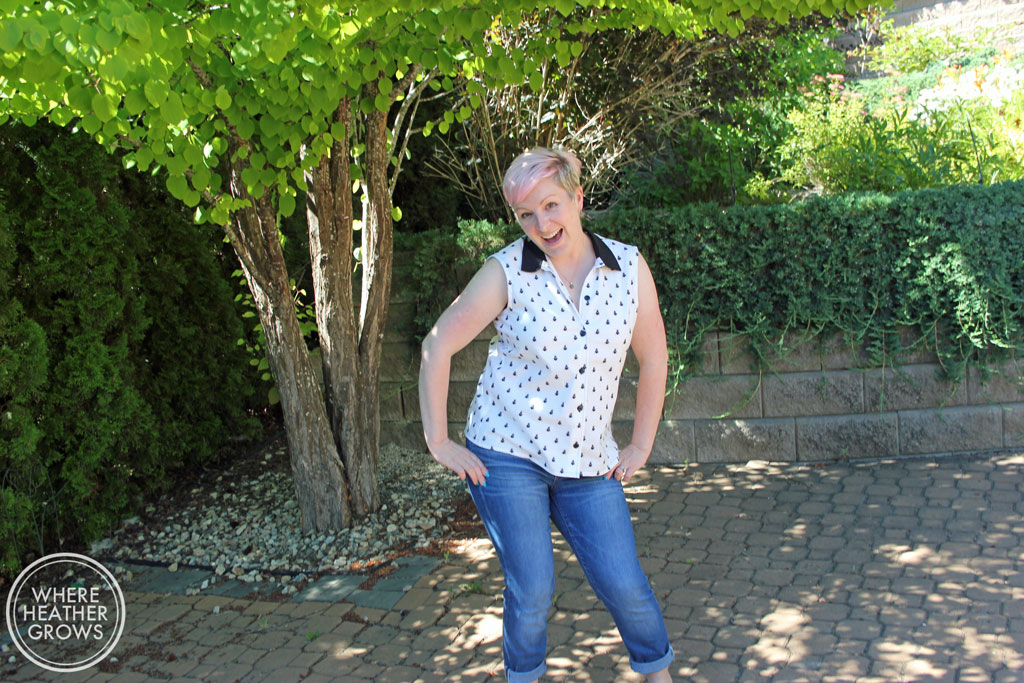
What do you think of my new sneakers? John is not sure they go, but I feel super hip wearing them with this dress, and they make this outfit feel casual and much more me (as much as I'd love to be, I am just not a heels girl except for my clogs and some low heeled boots). I think I also feel like I am breaking some kind of rule about only wearing dress shoes with dresses. What can I say, I'm a fashion rebel. There is one picture at the bottom of this post with me wearing my black flats with this dress and they look good too, but I love my sneakers! Am I crazy?

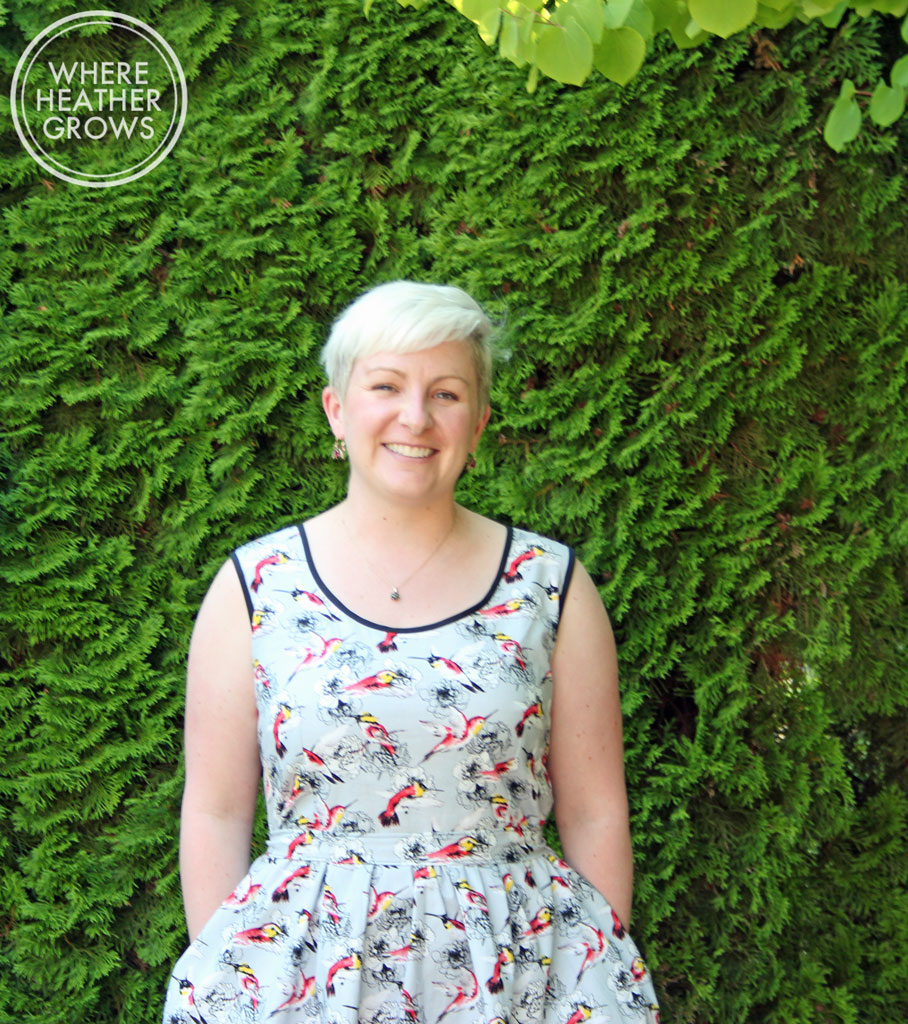
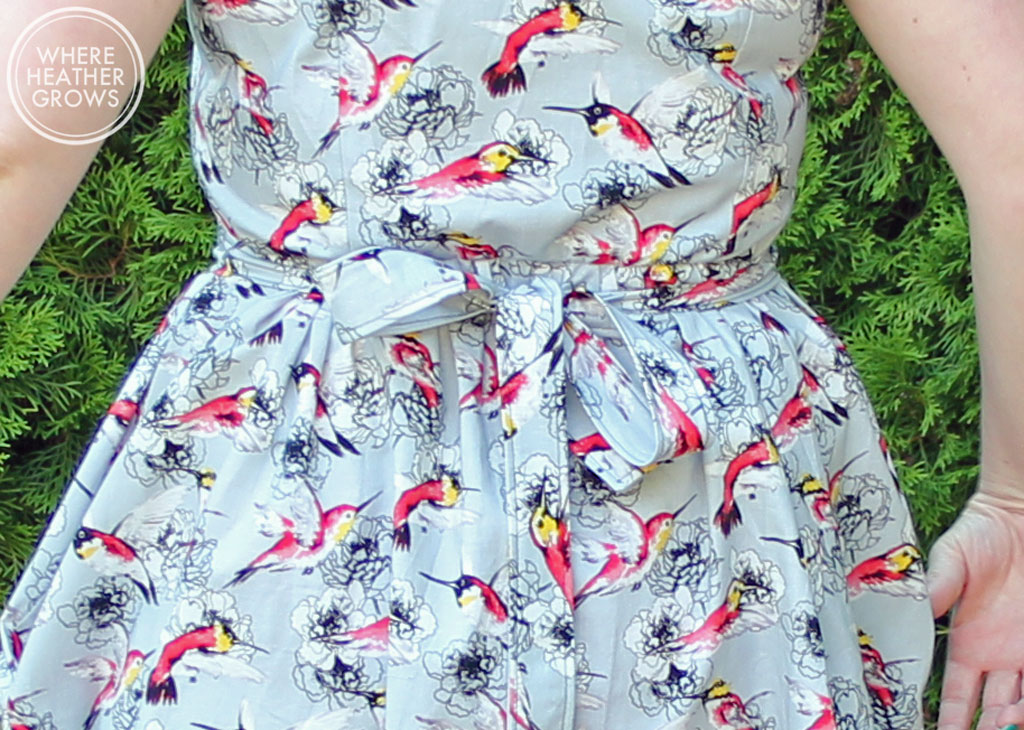
I am super in love with the paisley pattern on this light cotton. I wish I could tell you more about the fabric, but I don't know much else about it. I picked it up on Goldhawk Road when we were in London in the spring because both John and I were attracted to the colours (Yup, I have the best husband ever, not only does he come fabric shopping with me, he picks fabric out for me too!). It presses really well and was super easy to sew with.

IMG_5016

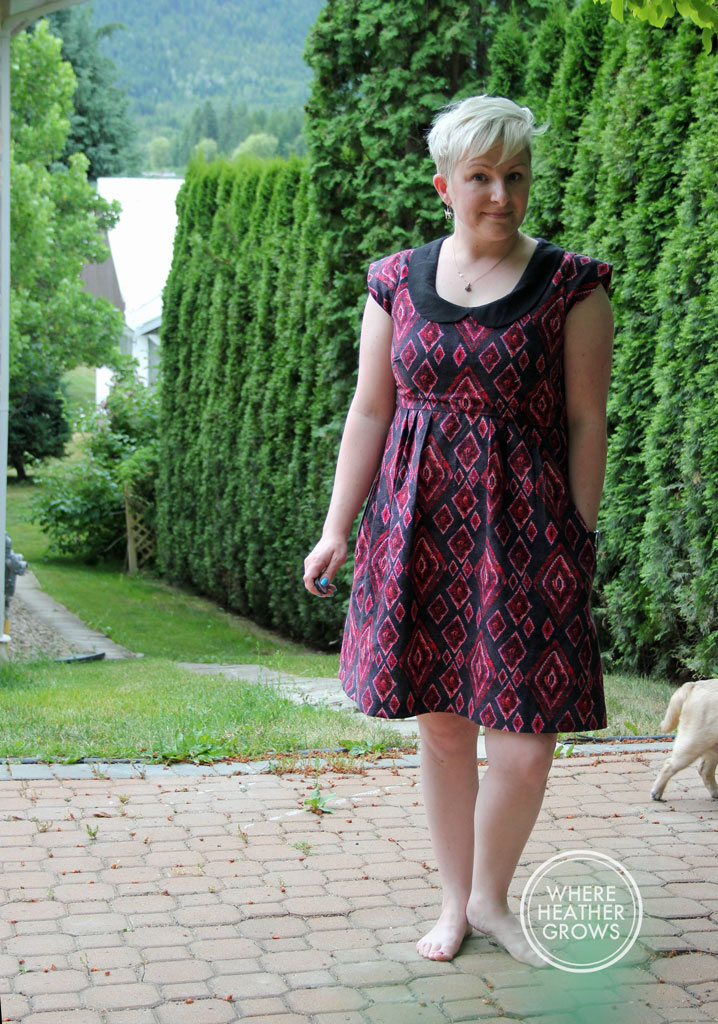
I wasn't sure what colour of buttons to use, but John suggested a rust or bronze colour (he's so good), so off to Fabricland I went. I ended up with these metallic orange buttons, and I think the look really great. Turns out there are perks to being short: you need less buttons (I only needed 8) and of course less fabric.

IMG_5040

This time I used Andrea's collar method, and it was so much easier/better looking than the traditional method. I was following along with the Alder Sew-a-long, but I got impatient, jumped ahead and finished this dress. It really did help with the button bands thought (I wasn't sure if I made them right on my first go) and I made sure to carefully mark my pocket placement before sewing the darts this time so everything went much smoother. I am looking forward to seeing how the variations Jen mentioned at the beginning of the sew-a-long are done, because I am now really happy with this dress and want to make more. I think John is even coming around.

So that's it. I am taking a break from Alders to make some t-shirts. I have discovered that my Me-Made wardrobe is bursting with dresses, but lacking basics, so I want to get a few of those made. I love dresses, but sometimes I just want a t-shirt and jeans.

What are you up to this weekend?

Alder the First

IMG_4962 So here it is, my Grainline Studio Alder Shirtdress! I loved this design the minute I saw it on Jen's instagram feed,  and I bought it pretty much the second it went on sale. Then it sat and it sat and it sat, and I couldn't drudge up enough courage to make it. I had so many fears: how would it look on a curvier shape like mine? I've never made a collar with a stand - how would that work? What fabric would I use? What if I put in a bunch of time and it looks awful on me?? It seemed easier to just dream about it and let it sit on the shelf, rather than try it out and possibly be disappointed (or thrilled). Silly, huh?

I finally just bit the bullet and decided to try it out late last week. I went with View A first, but I do have plans to make the ruffle butt (View B) version too.

IMG_4965Oh my goodness, do I ever need a haircut!! I took these photos last night as I wanted to get them done, but I'm looking a little rough and perhaps taking photos after a big steak dinner is not the best idea in the world.

IMG_4952

I used a super soft purple chambray I bought months ago out of the clearance section at Fabricland. I had planned to make a practice Archer out of it, but I decided it would probably work really well for an Alder wearable muslin. I'm not sure I am crazy about the colour on me, especially as a solid dress, but it's okay.

IMG_4953

The construction of this baby went well. The collar is far from perfect, but it's not awful for my first try,  and I had a bit of trouble with positioning the pockets (note to self -be sure to make pocket markings when cutting out, not when it's already sewn). I also feel like I may have screwed up the button band. It seems like the sides of this shirt are not symmetrical, but it might just be me. My husband couldn't see what I was talking about, and he's pretty picky about those things.  Jen's instructions are very good, and if you've made a button down shirt before, I am sure they would be enough, but because I haven't, I feel like I needed a little extra hand holding. I'm pretty confident that once all the sew along posts are up, they will clear up any issues I had. So I am very much looking forward to that.

I didn't make any adjustments, except to hem it up an extra 2 inches. I didn't shorten the pattern because I wanted to see the original length on me, but it was of course too long, and I actually think it's meant to be even shorter. I think the fit is pretty good, but next time I might grade down a size in the hips as I feel like there is a bit too much fabric there. I debated adding side seam pockets, but I decided against it as I like how streamlined this version is. I think on the ruffle butt version side seam pockets would work really well.

IMG_4959

I can definitely see myself make a ton of cute shirts from this pattern, or even shortening it to a tunic length to wear with leggings. John said it just looks like a really long shirt and would be much better if I just chopped it off at the waist. So needless to say he's not a big fan. I'm not sure what I think. It's cute and comfy, but does it flatter, or just make me look like a big blob? I love how it looks from the front, but when I turn to the side, I'm not so sure. Perhaps it's because I'm not in love with the fabric. I think maybe in a patterned fabric I might feel differently. I have loved all the ones I've seen around the interwebs - they are all so cute.

What do you think? Can you help me decide? Is it a keeper?

My Summer Hawthorn

I am so happy that I love this dress, because it was a nightmare while I was making it. I am really glad that I didn't give up on it, as I was tempted to do a number of times, and it actually turned out to be exactly what I was looking for: a comfortable, light, casual summer sundress. IMG_4845

So the pattern is Colette's Hawthorn. It's a great pattern and even has a cute peplum top variation. I decided that I would make the top as a wearable muslin first, and this would help me practice making button holes and also give me an idea of any fitting changes I might need to make. The top turned out pretty well except that the fabric I used was pretty thin, and I'm not entirely sure that I will wear it, but it was good practice. I debated and debated looking at the top if I should shorten the bodice a little bit, but I really wasn't sure - I made a note in my sewing journal (yes, I am a nerd and take notes on every project I make). It was little bit tight at the waist too and I couldn't decide if that was because of my fat belly or if it was because the waist was not at the right level, but thought I could just let the side seam out a tiny bit at the waist if need be. I also made a note to do a narrow shoulder adjustment too as I wanted it sleeveless, and there was just a touch to much fabric across the shoulders. Fast forward two weeks when I decided to finally make the dress version.

IMG_4847

I had this swiss dot chambray I bought at Denver Fabrics in my stash for months with the plans of making an Emery, but seeing as my last Emery was a bit of a flop, I decided it would be perfect for this Hawthorn (and I was right). I decided to ignore my notes on shortening the bodice, but I did narrow the shoulders by 1/2". The construction went along beautifully. Everything fit together perfectly, the insides looked beautiful - I was even thinking how this would be a dress that I took pictures of the inside for my blog so you could see how great seam work was. I sewed the button holes, but before I cut them, I decided to try it on. It looked horrible. It was too big, the waist was definitely too low and John was not in love with my fabric choice (not really a surprise as he doesn't really like anything denimish if it's not jeans). This was about 11 o'clock at night, and John and I both decided I should just scrap the whole mess, chalk it up to a learning experience and start over. I was upset, and of course obsessed about it all night.

IMG_4848

When I got up in the morning, I decided it wasn't as bad as I thought and that I needed to save it. I just loved that chambray, and I had already put so much effort into it. I ended up unpicking the waist seam (and two button holes - such a pain) and shortening the bodice by an inch. Then because the waist was now in the right place, I took in the side seams by about a 1/4'' and it fit perfectly. I re-spaced the two button holes I unpicked and re-sewed them (so now the button spacing isn't perfect, but it's not really noticeable). And voila, perfect fitting Hawthorn. I am really glad that I persevered because I love this dress and I have worn a bunch of times already. It's cool and comfy, and as an added bonus, I think it flatters my shape really well too. It's a bit wrinkly in these photos as I had been wearing it all day, but it presses really nice.

IMG_4852

I have now transferred all my changes to the flat pattern, so my next one should go much more smoothly, and I will definitely be making another one. Thank goodness for my inherited OCD and determined, won't let it go attitude, it really paid off this time.

Has something like this ever happened to you? Have you ever worked on a project to think it was an epic fail, but then found a way to save it? (It happens to me all the time, ask the boys - they've been served many a grilled cheese that was burned on the inside from me turning the bread around because I had used up the last slice. What can I say, I'm crafty ;) )

Beetlejuice! Beetlejuice! Beetle....

Oops, careful not to say it 3 times! Did you ever see that movie? It was one of my favourites when I was younger. It bordered on scary for me (I am the biggest fraidy cat ever - and I was only about 10 when I first saw it), but it was funny so I was able to look past the scary elements. It was my first introduction to Winona Ryder, Alec Baldwin, and Geena Davis, who all quickly became favourites of mine. Plus it also contained the musical stylings of Harry Belafonte. What's not to love?  I already loved Michael Keaton from his Mr. Mom fame - another one of my favourite movies, I'll have to track that one down and watch it again. They just don't make movies like that anymore. I'm discovering that the 80s is quickly becoming my favourite movie decade. Who'd of thought? Anyway, I digress, here is my Beetle blouse:

IMG_4810

This is probably one of my favourite makes so far, and guess what? It's self-drafted! Self-drafted you say? Yup, I created this pattern. Okay not totally from scratch, I had a bit of help. A while back I stumbled upon this post by Karen of Blinky Sews. She talked about this cool pattern-making set/template called Bonfit Patterners. It sounded really interesting to me, as I am always up for learning more about sewing, so I googled it. Turns out Bonfit Canada is based out of Calgary!! It was meant to be. I called the lovely lady up (the president of the company: Midge Travis), and she told me I could stop by and pick up a kit. She turned out to be this extremely sweet older lady ("I'm 88 you know!") and she even wrote books to accompany the patterers.  The style suggestions are very 80s (I'm seeing a theme here), but I pretty much love all the silhouettes they suggest, and you can use the base template you create to make just about any style. Anyway, I still have a lot to learn, and this blouse is definitely not perfect, but I think it's pretty awesome for my first attempt at pattern drafting.

IMG_4815

IMG_4814

This was my first attempt at a sway back alteration (the tutorial I used is here - very helpful), and I thought it turned out okay, but from the look of this picture, I may still need to take a little more out of the back.

IMG_4812

IMG_4811

The other issue that I should have addressed but didn't was arm-hole gape. Because I went sleeveless, I should have re-adjusted the arm hole and probably added a bust dart, and maybe made the shoulder seam a bit shorter. That all seemed extremely complicated to me, so I thought I would leave it for this go around. I have been actually pretty OCD about perfecting the fit of this blouse since I made it, so my next version which is coming soon, should be better. Pattern drafting is really hard, yo! (And it requires a whole lot of muslins.) I have so much respect and admiration for all those amazing pattern designers/makers out there.

IMG_4821

I learned a ton making this blouse, I have never made a button-down, collared shirt (this collar was pretty easy as it has no stand and is meant to lie open) before so it was a complete learning experience. Not to toot my own horn, but I feel so incredibly proud and accomplished now that it's done. I really took my time and put love into this top, which is probably why I love it so much. Plus when I showed the final product to my husband he said "I love it!", which is rare, so that made me feel even more amazing.

The fabric is a Michael Miller quilting cotton from Fabricland and the buttons are just plain black plastic buttons from Fabricland too. Here's a detail of the beetleness:

IMG_4813-detail

The cool thing about making your own pattern is that it is based solely on your own measurements. How awesome is that? The books by Midge that accompany this patterner are awesome. She talks a lot about fit issues and how to identify them, and suggestions on how to make patterns work for your shape. I've only read the Bodice book so far, but I learned a ton. I'm not sure if I will continue to draft all my own patterns because if I did they would probably look all the same - I just don't know enough, but it's fun to play with this system and I'm learning lots about my shape and what works for me, so that's good too. I am hoping that I might be able to create a template to help me fit other patterns to my body - I think that's called a sloper? I have a pretty huge stack of patterns on my sewing shelf waiting for me, so I'm not sure what to make next but we'll see if this experience helps.

Hope you all are having a lovely week!

The Rough Diamond Washi

Ah...yes, the rough diamond, not the diamond in the rough, as I seem to have way more washis than there are Aladdins in Akrabah. But anyway the point is I'm attempting to get more creative with my titles to lure you in. Do you feel lured? :) Not yet, how about with this weirdo come hither look: IMG_4723

I am not entirely sure what is going on in these pictures. I took them awhile ago (myself) and I seem to have some strange angles and facial expressions going one. Plus my dress is wrinkly from wearing it all day. It really is much better when John takes my photos, hooray for helpful husbands!

IMG_4717

This is my favourite Washi so far, and I'm sure I've said that before, but this one really is. I actually addressed some fit issues in between this one, and the one I made before this. I once again used the Washi expansion pack and chose the curved peter pan collar and the normal curved sleeves. I also went with the elastic casing for the back, instead of the shirring. I found that this worked really well.

IMG_4724

I think the elastic in the casing is a little bit stronger and cinches in the waist a bit more. I also haven't quite mastered shirring with elastic on my new Pfaff, so this was easier.  The bodice is also lined, and I loved Rae's crazy all in one lining and finishing method. Thank goodness for videos, because I'm not sure I could have done it without those. It's really cool and I need to figure out how to do it on other dress bodices too!

IMG_4720

I lengthened the bodice by about an inch and now I think it hits in exactly the right place - it's amazing what such tiny amount of  seam movement can do. I also took about a half inch dart out of the neckline on either side, so now the collar and neckline lay flat  - unfortunately I forgot to make the collar smaller so it overlaps a little at the front, but you can hardly tell so I didn't bother unpicking it.

The fabric is from Fabricland out here in Salmon Arm. I think it's an apparel cotton and it was a dream to work with. The perfect weight. When I saw it, I really loved the colours, but the diamonds were actually meant to go horizontally. How weird is that? I didn't think that would make for a very flattering dress, so I cut my dress so the diamonds would be vertical. Luckily for me, I am short enough that it worked out and no one is the wiser. There are definite perks to being vertically challenged.

IMG_4704

So there you have it, fourth Washi completed! Just seeing these pictures makes me want to make another one. What is it with this pattern? I actually think, I might pick apart and remake my Apple Washi, as it's a bit tight across the boobs and it has that weird neckline thing going on which I have now figured out, and I think I have enough fabric left over to remake the bodice too.

Are you addicted to any one piece of clothing? Or maybe a sewing pattern? Are you sick of the Washis yet?

The Hummingbird Dress

I'm so good at coming up with names, aren't I? Very creative! This is my easy, breezy, hummingbird dress. IMG_4784

And apparently I'm all about the short hemlines this summer, must have something to do with the heat we're having out in BC.

IMG_4795

I am beginning to realize that all the ground in front of our house is on a slope (that or the tiles are sinking) and maybe it's not the best place for blog photos.

IMG_4791

This dress is the Angie Dress by Sis Boom. It's quick and easy to sew up (great for a beginner), and it pops over your head so no finicky zips! Yay! It's got a small piece of elastic hidden in the back waistline - you can't see it as it's sewn into the seam allowance on the inside. It gathers up the skirt to make it a little more fitted and adds to the comfort level of the dress as it moves with your body when you sit down or bend, or whatever it is you like to do in a dress. Also, it has pockets!

IMG_4796

I decided to finish this dress with store bought bias tape, and have it show for contrast. John suggested I add it to the hem of the skirt, so I did and I really like the finished product. This dress also has an included optional sash, which I decided to make too as it cinches in the waist just a little bit more, and I like the look of it.

IMG_4789

IMG_4788

I am thinking that a black sash would look really sharp as well, so I plan to make one soon too.

IMG_4801

I really love the fabric of this dress. I don't usually wear grey, but I fell in love wither little colourful hummingbirds. I picked this fabric up in the quilting section of, you guessed it, Fabricland. It's a medium to light weight cotton and worked perfectly with this pattern.

IMG_4808

John and I were goofing around, can you tell I'm having fun? I don't think this dress really goes with my brown clogs, but they were the best choice I had with me. It was brown clogs or beat up runners, so the clogs won out. Perhaps this could be an excuse to buy another pair in black?

Hmmmm...what else can I say about this dress? Oh, the pdf pattern was awesome! It was super easy to assemble and the instructions that came with it were extremely detailed and helpful. Lots of great pictures, and descriptions of techniques. This is a great, comfy, and easy to wear day dress, and I will definitely make it again.

Happy Sewing! (Or Cooking, Baking, Crafting, Knitting, Writing, Eating, Watching TV or whatever it is you like to do!)

The Sunflower Laurel

Okay guys, confession time - I bought fabric! I was trying to do The Summer Stashbust, but I just couldn't handle the restriction. All I could do was think about fabric shopping. I was looking at fabric online, filling up virtual carts, looking at crazy patterns I would normally never buy.  I was having nightmares, tossing and turning, and all I could do was think of fabric - must have more fabric, must have more..... My pulse would increase and my knees would weaken every time I saw my dwindling stash (who am I kidding, my stash is pretty huge for only sewing for 7 months). Okay so that may be a bit of an exaggeration, but I kept wanting to make projects that I just didn't have the appropriate fabric for, so I cracked. John said it isn't really cheating, because he bought the fabric (and came to Fabricland and picked a bunch out with me). But my indiscretion was gnawing at me, so I felt that I needed to come clean. Funnily enough, as soon as I allowed myself to buy - I didn't feel the intense need to hoard anymore. Apparently I don't do well with restriction! Anyway, on to the dress. This is a summery short-sleeved little shift dress called Laurel by Colette Patterns. This pattern was the first dress pattern I ever made, and I would show you the dress, but it literally fell a part at the seams. I'm not sure what happened, I blame cheap fabric, but nonetheless, here is my successful version (which hasn't fallen apart yet).

IMG_4774

I love this dress! It's light and super easy to wear, perfect for summer! Plus it's colourful and has kind of a tie-dyed, hippy vibe going on. The fabric is from the aforementioned trip to Fabricland and it's a little stiff, but I am hoping it will soften up with more washes and wears.

IMG_4777

IMG_4778

I am not thrilled with the neckline, and I might unpick it and redo. I didn't have the exact right bias tape and I thought what I had would do, but in looking at these pics, I'm not so sure. But I am thrilled with my invisible zip - you can't even see it at all!

IMG_4775

I really need to come up with some more interesting poses. John's taking my photos for me now by the way. My neckline isn't really that gapey, I think it's just from the stiff fabric lifting up the dress with my ridiculous pose.

This was a super easy dress to make, hello instant gratification and I am super happy with it. It's unlined so it's light and airy and summer (so it qualifies for the Summer Sundress Sewalong - at least I am making good on one challenge). It may be a pinch too short. It looks fine when I am standing up straight, but I have to be very careful if I drop something, or when getting into the car. Maybe I should just make myself some matching undies LOL.

Are you wearing sundresses this summer or are you more of a shorts person? Either way I hope you are enjoying your summer! 

The Emery Fail

I'm really not sure what went wrong. Maybe it's because I started this dress back in May, and finished 2 days ago. Maybe I made the wrong size. What I am pretty sure of is that I picked the wrong fabric. IMG_4769

See what I mean? I think the fabric on it's own isn't bad, but it is not very flattering on me. This is the Emery Dress by Christine Haynes. It's a lovely design and lovely pattern, but unfortunately, it may not be for me. Although, I did make another version a few months ago, and I don't remember it being this unflattering. I think it must be the plaid causing some kind of weird optical illusion or something.

IMG_4770

It actually looks better in the photos, than it does in the mirror. The fit isn't spot on, but it's not too bad. I think if I do attempt this pattern again I'll make it in one size up. This size  fits okay (I think), but it's a little tight across the boobs. Perhaps I've been eating a few too much pizza and chocolate. (Mmmmmm...chocolate...) I'm still learning, and I'm not really sure at how to identify my fitting issues, so if you have any ideas or advice for me, I would love to hear (read) it.

IMG_4771

The collar isn't perfect either. I'm not sure what I did wrong, but something isn't right with it. Is it maybe on backwards? I also didn't bother with pattern matching. Why? I'm not sure, probably because I don't play by anyone else's rules. Ya - let's go with that.

IMG_4772

This fabric came from somewhere in London (I can't remember exactly where), and its a lightweight cotton seersucker. I thought it would be perfect for a light summer dress, and it probably would be in a different print. Turns out I should have attempted to make John a shirt instead. Oh well, you win some you lose some.

Happy Sewing (or doing whatever it is that you like to do)!